
Why Your Toilet Keeps Running
That sound. That faint hissing or trickling that you hear at 2 AM when the house is quiet. Maybe you’ve been ignoring it for weeks. Months. Thats a toilet flapper thats failing, and its wasting water every single hour of every single day.
I fix houses for a living and I cant tell you how many times Ive walked into a bathroom and immediately known the flapper was shot just from the sound. Or worse, from the water bill someone shows me with a look of genuine confusion on their face.
The EPA estimates that household leaks waste nearly 1 trillion gallons of water annually across the country. Worn toilet flappers are one of the most common culprits. The good news is this is one of the easiest repairs you’ll ever do. The bad news is most people put it off because they think its complicated. Its not.
What a Flapper Actually Does
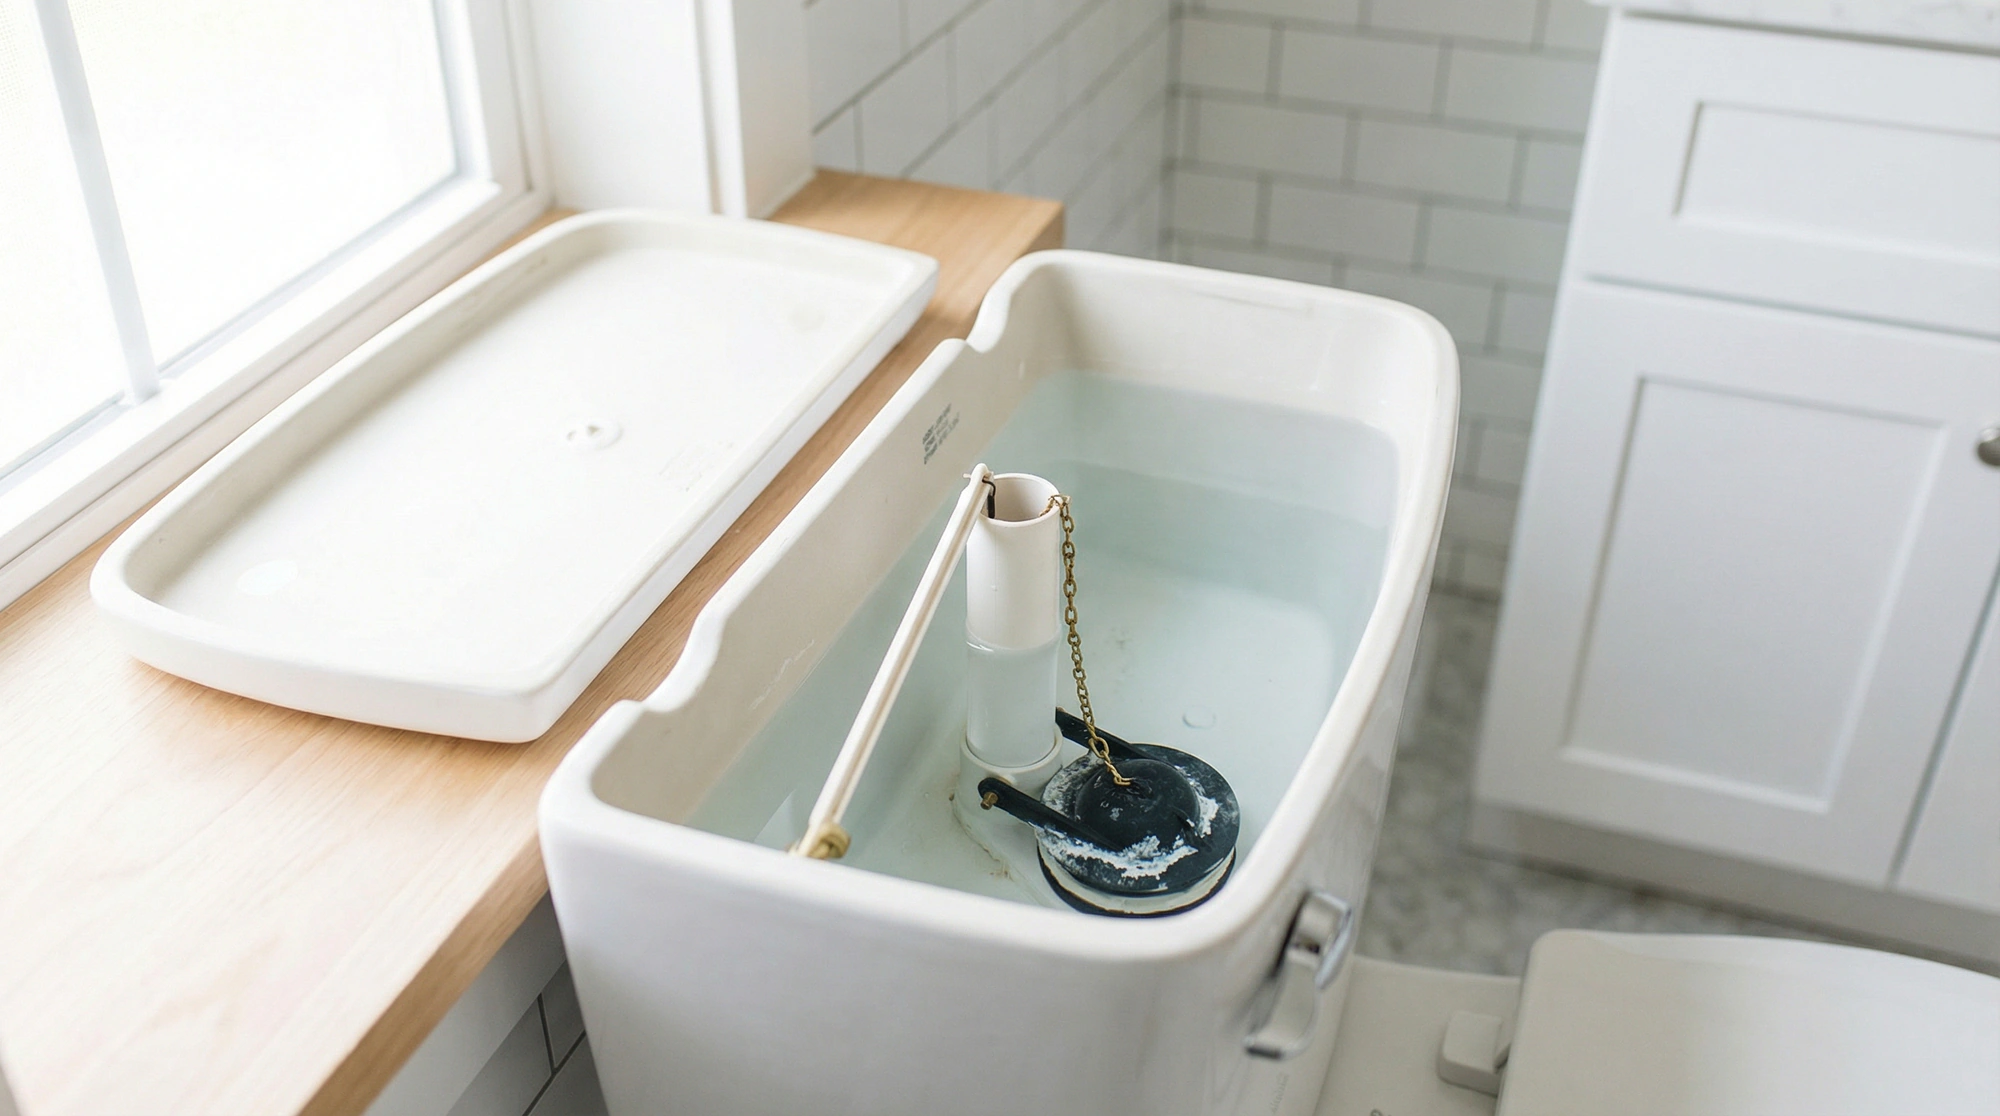
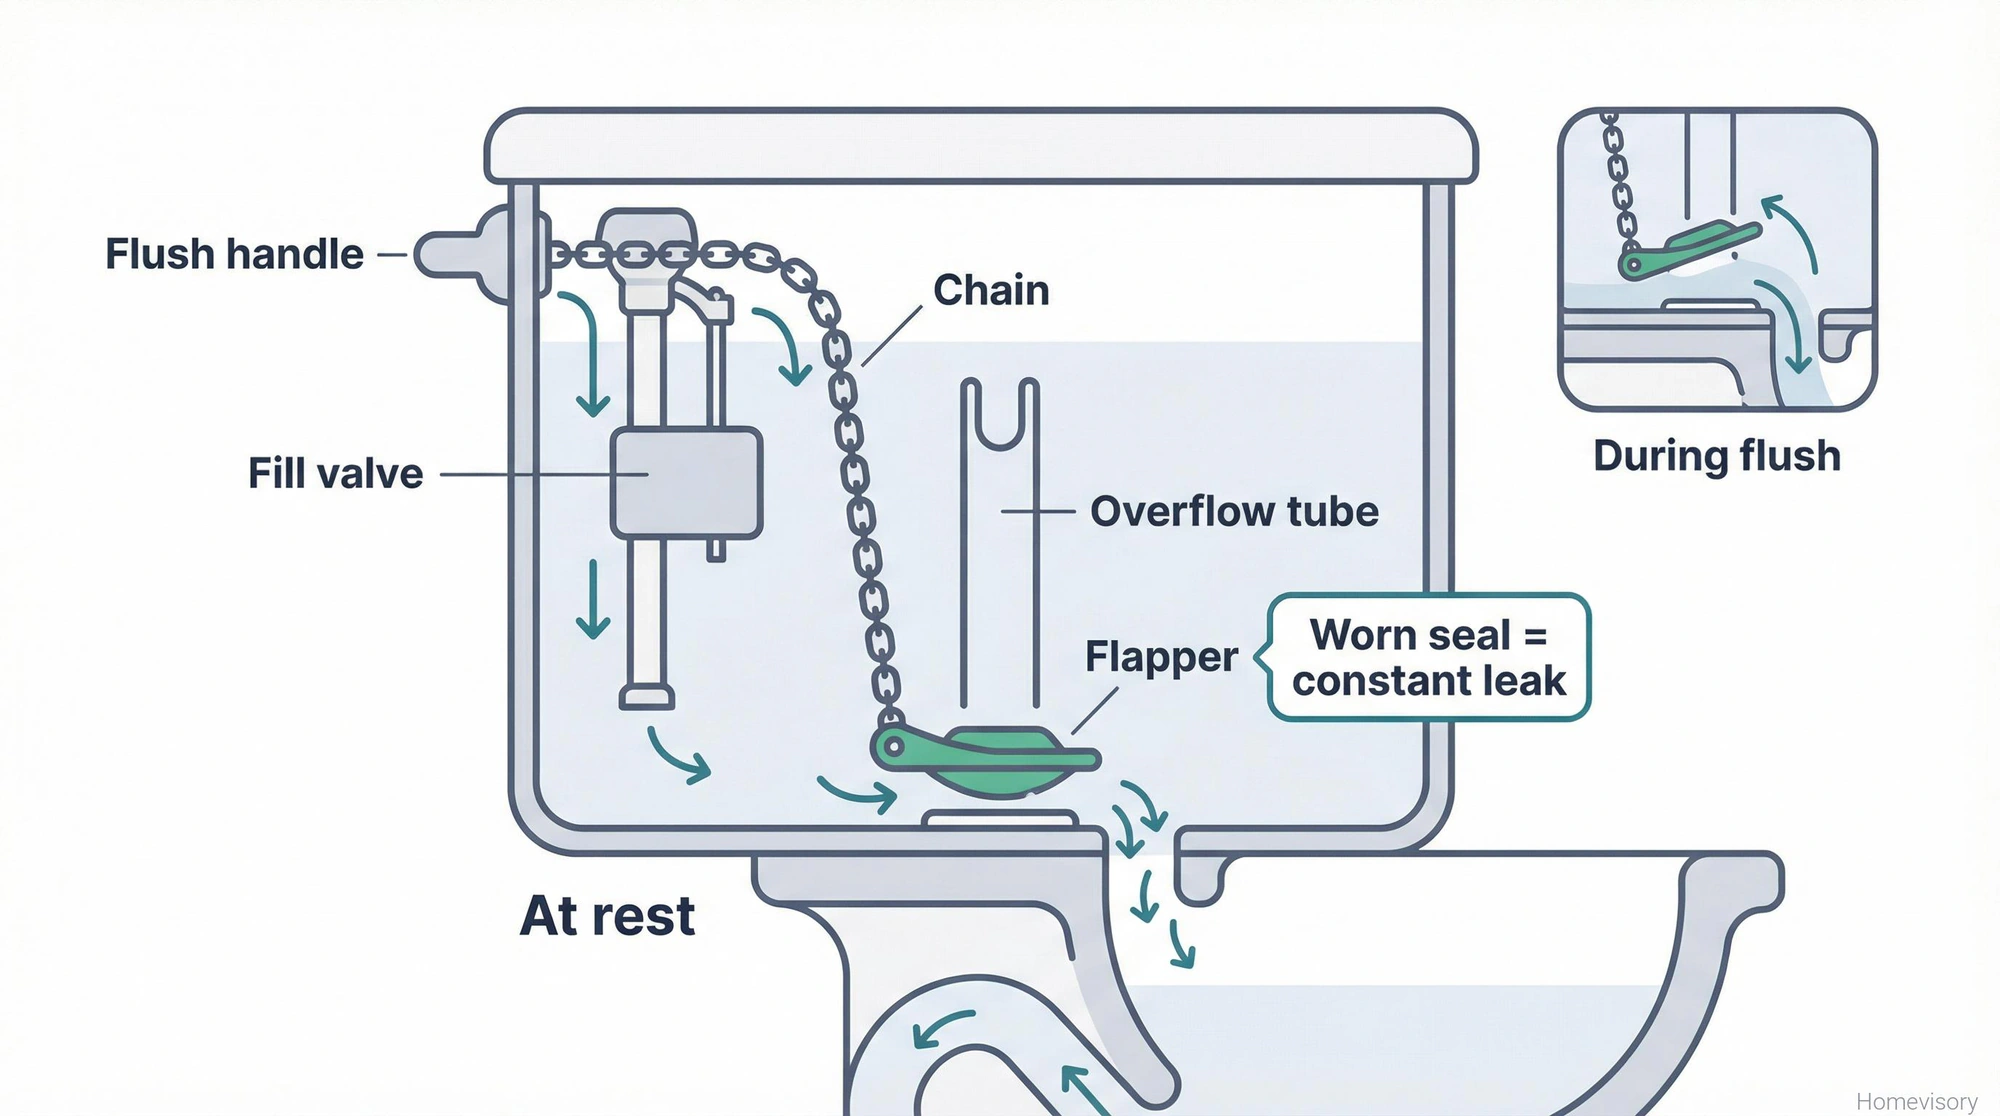
The flapper is that rubber piece at the bottom of your toilet tank. When you flush, the handle lifts a chain, which lifts the flapper, which releases water into the bowl. Then the flapper drops back down and seals the tank so it can refill.
Simple. Elegant. And rubber deteriorates over time.
When that rubber gets old, it warps. It gets stiff. It develops cracks or mineral buildup. And then it doesnt seal properly anymore. Water trickles from the tank into the bowl constantly, your fill valve keeps running to compensate, and you’re basically flushing money down the drain without ever touching the handle.
The EPA recommends replacing toilet flappers about every five years, but honestly I’ve seen them fail in three years in houses with hard water and last seven years in others. Depends on your water quality, how often the toilet gets used, and whether you use those drop-in tank tablets, which you shouldn’t, they destroy flappers faster than anything.
The Dye Test
If you’re not sure whether your flapper is leaking, do the dye test. Drop some food coloring in the tank, dont flush, and wait 15-20 minutes. If color shows up in the bowl, your flapper isnt sealing.
Whatever. Just do it. Takes two minutes and saves you from guessing.
I remember the first time I heard a running toilet and actually understood what it meant. I was maybe thirteen, visiting my grandmother’s place in Atlanta, and there was this sound coming from the bathroom that wouldnt stop. My dad Curtis went in there with a flashlight, took the lid off the tank, and showed me the flapper. He said something about how water costs money and money comes from work and if youre wasting water youre wasting work. He was a factory guy. Everything came back to work with him.
Anyway.
How to Replace a Toilet Flapper: Getting the Right Part
This is where people mess up and I probably care too much about this part but I’ve seen so many folks buy a “universal” flapper, get home, realize it doesnt fit, go back to the store, buy another universal flapper in a different size, get home, realize that one doesnt fit either, and now they’ve wasted an afternoon and twenty bucks and they still have a running toilet. There are at least four or five common flapper types and they are not all interchangeable despite what the packaging wants you to believe. You’ve got your standard 2-inch flappers which fit most older toilets, your 3-inch flappers which are common in newer high-efficiency toilets, your Kohler-specific flappers with that canister design, your Toto flappers, your American Standard flappers with the specific mounting clips, and then various proprietary designs that only work with certain models. The universal flappers work for maybe 60% of toilets and if yours is in the other 40% you’re going to have a bad time. Best thing you can do is take the old flapper with you to the hardware store. Remove it first, put it in a plastic bag, and match it up in the aisle. This is what Mr. Davis used to tell me about wood selection back in his shop in Atlanta, he’d say you can read all the descriptions you want but nothing beats holding the thing in your hand and comparing it to what you actually need. Same principle applies here.
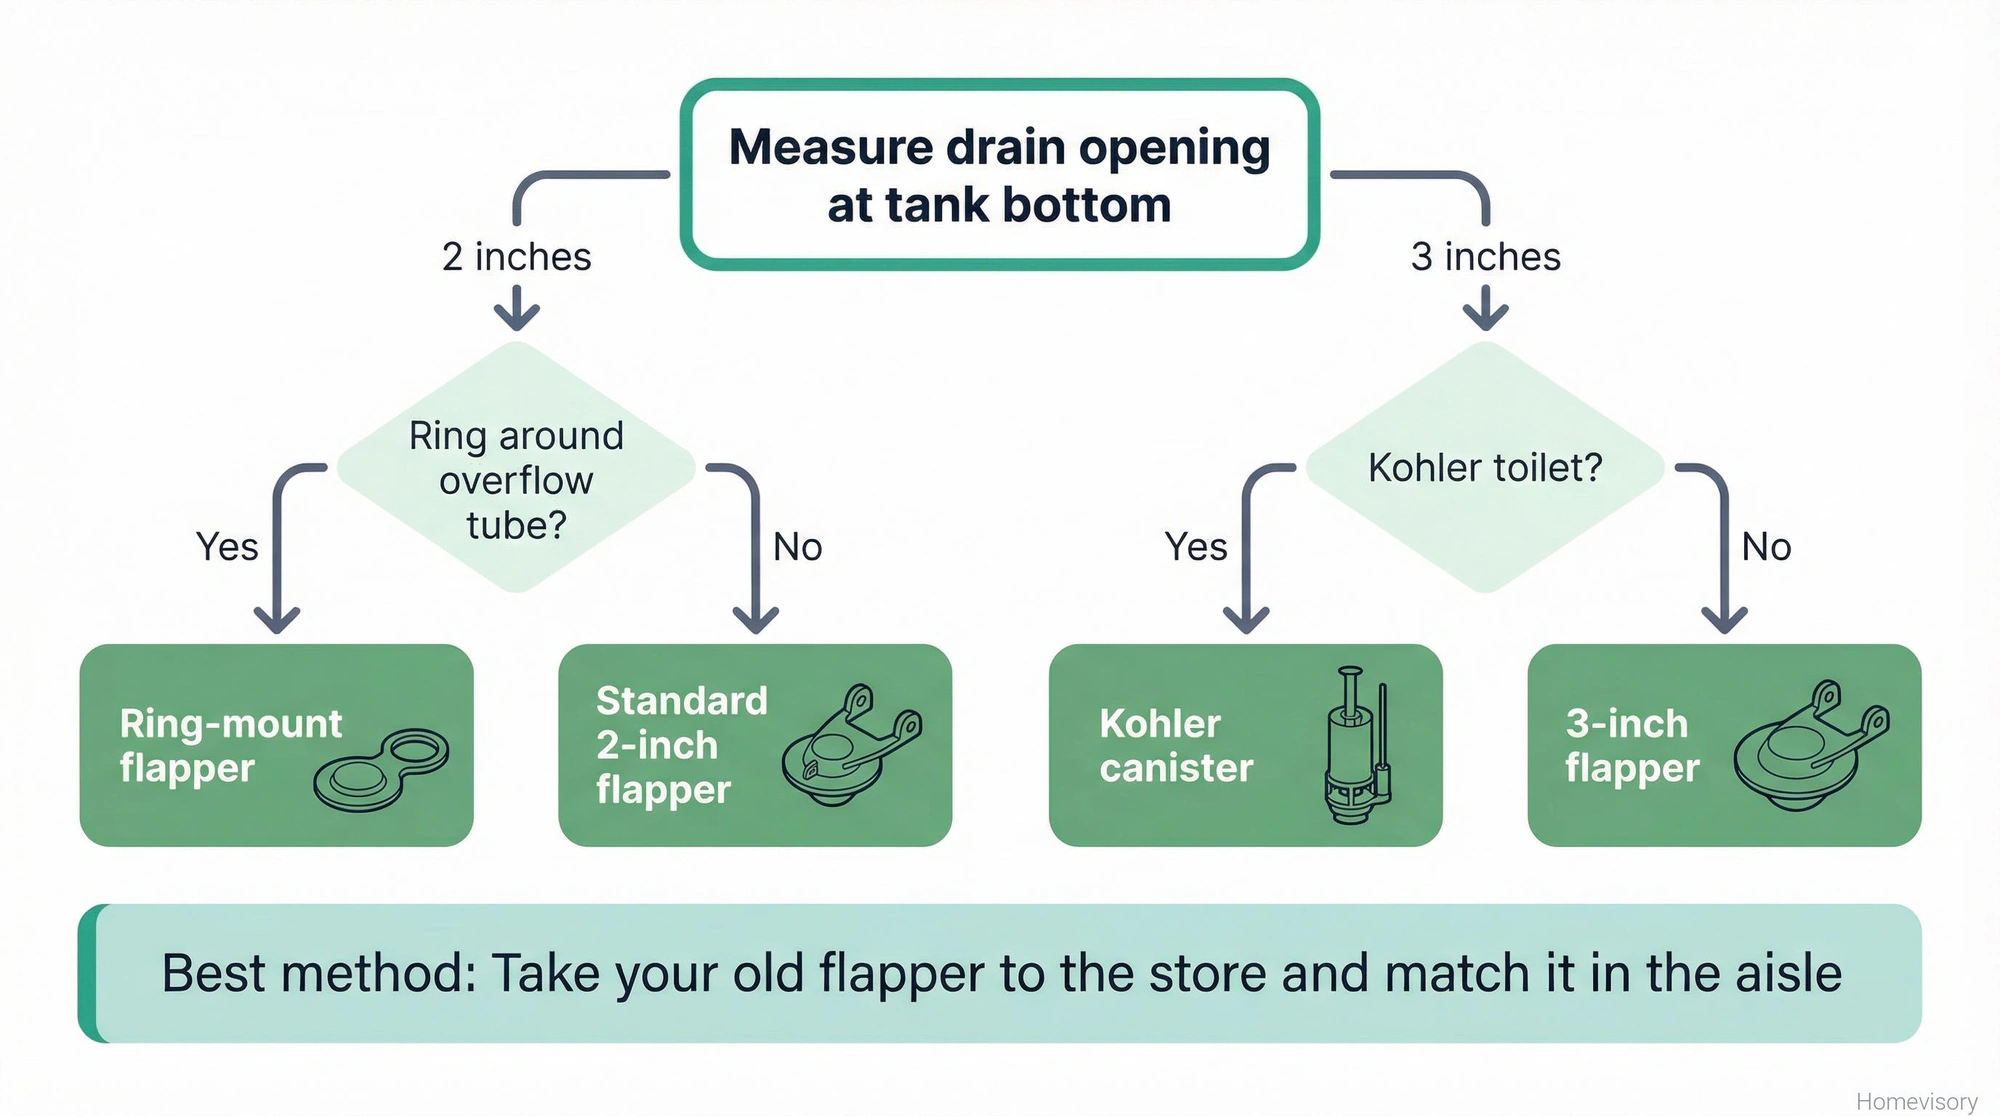
If you cant take the old flapper with you, write down the toilet manufacturer and model number. Its usually stamped inside the tank or on the back of the bowl near the seat hinges. Then you can look up the exact replacement part online or at least narrow it down.
Tools You Need
- Replacement flapper (the right one)
- Towel
- Maybe some rubber gloves if youre squeamish
Thats it. No tools required for most flappers. If yours has a hard plastic seat that bolts to the overflow tube, you might need an adjustable wrench or pliers. Probably wont.
Step-by-Step: How to Replace Toilet Flapper
Step 1: Shut Off the Water
Theres a valve on the wall behind or beside your toilet. Turn it clockwise until it stops. If you have one of those push-pull valves, pull it out.
If your shutoff valve is stuck, corroded, or won’t turn, dont force it. You can shut off water to the whole house at the main, but honestly if your toilet shutoff is that far gone you should probably address that too. A stuck shutoff valve is a future emergency waiting to happen.
Step 2: Flush and Drain the Tank
Flush the toilet to empty most of the water from the tank. Hold the handle down to let as much water out as possible.
Theres going to be some water left in the bottom. You can sponge it out if you want. I usually just put a towel down and work fast. Not a big deal either way.
Step 3: Remove the Old Flapper
Most flappers have two ears that hook over the pegs on either side of the overflow tube. Just unhook them. Then disconnect the chain from the flush lever.
Some flappers have a ring that slides over the entire overflow tube. For those, you have to disconnect the refill tube first, the little hose that clips to the top of the overflow, then slide the whole flapper assembly up and off.
Older toilets sometimes have flappers that screw onto a threaded rod. If you have one of those, unscrew it. Counterclockwise.
Look at how your old flapper was attached before you remove it completely. Take a photo if you need to. Youre going to replicate this setup.
Step 4: Install the New Flapper
Snap the new flapper ears onto the pegs. Or slide the ring over the overflow tube. However your old one was attached, thats how the new one goes.
Connect the chain to the flush lever. Heres the thing about chain length: you want just a little slack when the flapper is closed. Maybe half an inch. Too much slack and the flapper wont open fully when you flush. Too little slack and the flapper wont seal properly because the chain is holding it up slightly.
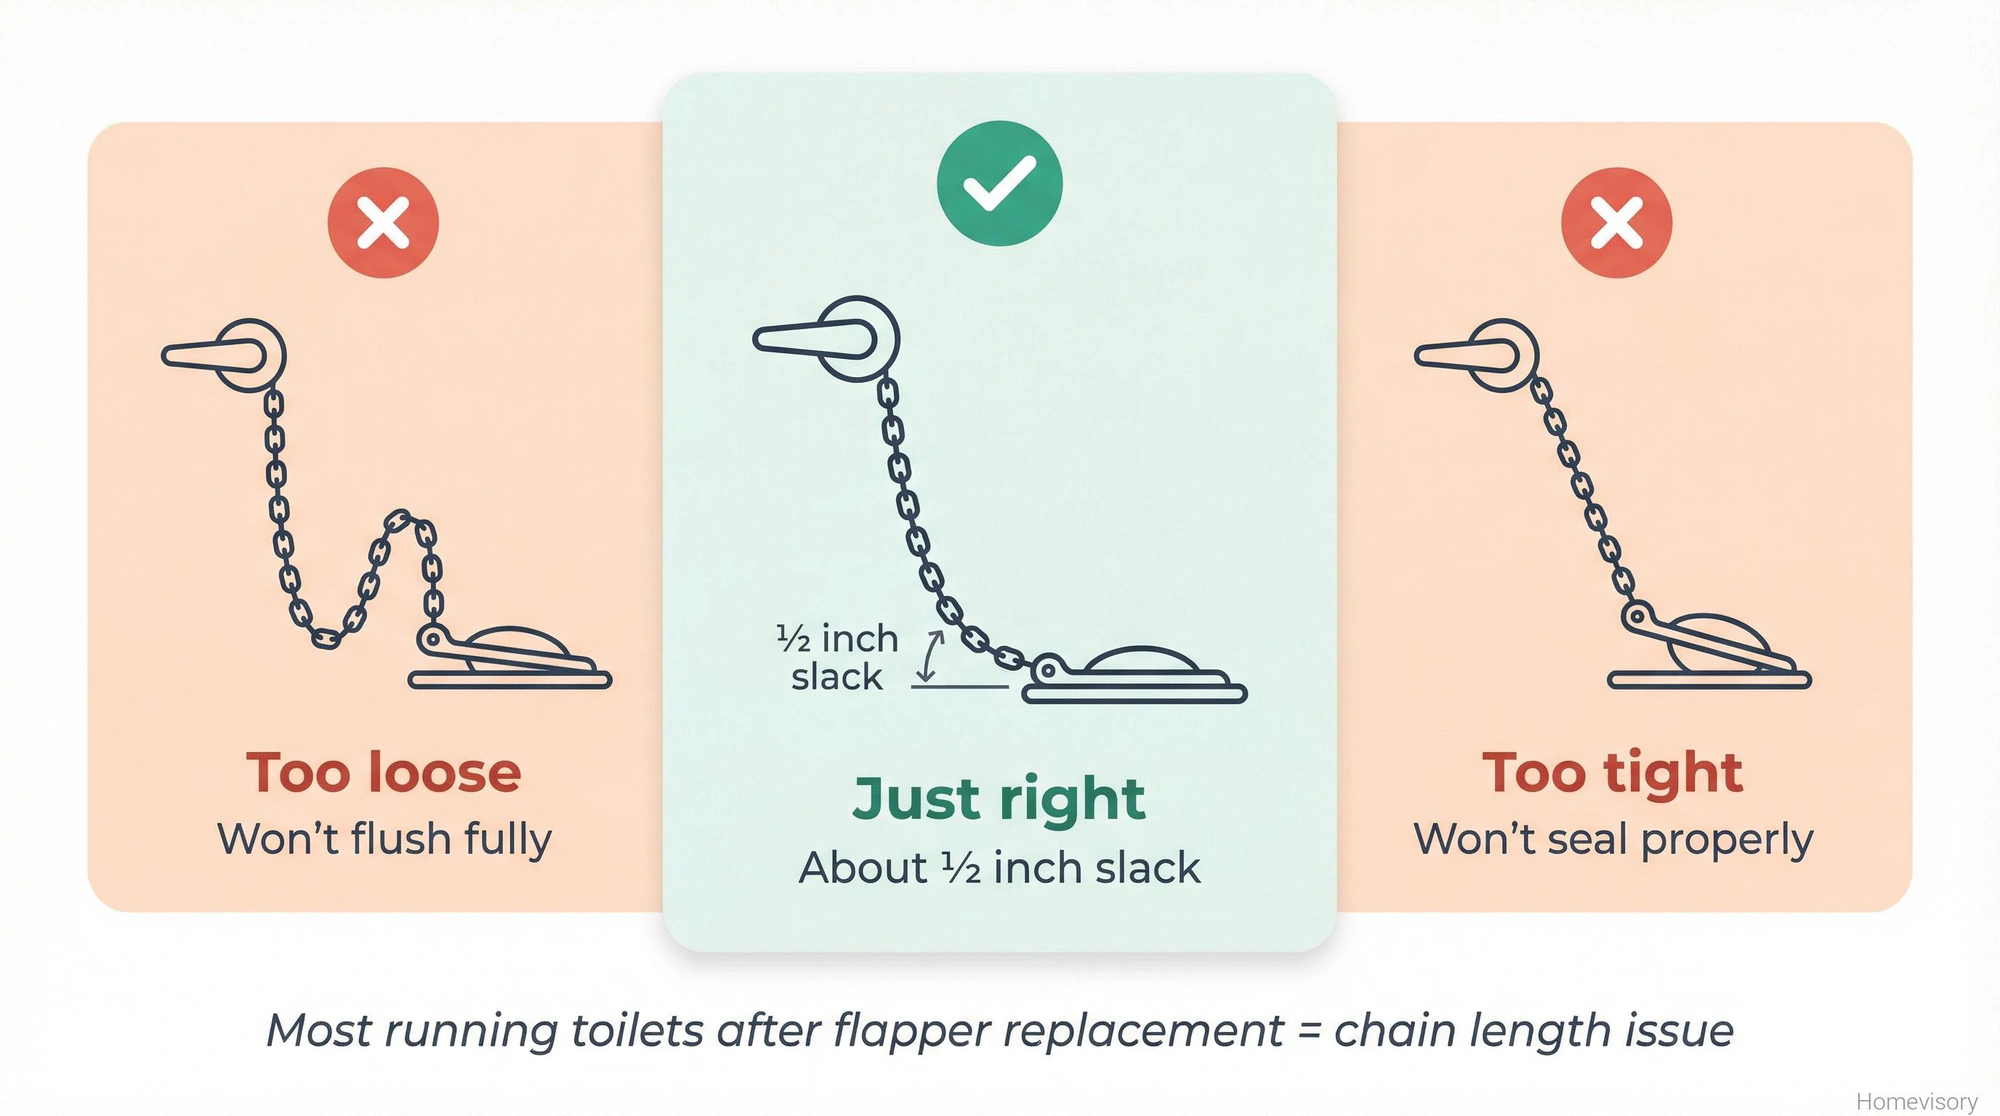
I’ve adjusted more chains than I can count for people who installed new flappers and still had running toilets. The flapper was fine. The chain length was wrong.
Step 5: Turn the Water Back On
Turn the shutoff valve counterclockwise to restore water. Let the tank fill.
Step 6: Test It
Flush a few times. Watch the flapper. Make sure it lifts fully, drops back down, and seals. Listen for that hissing sound. If you hear it, adjust your chain length.
Do the dye test again if you want to be sure.
Cost Comparison: DIY vs. Professional
A flapper costs somewhere between $5 and $15 depending on the type. Takes maybe 15 minutes to replace once you know what youre doing.
HomeAdvisor puts the average toilet repair cost at $150 to $391 when you hire a plumber, with labor accounting for 60-75% of that. For a flapper replacement specifically youre probably looking at the low end, maybe $100-150, but still.
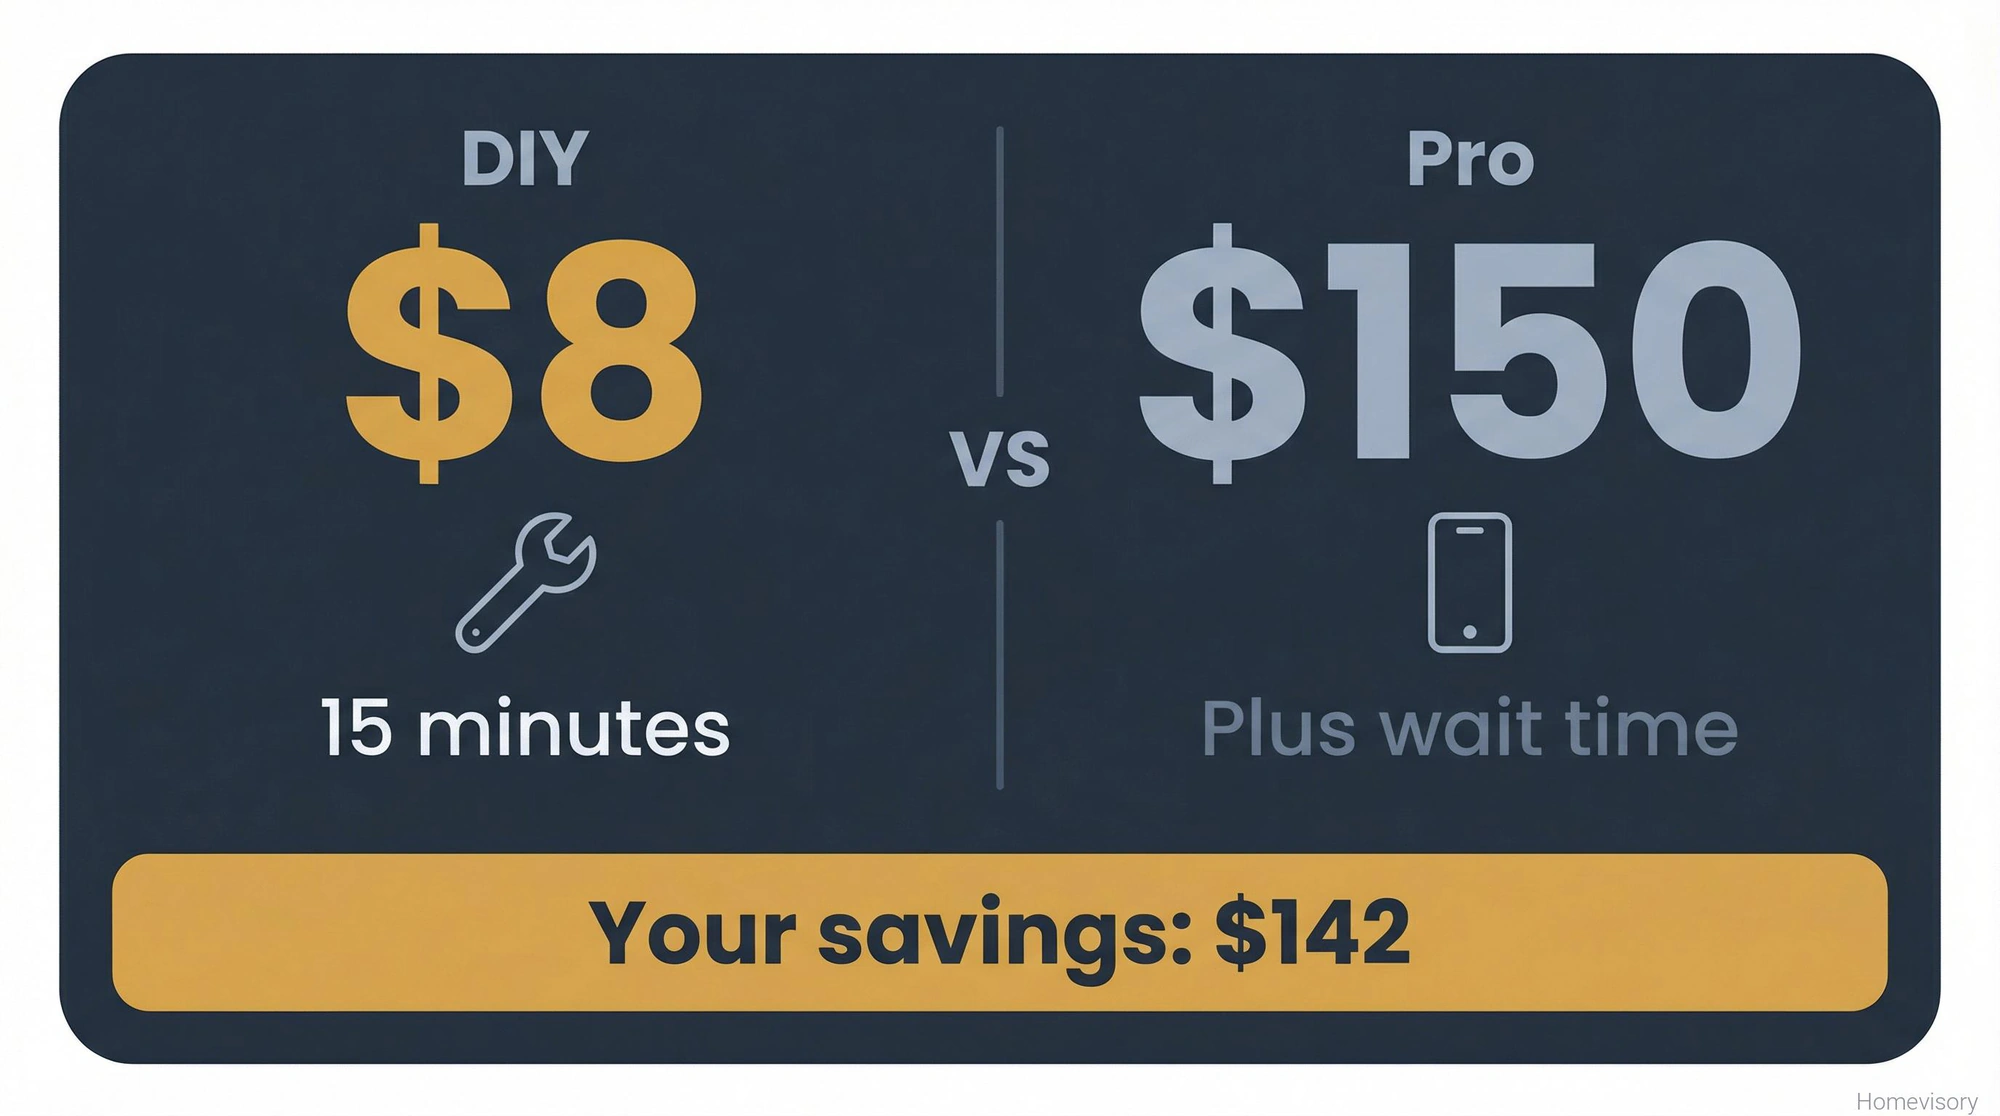
So you can spend $8 and fifteen minutes, or you can spend $150 and wait around for someone to show up. Your call.
When to Call a Plumber
If the flapper replacement doesnt fix the running, you might have a problem with your fill valve, your flush valve, or the tank itself. Could be cracked. Could be warped at the seal.
But honestly. If you can follow the steps above and your toilet still runs, check your chain length again first. Nine times out of ten thats the issue.
If you’ve done everything right and its still running. Fine. Call someone. Moving on.
Why This Matters Beyond Your Water Bill
I mentioned the EPA earlier. An old or worn flapper can silently leak thousands of gallons a year, and most people have no idea its happening because the leak is silent, just a slow trickle from tank to bowl that you cant hear unless you’re really listening.
The average household wastes nearly 10,000 gallons per year from leaks, and ten percent of homes have leaks wasting 90 gallons or more per day. Thats wild to me. Ninety gallons a day from leaks.
I taught all my kids how to replace a toilet flapper. Milton was maybe fourteen when I showed him, Richard right after, Janelle and Peach eventually. Its one of those basic life skills that takes no time to learn and will save you money forever. Peach thought it was gross to stick her hand in the tank. I told her the tank water is clean, its the same water that comes out of your sink, and she said “then why dont you drink it” and I said “because Im not proving a point to a teenager” and we moved on.
But she knows how to do it now. Thats what matters.
Keep Your Home Running Right
A running toilet is one of those problems that feels small until you see the water bill. Or until you realize the average family could save nearly 10,000 gallons annually just by fixing bathroom leaks and upgrading fixtures.
Learning how to replace toilet flapper is legitimately one of the easiest home maintenance skills you can pick up. Five minutes of learning, fifteen minutes of doing, and youre done. If your toilet has other issues beyond the flapper, our complete toilet repair guide covers every common problem and how to fix it.
Thats what we do here at Homevisory, give you the knowledge to handle the stuff that matters without overthinking it. If you want help staying on top of all the maintenance tasks that keep your home running right, check out our free Homevisory home task manager. It’ll remind you when its time to check things like flappers, filters, and all the other stuff that quietly keeps your house from falling apart.