
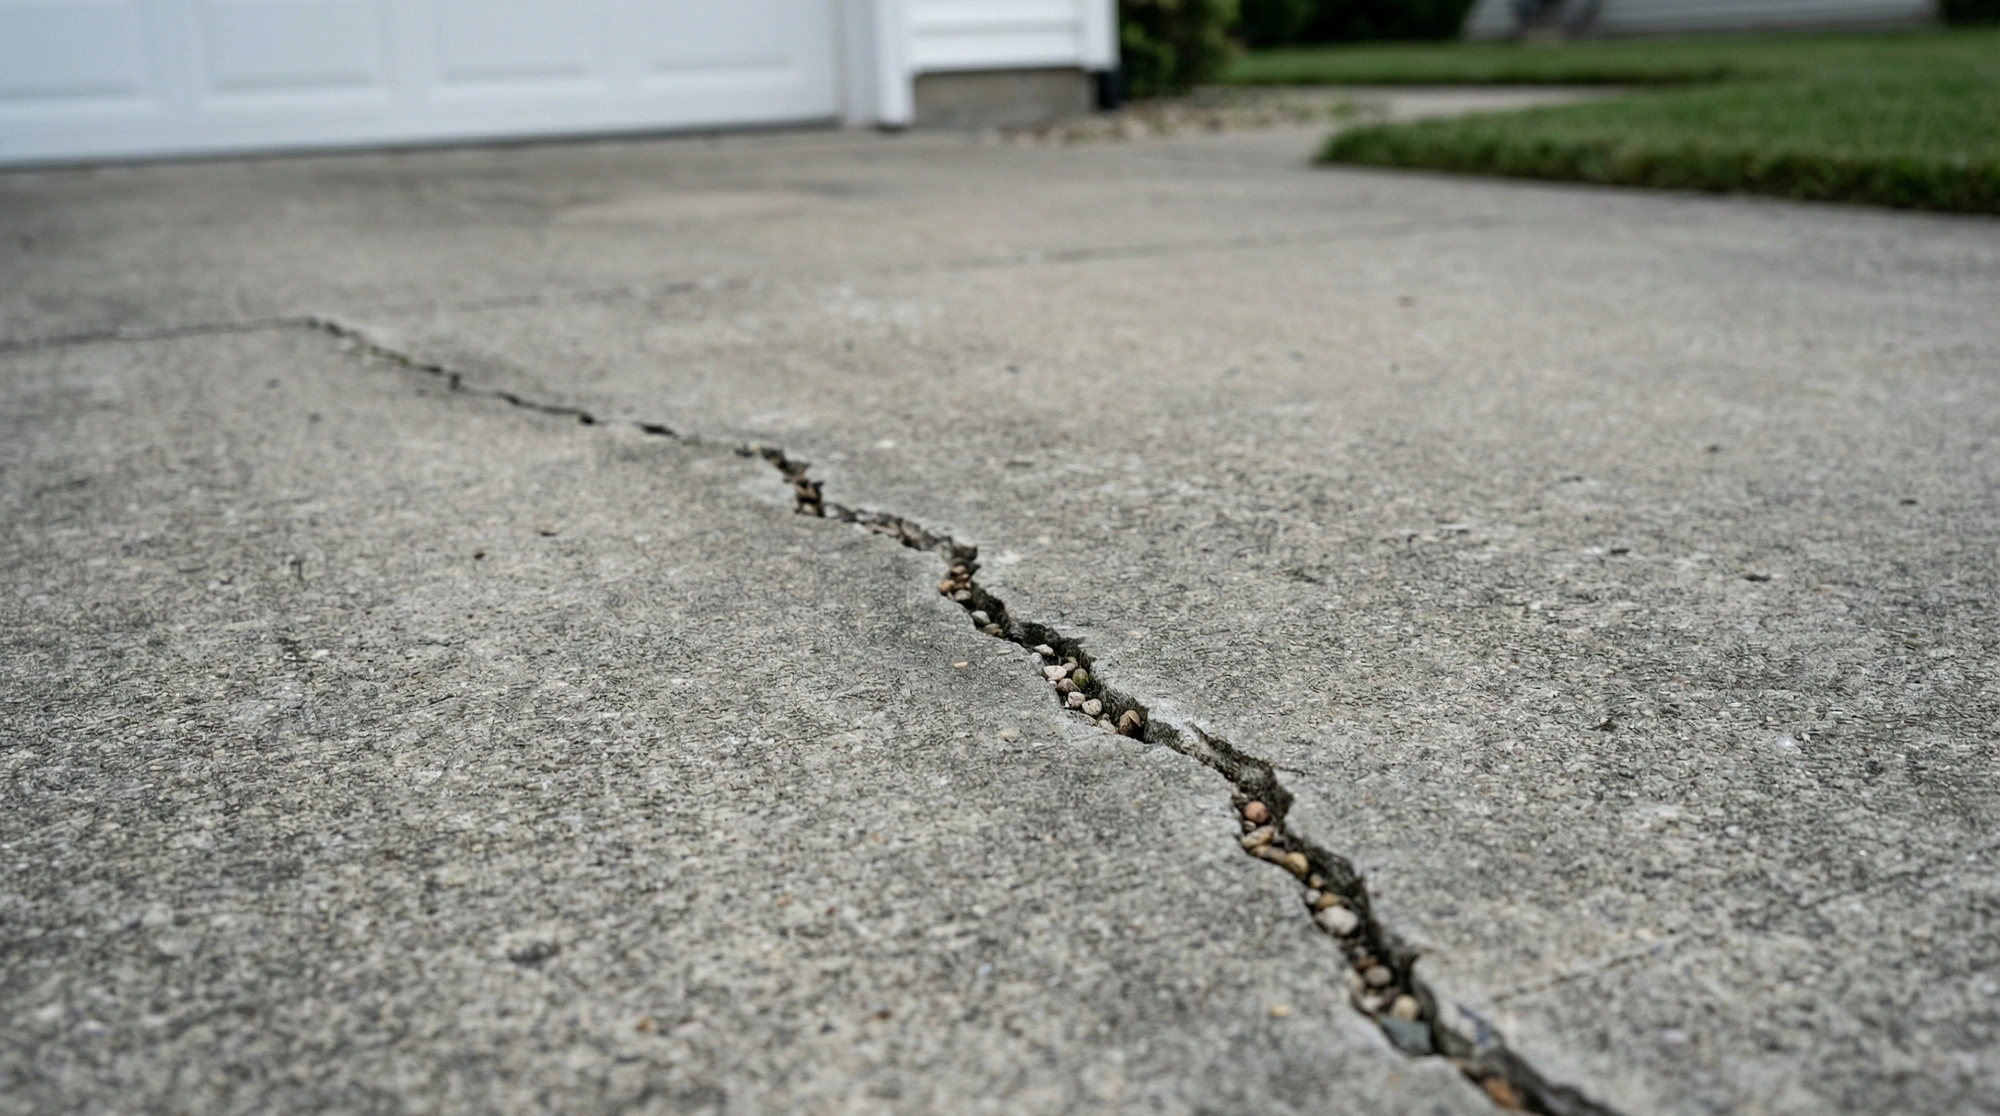
Concrete is one of those materials that seems indestructible until it isnt. You pour a driveway or a patio, it looks solid, and you forget about it for a decade. Then one day you notice a crack. Then another. Then the crack has a crack and now water is getting underneath and you’ve got a real problem.
I’ve been doing concrete driveway repair for over thirty years, and the pattern is always the same. People ignore the small stuff, then panic when the small stuff becomes expensive stuff. Concrete patio repair, concrete sidewalk repair, its all the same basic principle. Catch it early or pay later.
Why Concrete Cracks in the First Place
Before you can fix something you need to understand why it broke. Concrete cracks for a few predictable reasons and knowing which one you’re dealing with matters for how you fix it.
Freeze-thaw cycles are brutal. Water seeps into fissures, expands when frozen, and forces the roadway to swell and bend. Your driveway isn’t a roadway but the physics are identical. If you live somewhere with real winters, Chicago, the Northeast, parts of Texas even, this is probably your main enemy.
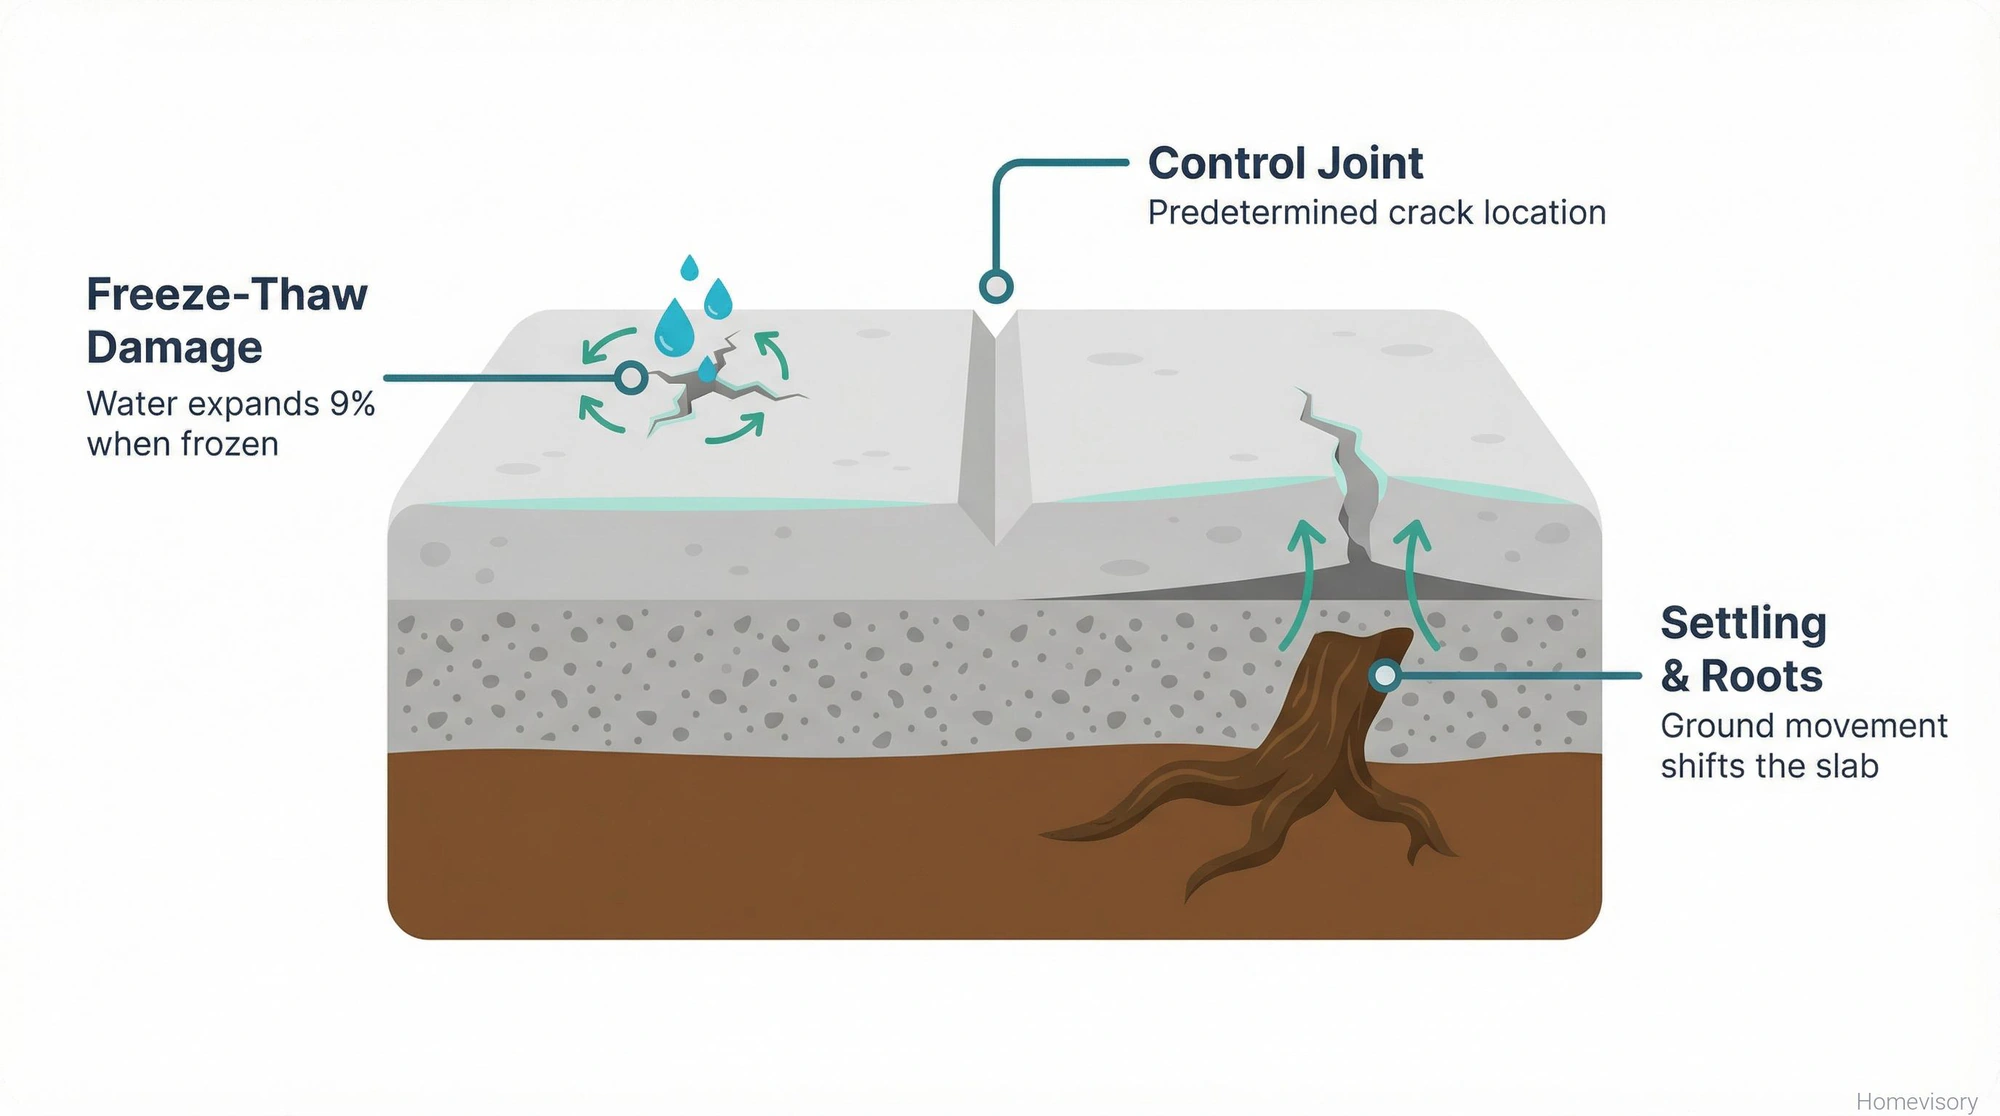
Then theres settling. The ground underneath your concrete moves over time. Tree roots, poor compaction when the slab was poured, erosion from bad drainage. The concrete itself might be fine but whats under it isn’t.
Control joints help prevent random cracking. Saw cuts are typically made at distances of 15 feet between joints to predetermine where cracking will occur. If your driveway doesn’t have these, or they weren’t placed right, cracks show up wherever they feel like it.
My dad Curtis used to say, about factory equipment not concrete, he used to say “you can fix something small or wait until it becomes something big. Small is always cheaper.” He was talking about conveyor belts and hydraulic systems. But it applies perfectly to concrete. A hairline crack costs you twenty minutes and a tube of filler. That same crack after two winters costs you a thousand dollars.
Crack Repair Is Where Most People Go Wrong
This is the section I care about. This is where I’ve seen people waste the most money and create the most problems for themselves.
Hairline cracks, the ones that are just surface-level and maybe a sixteenth of an inch wide, those are cosmetic. You can fill them or you can leave them alone. They’re not structural. But people either ignore them completely or they panic and resurface their entire driveway because of a crack you can barely see.
The cracks you need to worry about are the ones that are a quarter inch or wider. Especially if theyre getting wider over time. I had a driveway at my place in Texas, this was maybe 2005 or 2006, and I noticed a crack running across near the garage. Maybe three inches long, quarter inch wide. I told myself I’d get to it. Raquel reminded me twice. I said yeah yeah I’ll handle it. Two years later that crack was eight feet long, half an inch wide in places, and water had been getting underneath every time it rained. The slab was starting to sink on one side. What would have been a forty dollar fix turned into having someone come out and lift the whole section. That was not forty dollars.
Here’s how to actually fix cracks before they become disasters:
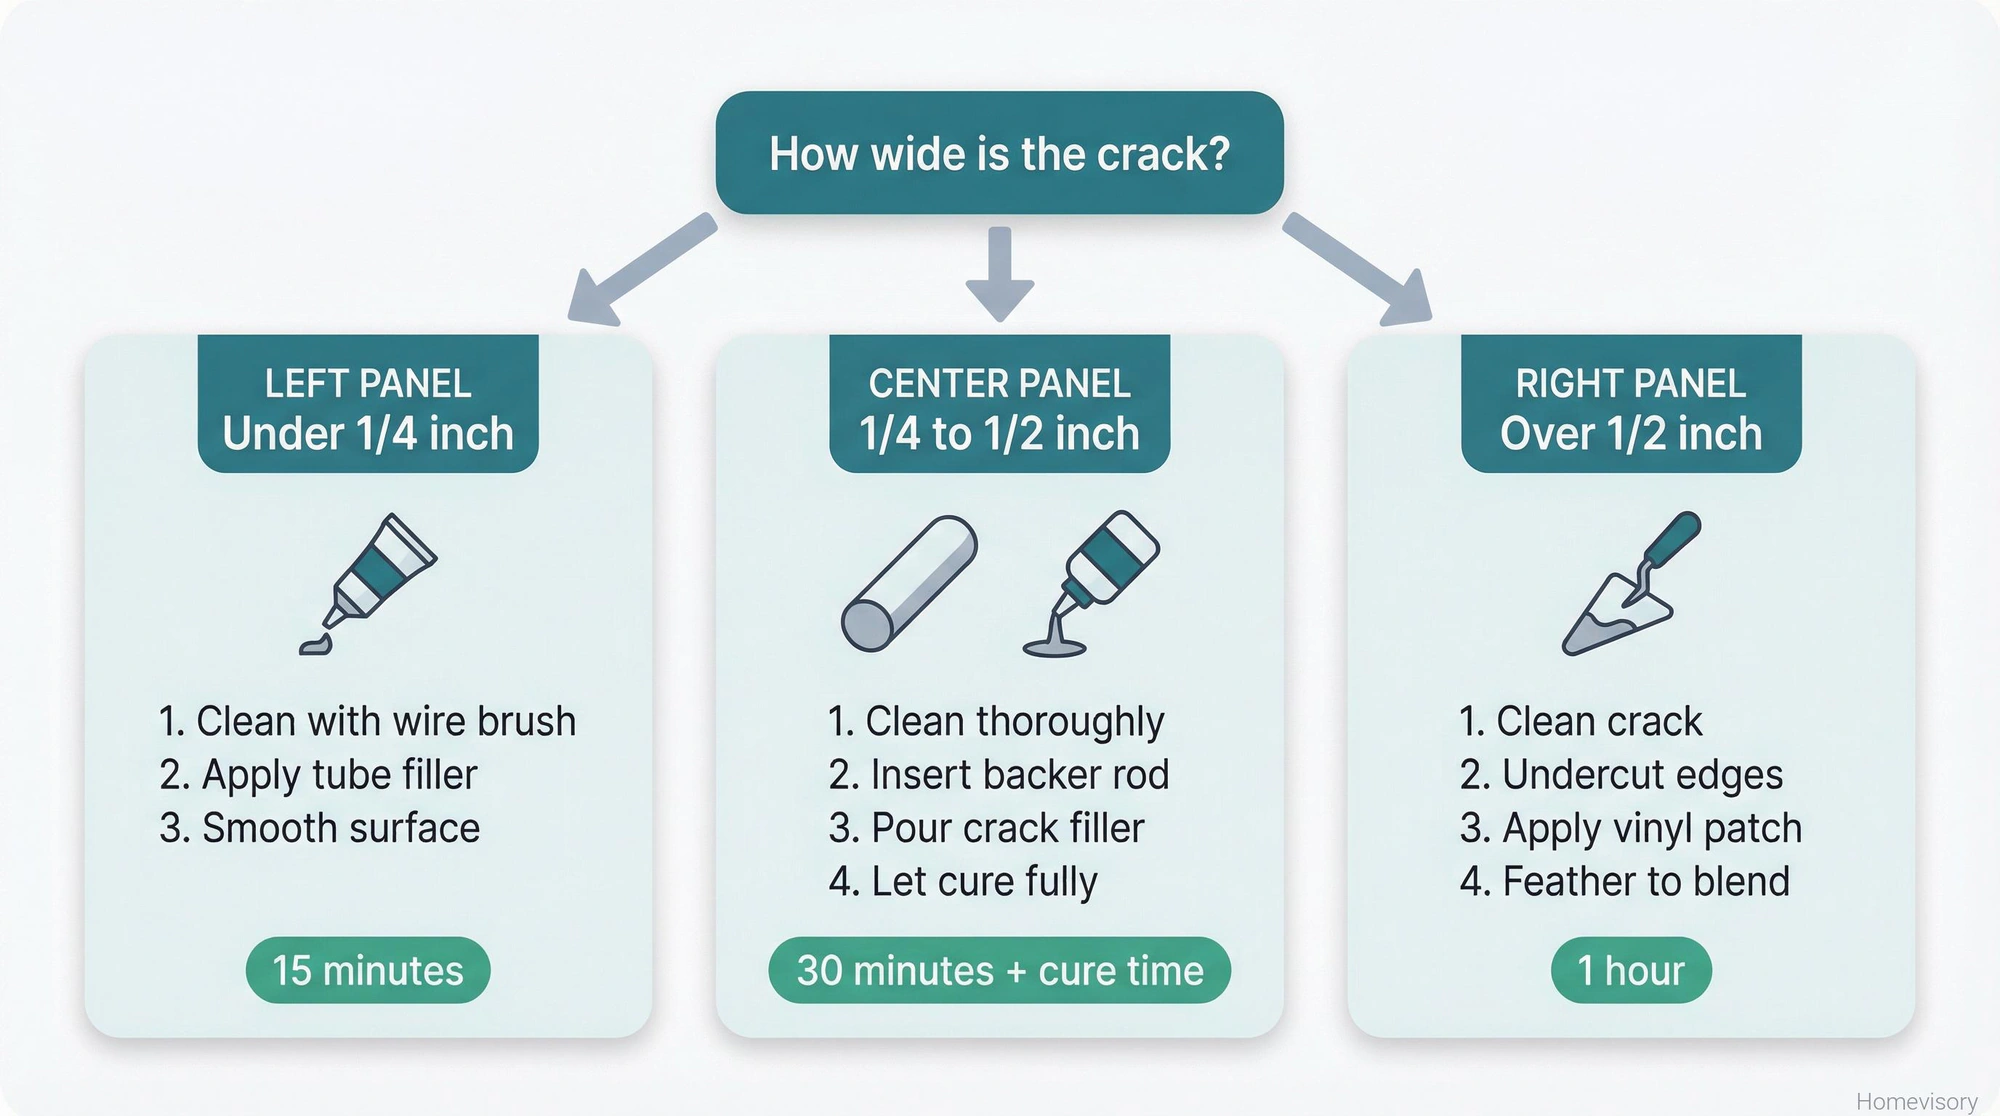
For cracks under a quarter inch: Clean out any debris with a wire brush or compressed air. Use a concrete crack filler, the stuff that comes in squeeze tubes works fine for small cracks. Apply it, smooth it, done. Takes fifteen minutes.
For cracks a quarter inch to half inch: You need backer rod first. Its this foam rope you stuff into the crack to give the filler something to bond to. Then use a pourable crack filler, not the squeeze tube stuff. Let it cure according to the directions. Dont rush it.
For cracks over half an inch: Now youre getting into repair territory. Clean the crack thoroughly, undercut the edges if you can so the patch has something to grip, and use a vinyl concrete patch compound. Feather the edges so it blends with the surrounding concrete.
The one thing people consistently screw up is not cleaning the crack first. You cannot just squeeze filler into a crack full of dirt and leaves and expect it to hold. It wont. I’ve seen people do this and then blame the product. The product is fine. You just didn’t prep.
Sealing Your Concrete
I go back and forth on whether sealing is necessary or just something the sealer industry wants you to believe. The truth is somewhere in the middle.
If you live somewhere with harsh winters and they use rock salt, which is corrosive to concrete, then yes, sealing helps. If you live in San Diego where it never freezes and barely rains, you can probably skip it.
The issue is most sealers need to be reapplied every two to three years. And people don’t do that. They seal once and think theyre protected forever. Then they’re confused when problems show up anyway.
My neighbor a few houses down, this was in Florida not Texas, he bought some “driveway sealer” from one of the big box stores. I wont say which one. It was basically paint. He rolled it on like paint, it looked wet and shiny for about four months, and then it started peeling up in sheets. Looked worse than if he’d done nothing. He asked me what happened and I didn’t have the heart to tell him he bought the wrong product and applied it wrong. I just said yeah that happens sometimes. It does happen sometimes. When you buy garbage.
If youre going to seal, use a penetrating sealer not a topical one. Penetrating sealers soak into the concrete and protect from within. Topical sealers sit on top and eventually fail. Silane or siloxane based sealers are what you want. Our concrete care guide covers the full cycle — cleaning, crack repair, and sealing — in the right order. Theyre not cheap and theyre not shiny. They just work.
When You Have Bigger Problems
Cracks are one thing. Sections of your driveway sinking or heaving are another thing entirely.
If you’ve got a section that’s dropped and created a lip, thats usually a settling issue underneath. The concrete itself might be fine but the ground moved. This is where mudjacking or polyjacking comes in. They drill holes, pump material underneath to lift the slab back to level. This costs between $3 and $25 per square foot depending on your area and how much needs lifting.
I’m not getting into the DIY version of that. Call someone. Seriously. The equipment is specialized, the margin for error is small, and if you lift too much you crack the slab. Not worth it.
For concrete patio repair with settling issues, same deal. I’ve fixed a lot of things myself but lifting slabs isnt one of them.
Spalling is different. Thats when the surface of the concrete is flaking off, usually from freeze-thaw damage or salt exposure. You can patch spalling areas with a concrete resurfacer if it’s not too extensive. Clean the surface, dampen it, apply the resurfacer with a squeegee, texture it if you want. But if spalling covers more than maybe a third of the surface, youre looking at full resurfacing or replacement.
The Full Replacement Question
At some point repair stops making sense and replacement starts making sense.
According to HomeAdvisor, concrete surfaces typically last 20 to 25 years with regular maintenance. If your driveway is older than that and has problems everywhere, repairs are just delaying the inevitable.
The general rule I use: if damage covers more than 25% of the surface, youre better off resurfacing or replacing. The math just works out that way. Patching here, lifting there, filling this crack and that crack, eventually you’ve spent more than replacement would have cost and you still have an ugly driveway.
Average concrete driveway repair costs range from $829 to $2,826, with most people paying around $1,800. That’s for repairs, not replacement. Replacement is significantly more. But if youre going to spend $2,500 on repairs for a driveway that’s going to need another $2,500 in repairs in three years, maybe just replace it.
At that point youre past DIY. Get three quotes. Moving on.
A Word About Safety
This is where I have to be the responsible one.
OSHA identifies two main hazards with concrete work: silica dust exposure and concrete burns. Silica dust comes from cutting, grinding, or drilling concrete. Those particles get in your lungs and they dont come out. Wear an N95 respirator at minimum. Better yet, wet-cut instead of dry-cut if you have to cut anything.
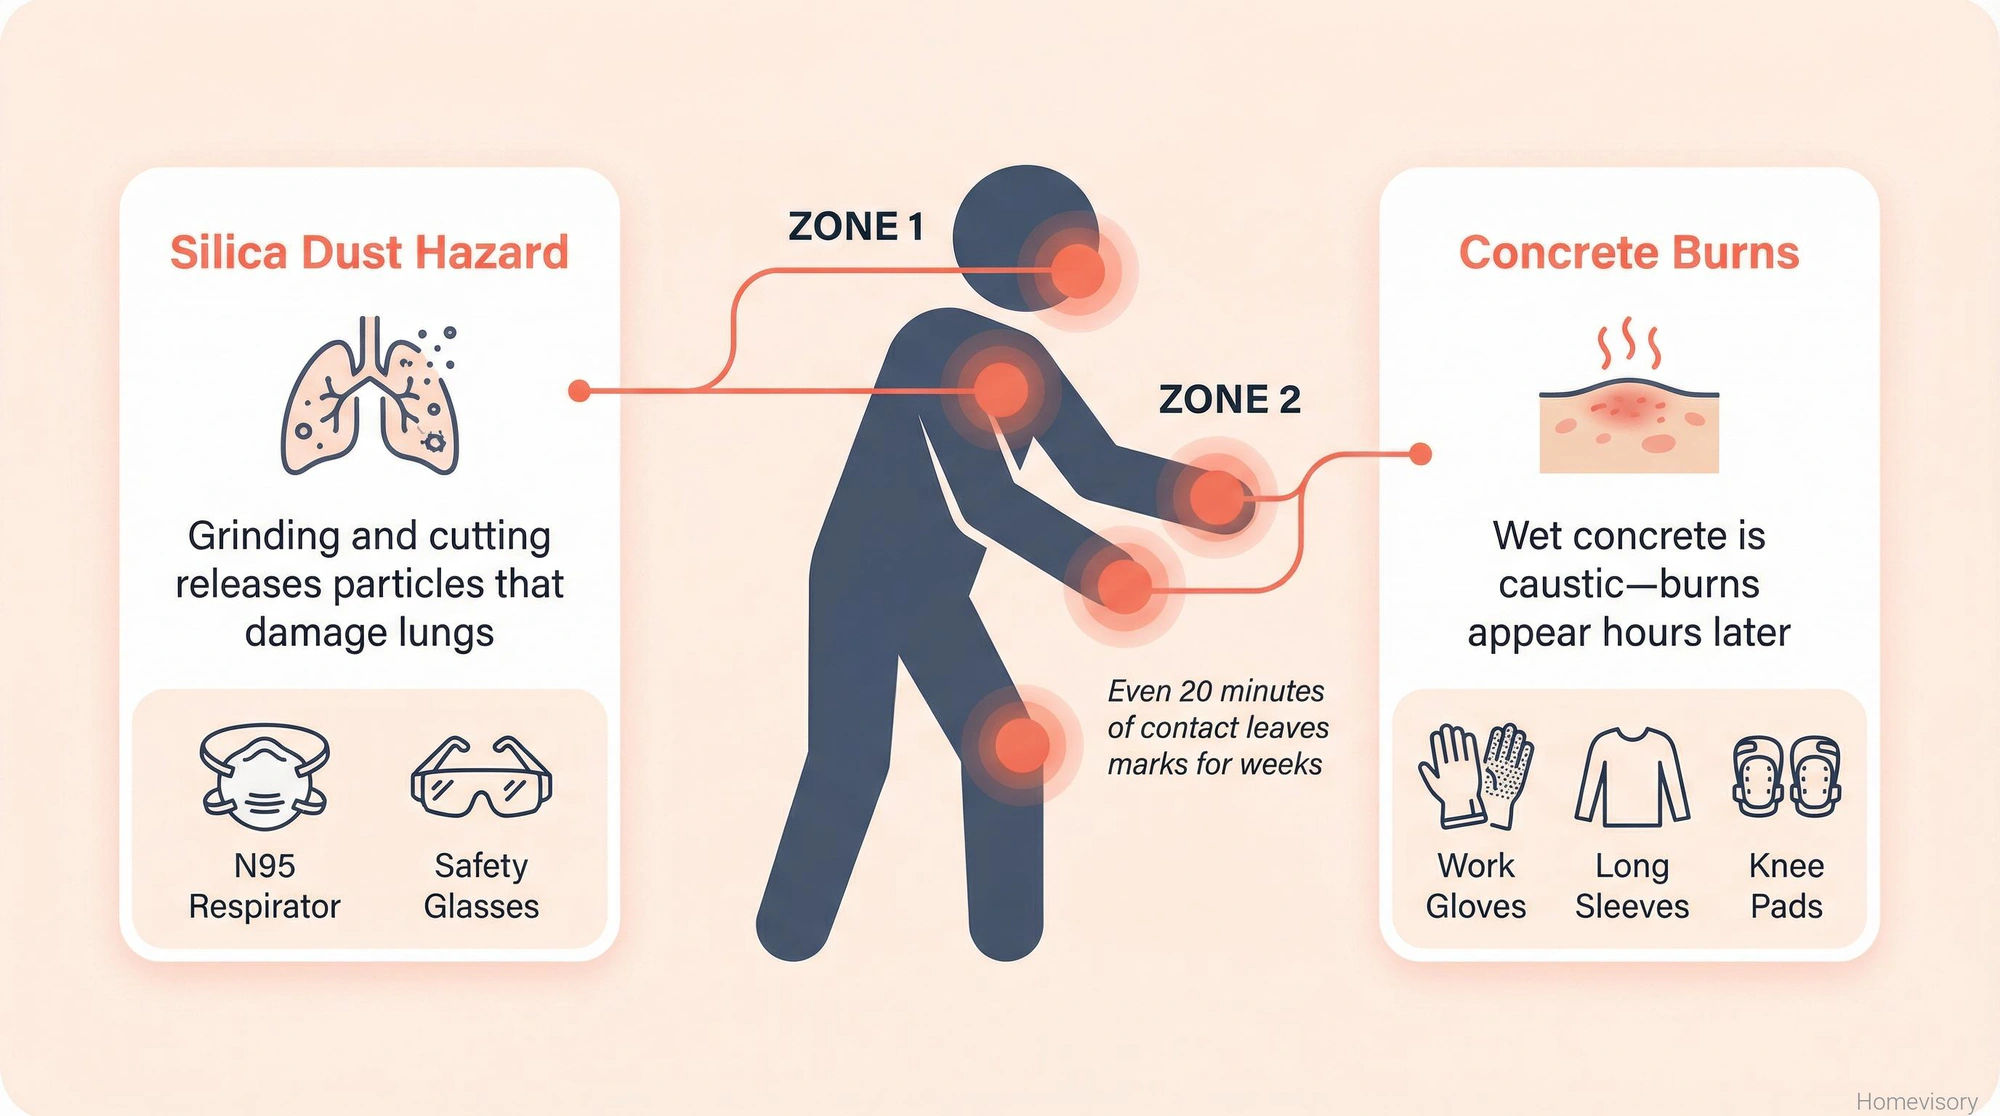
Concrete burns are real and people don’t take them seriously. Fresh concrete is caustic. If you’re mixing and pouring, wear gloves, long sleeves, eye protection. Even cured concrete can irritate skin if youre working with it for hours. Wash your hands. Don’t kneel in wet concrete without knee pads.
I got some wet concrete on my forearm once in Chicago, didn’t notice it for maybe twenty minutes because I was focused on finishing a pour before it set up. It left a mark for weeks. Felt like a sunburn that wouldn’t heal. Lesson learned.
Concrete Sidewalk Repair
Quick note on sidewalks because the principles are the same but the stakes are different.
A cracked or heaving sidewalk is a trip hazard. If someone falls on your property because your sidewalk is messed up, thats a liability issue. Cities know this, which is why some municipalities will actually cite you for damaged sidewalks.
Same repair techniques apply. Clean the crack, fill appropriately for the size, seal if you want. The difference is sidewalks get way more foot traffic than driveways get car traffic, so topical repairs wear faster. If you’re patching a sidewalk crack, expect to redo it every few years.
For leveling, same deal as driveways. If a section has heaved up or sunk down, thats a pro job.
What I Actually Do
My own driveway gets inspected twice a year. Spring after winter damage has happened and fall before winter starts. Takes me ten minutes to walk the whole thing and look for new cracks.
Any crack gets addressed immediately. I keep a tube of crack filler in the garage next to the air compressor. See a crack, clean it out, fill it. Maybe five minutes of actual work.
I seal every three years. Penetrating sealer, siloxane based, not cheap but not crazy expensive either. Takes a Saturday afternoon.
My dad helped me pour a small concrete pad in Atlanta when I was fourteen or fifteen. For his grill, so it wasn’t sitting directly on the grass. We mixed it by hand, which is brutal, and he showed me how to level it and put the control joints in so it wouldn’t crack randomly. Its probably still there at that house. Or maybe they tore it out. I dont know. He was patient about it, explaining why we were doing each step. I remember the Portland cement smell and the weight of the concrete in the wheelbarrow and how it was August in Georgia so we started at six in the morning to beat the heat. It didn’t work, we were drenched by nine. But yeah.
The concrete repair stuff, the crack filling and the patching and all that, I learned later. From screwing it up mostly. The Texas driveway taught me more than any book would have.
Look, concrete driveway repair isnt complicated but it does require actually paying attention to your driveway, which most people dont do until theres a problem. Walk your concrete twice a year. Fix cracks when theyre small. Seal if it makes sense for your climate. And know when to call someone instead of making things worse.
Thats what we do here at Homevisory. We help you keep track of the maintenance stuff that’s easy to forget until it becomes expensive. If you want reminders for seasonal concrete inspection, gutter cleaning, filter changes, all of it, the Homevisory home task manager is free to set up and it’ll bug you before small problems become big ones.