

People think pipe insulation is only for cold climates. They think if you live somewhere it doesn’t snow much, you can skip it. Wrong. I’ve seen pipes burst in places that get maybe two hard freezes a year because those are the houses where nobody prepared for it. The pipes in your crawl space dont care that it “usually doesn’t get that cold here.” They care about the one night it does.
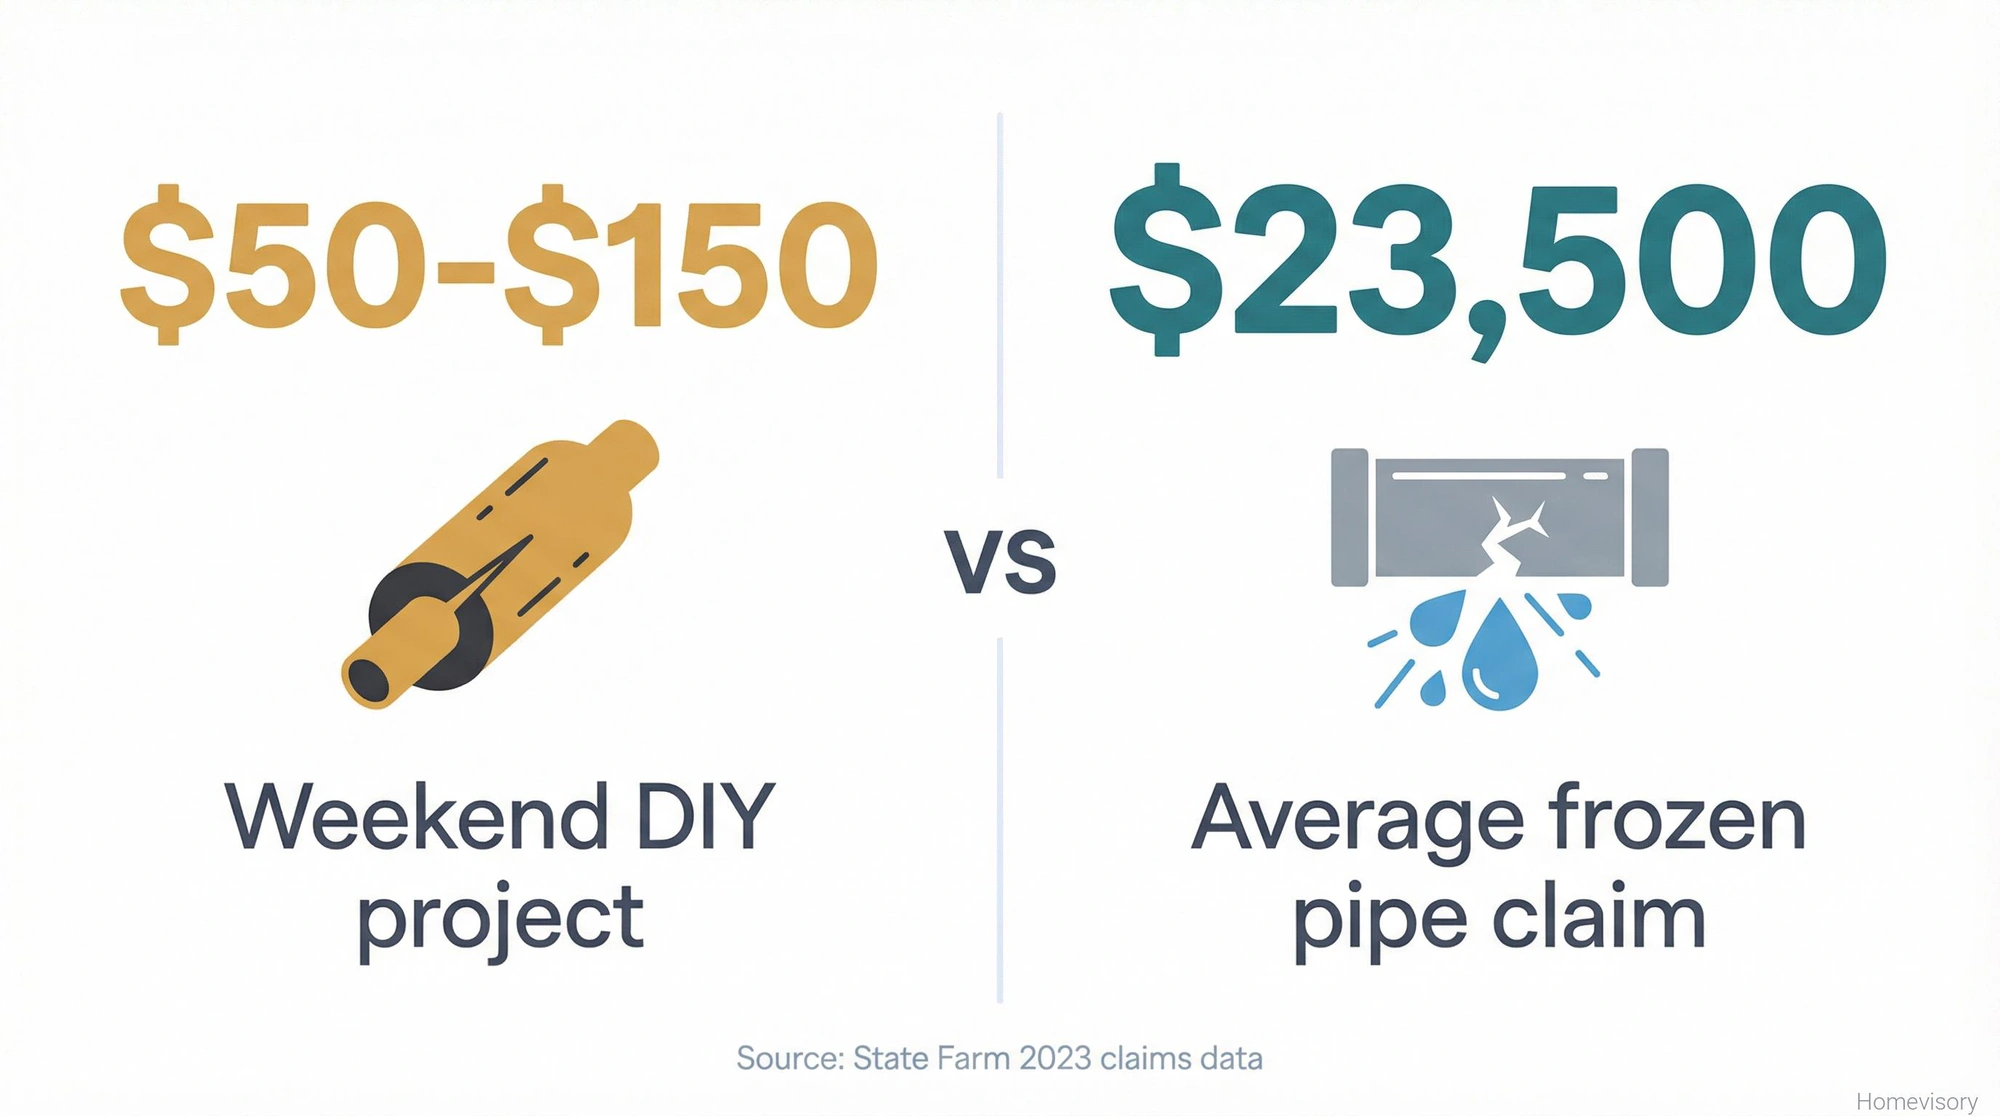
Pipe insulation is one of those maintenance tasks that costs almost nothing, takes a few hours, and prevents the kind of damage that can run you tens of thousands of dollars. State Farm’s 2023 claims data showed they paid out more than $432 million on frozen pipe claims. The average claim was over $23,500. For something you can prevent with foam sleeves that cost a few dollars per linear foot.
Why Pipes Freeze in the First Place
This isn’t complicated. Water freezes at 32 degrees. If the water in your pipes gets to 32 degrees, it freezes. When water freezes, it expands. Your pipes, whether theyre copper or PVC or PEX, don’t expand with it. Something has to give.
What gives is usually your pipe. And then you have water everywhere.
The Insurance Institute for Business and Home Safety says a crack as small as 1/8th inch can spew 250 gallons of water per day. That’s not a typo. A crack you can barely see. Two hundred fifty gallons. Per day.
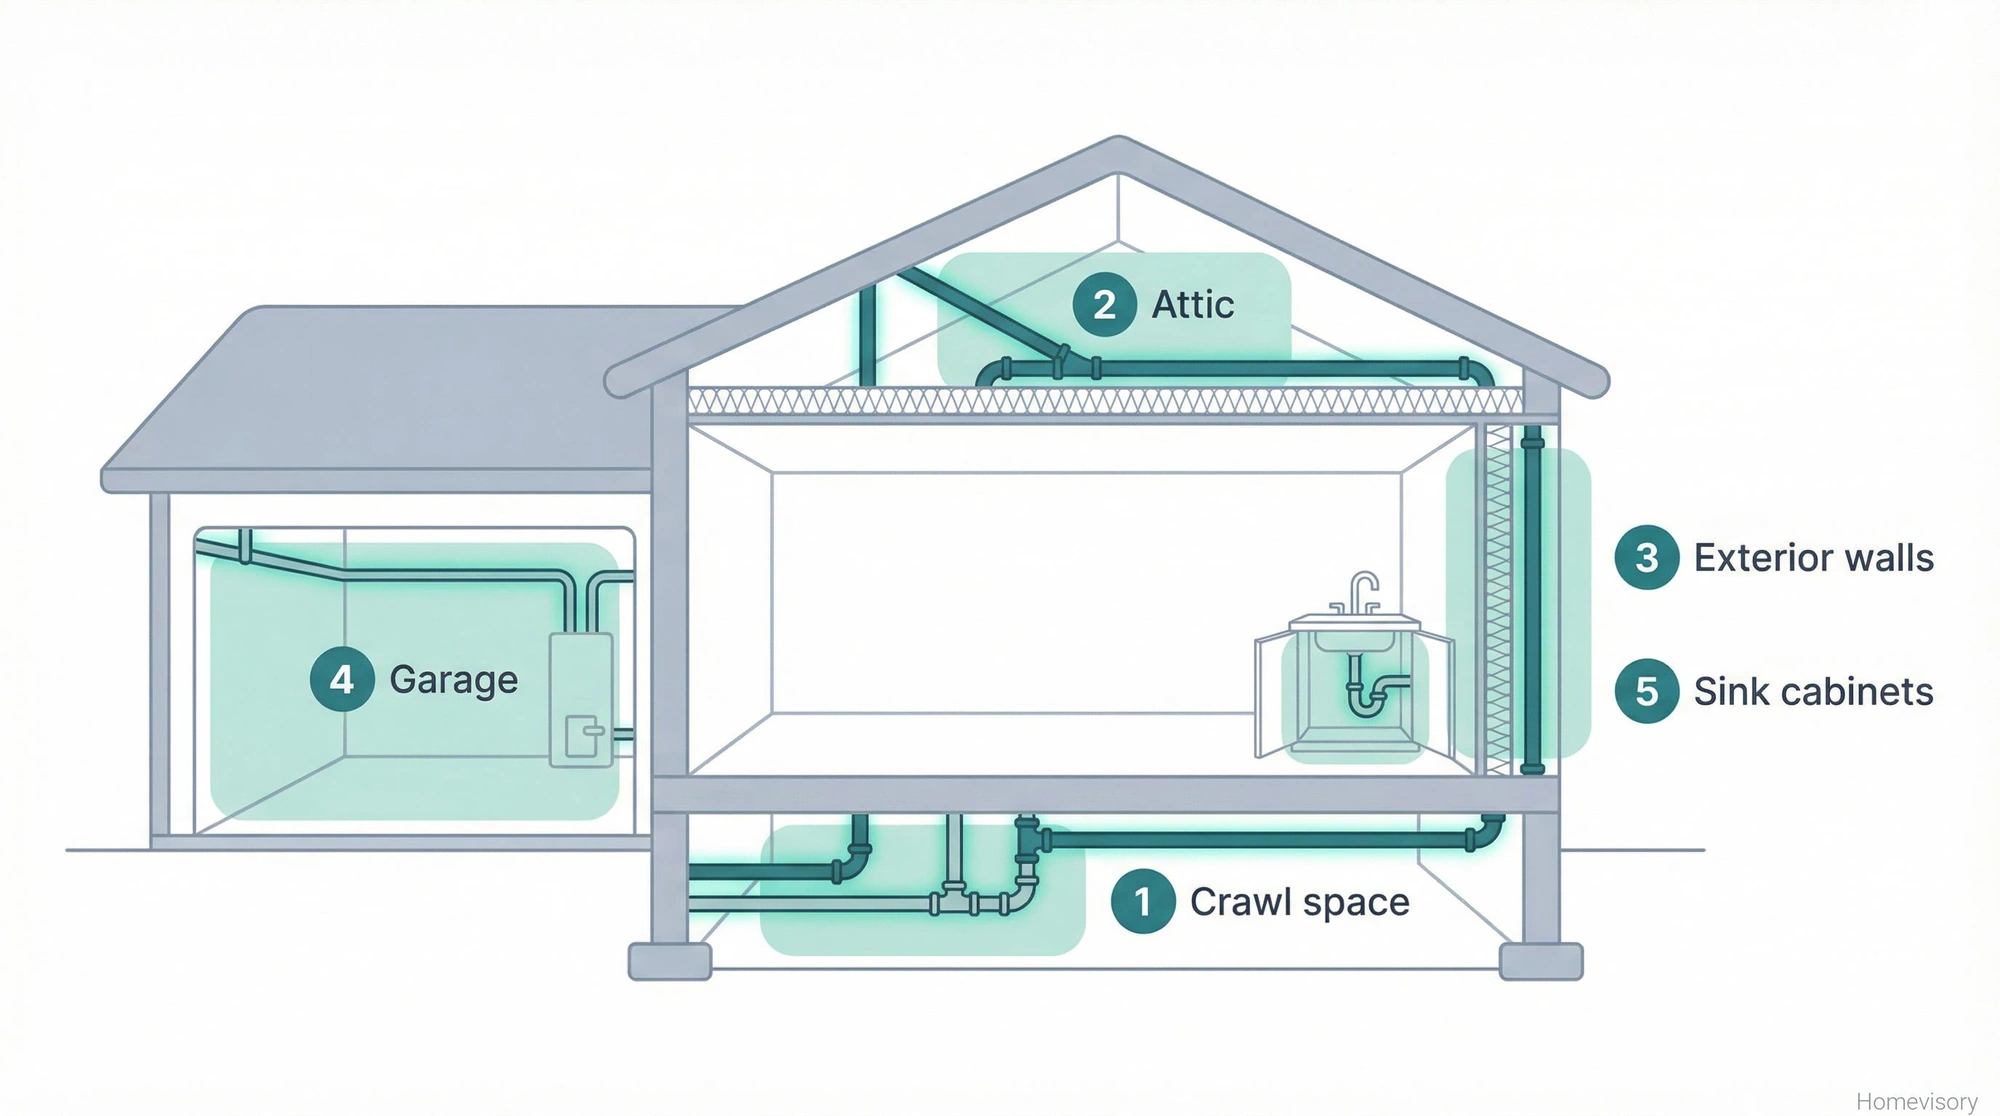
The pipes most at risk are the ones in unheated spaces. Crawl spaces. Attics. Garages. Exterior walls. Basically anywhere that isn’t getting the benefit of your heating system. I’ve talked to people who didn’t even know they had pipes in their attic. They found out when their ceiling caved in.
According to one analysis of 433 burst pipe claims, unheated attics were the most common location. The average loss was $27,000, but the most expensive claim was $1.7 million. Million. With an M.
The Materials: What Actually Works
Alright, let me talk about what you’re actually putting on these pipes, because this is where I see people either overthink it or completely cheap out.
Foam Sleeve Insulation
This is the standard. Polyethylene foam tubes, pre-slit down the side, you slip them over the pipe and you’re done. They come in different diameters to fit different pipe sizes and different thicknesses depending on how much thermal barrier you need.
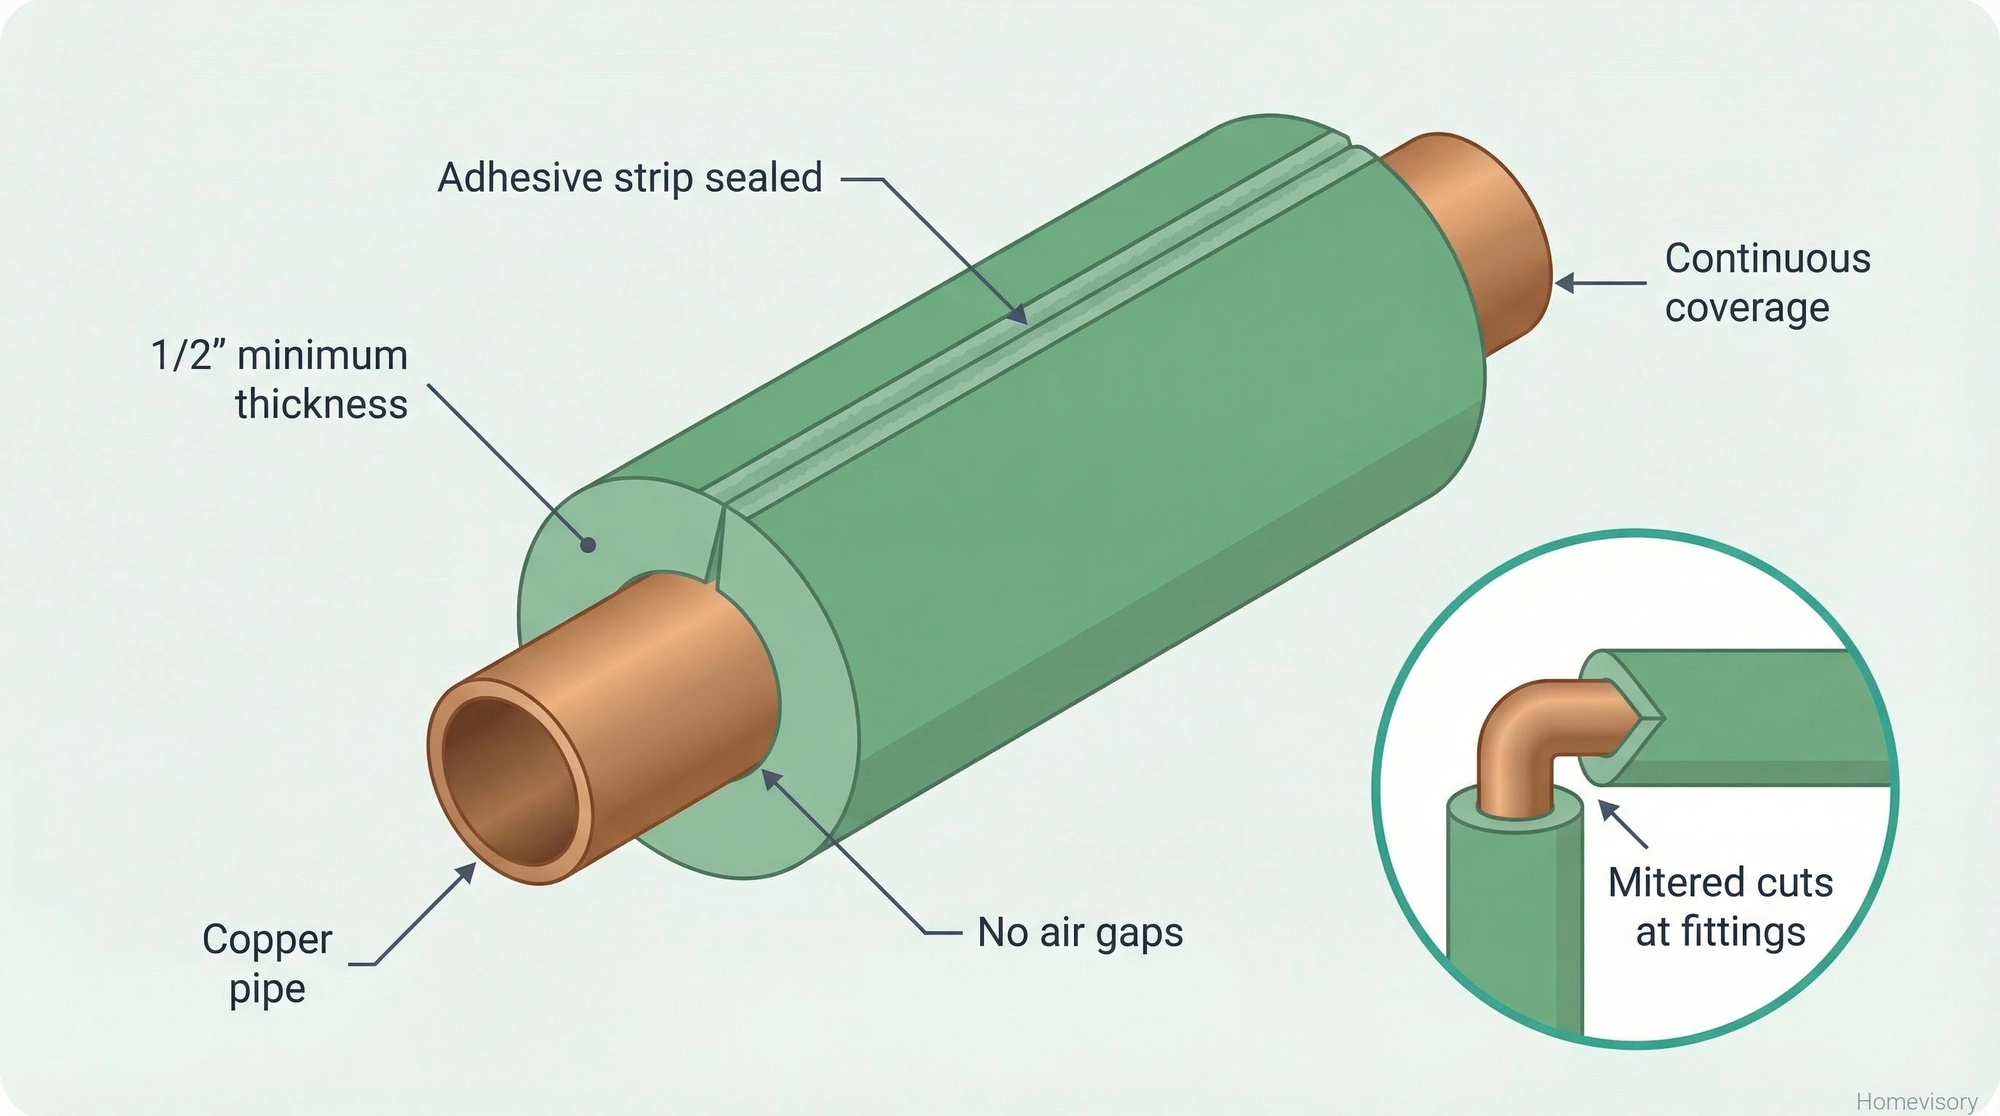
Foam insulation runs about $0.20 to $1.35 per linear foot depending on thickness and quality. For most residential applications, you want at least 1/2 inch thickness. If you’re in a seriously cold climate or insulating pipes in a particularly exposed location, go thicker. The difference in cost between 1/2 inch and 1 inch foam is negligible compared to what you’re protecting against.
The foam sleeves usually come with a self-adhesive strip along the slit so you can seal them closed after installation. Use it. I see people skip this step, leave the slit open, and then wonder why their insulation isn’t doing much. The whole point is creating a continuous thermal barrier around the pipe. A gap defeats the purpose. You need to seal every joint, every elbow, every T-fitting. The fittings are actually where most people mess up because the straight runs are easy but then they get to an elbow and just kind of wrap some foam around it and call it good enough. Its not good enough. They sell pre-formed foam pieces for elbows and tees. Buy them. Or cut your straight pieces at angles so they meet flush at the fittings. I prefer the second method because the pre-formed pieces never seem to fit exactly right, but either way, you need full coverage with no gaps.
Foil-Backed Insulation
This is fiberglass or foam with a reflective foil facing. Works well, especially near heat sources because it reflects radiant heat back toward the pipe. The Department of Energy specifically mentions that if your pipes are within 8 inches of a gas water heater flue, you should use fiberglass pipe wrap at least 1 inch thick without a facing, for safety reasons. Keep any insulation at least 6 inches from the flue.
Fiberglass runs about $1.50 per linear foot for the tubular pieces. More expensive than foam but better in certain applications.
Heat Tape and Heat Cable
Now we’re getting into the stuff that actually generates warmth, not just retains it. Heat tape, heat cable, same thing, different names. Its an electrical heating element you wrap around the pipe or run alongside it, then cover with insulation.
I lived in Chicago for a stretch in the 90s. Commercial work, renovation projects, cold that would make your eyelashes freeze if you were outside for five minutes. In that kind of climate, pipe insulation alone is not enough for exposed pipes. The National Insulation Association puts it plainly: in northern regions where freezing temperatures set in for prolonged periods, heat tape should be used in conjunction with insulation.
They ran some numbers. Still water at 55°F in a 6-inch pipe with 2 inches of insulation, exposed to 0°F air, will freeze in about 23 hours. Insulation buys you time. It doesn’t buy you forever.
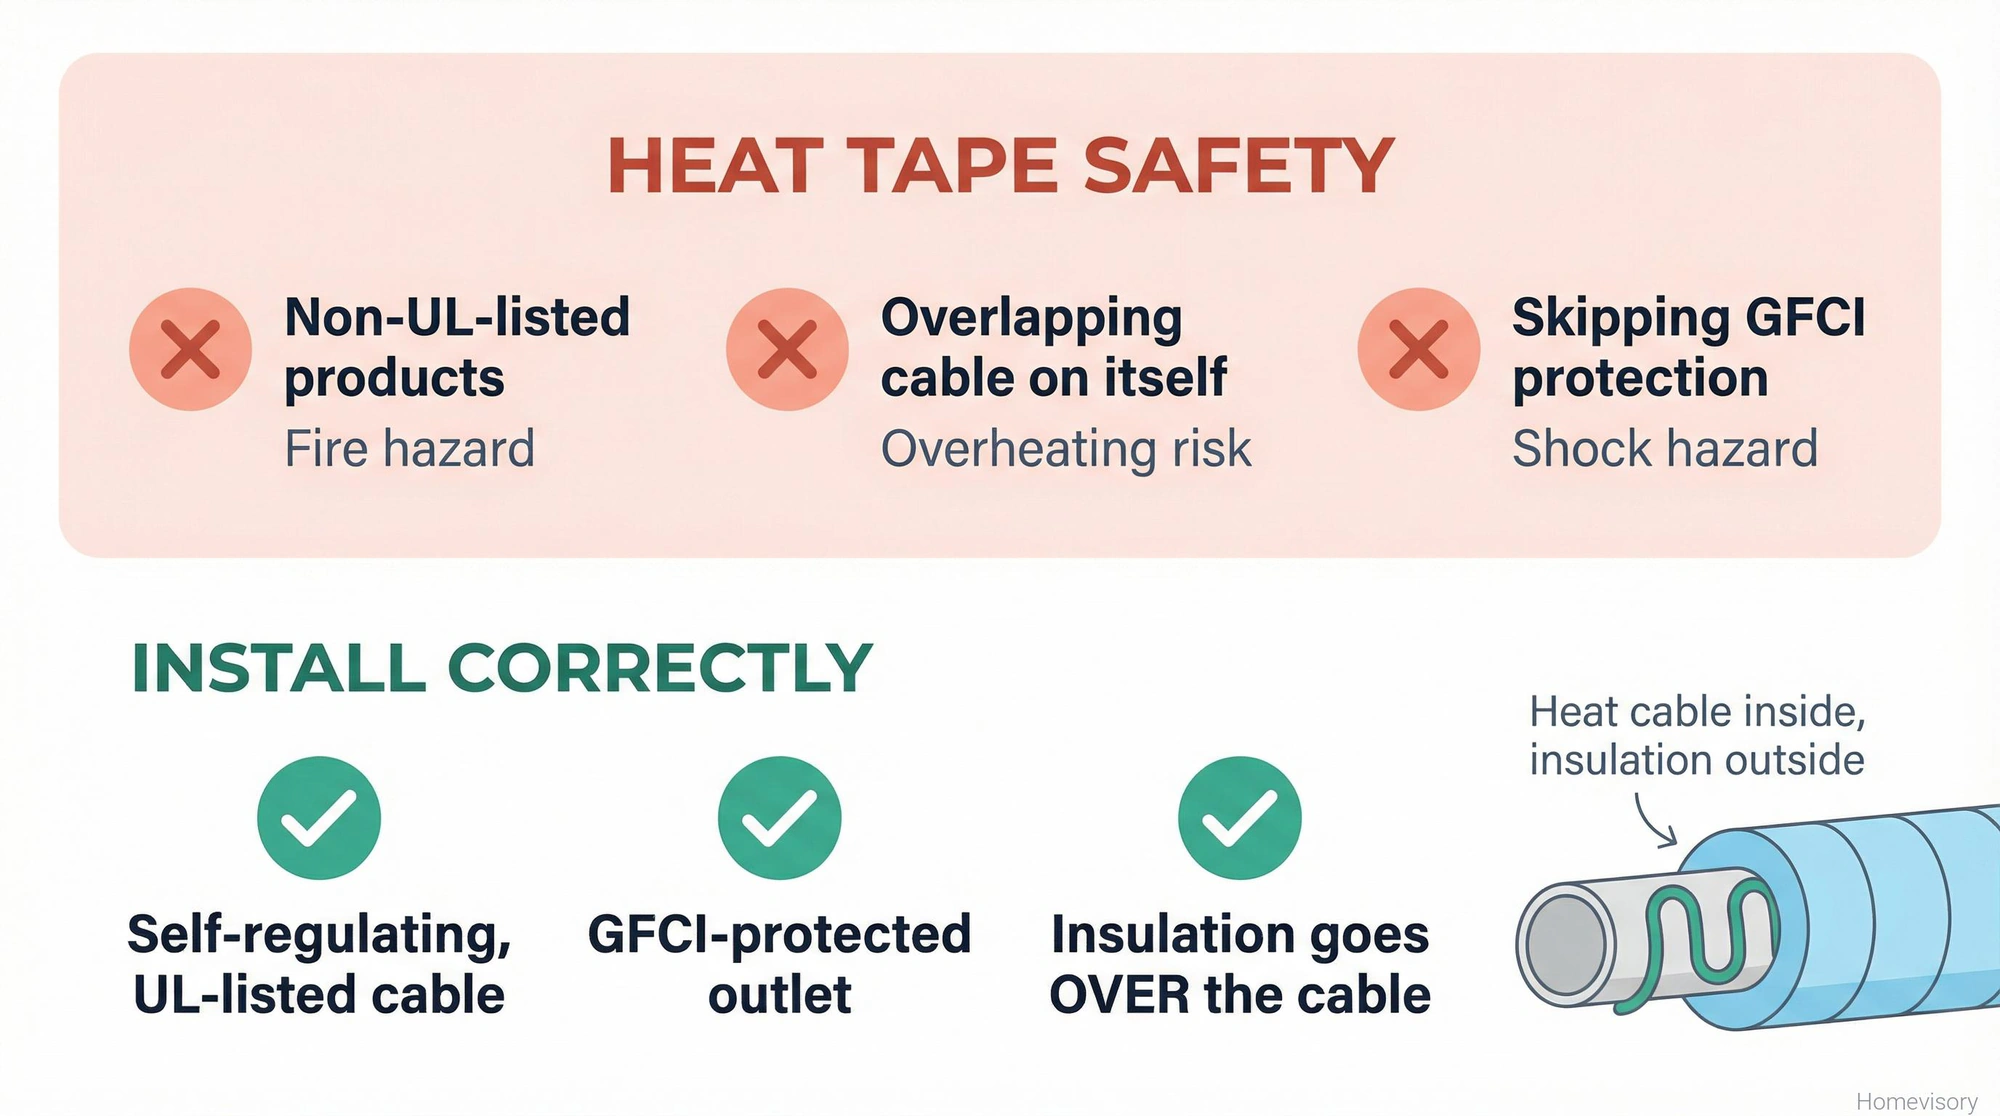
There was a woman in our building in Chicago, older lady, she’d just redone her whole kitchen. New cabinets, new counters, the works. This was maybe February of 95 or 96. Polar vortex or whatever they called it back then. Her pipes froze and burst while she was visiting her sister in Indiana. Came back to… anyway. The point is heat tape. Get the self-regulating kind, its more expensive but it adjusts its heat output based on the pipe temperature so it doesn’t run constantly and its safer. Make sure whatever you buy is UL-listed. Non-UL-listed heat tape is how you start fires.
Where to Insulate
Every exposed pipe in an unheated space. Every pipe in an exterior wall. Every pipe in a crawl space, attic, garage, unfinished basement.
My obsession list, in order:
- Crawl spaces. This is the big one. Dark, forgotten, out of sight, exactly the kind of place where pipes freeze and nobody notices until the damage is done.
- Attics. People forget there’s plumbing up there. Out of sight, out of mind, out $27,000.
- Exterior walls. Pipes running through walls that face outside. You cant get to these without opening the wall, but if you’re doing any renovation work, insulate while you have access.
- Garages. Especially attached garages that share a wall with living space.
- Under bathroom and kitchen sinks on exterior walls. Open the cabinet doors during cold snaps to let warm air circulate. Easy.
The Department of Energy recommends insulating at least the first 3 feet of pipe from your water heater, both hot and cold sides. Even if you’re not worried about freezing, insulating hot water pipes reduces heat loss and can save on energy costs.
Installation: Just Do It Right
This is a weekend project. Do it yourself.
Measure your pipes. Buy insulation in the right diameter, most residential water supply lines are either 1/2 inch or 3/4 inch. Measure, don’t guess. Get a few extra feet because you’ll mess up a cut or two.
Cut the foam to length with a utility knife or scissors. Slip it over the pipe, peel the adhesive backing, seal it closed. At joints and fittings, miter your cuts so pieces meet flush. Seal every seam with foil tape or the adhesive strips.
For heat cable, follow the manufacturer’s instructions exactly. Usually you’re either wrapping it in a spiral pattern or running it straight along the pipe, then covering the whole thing with foam insulation. The insulation goes over the heat cable, not under it. The cable heats the pipe, the insulation keeps the heat in. Connect to a GFCI-protected outlet.
Some things Im not getting into here: thawing pipes that are already frozen, that’s a whole separate problem and you need to be careful because a torch can cause a steam explosion or start a fire. Indiana’s utility consumer office is very clear about this: never attempt to thaw a pipe with a torch or open flame. Call a plumber if you’re in that situation.
The Other Stuff That Helps
Pipe insulation is the main thing. But there’s supporting work.
Keep your heat on. If you’re traveling, don’t set the thermostat below 55 degrees. I know it hurts to heat an empty house but it hurts worse to come home to a flooded one. Multiple sources agree on 55 as the minimum.
Let faucets drip during extreme cold. A trickle of water keeps things moving, and moving water is harder to freeze. This isn’t a permanent solution, its a get-through-the-night solution when temperatures drop below what your insulation can handle.
Seal air leaks in crawl spaces and rim joists. Cold air infiltration makes everything worse. Pipe insulation is one piece of a bigger picture — I’ve got a complete house winterization checklist covering windows, heating, exterior prep, and everything else you need to do before winter. Our winterization guide puts all the tasks in one place.
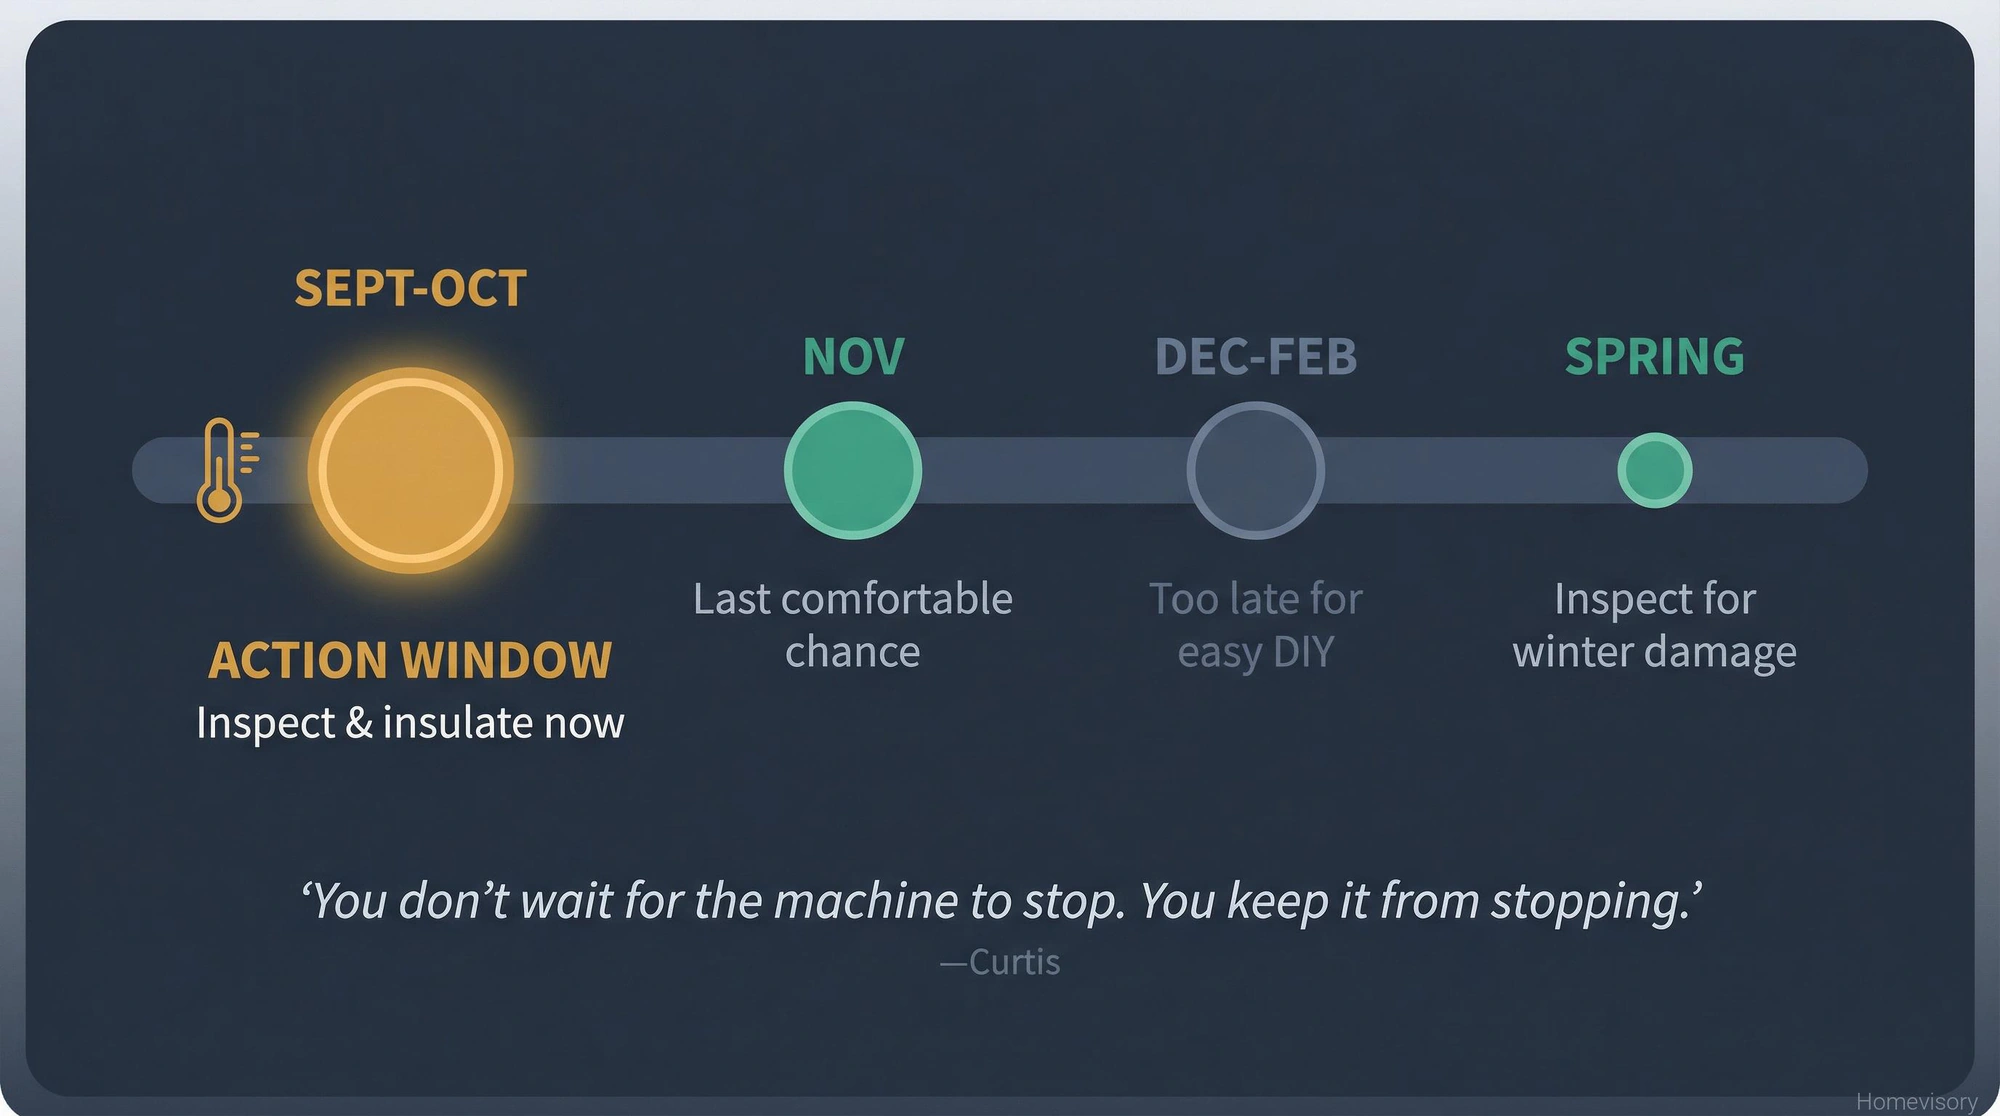
My dad Curtis worked in a factory for years. Industrial equipment, heavy machinery. He used to say you don’t wait for the machine to stop, you keep it from stopping. Preventive maintenance. Checking things before they break. He was talking about stamping presses or whatever they had there, but its the same principle. You dont wait for your pipes to freeze and burst. You insulate them in October when its still 60 degrees outside and you can work in your crawl space without freezing yourself.
What This Costs vs. What It Prevents
Foam insulation for a typical house, maybe 50 to 100 linear feet of pipe: $50 to $150 in materials. A Saturday afternoon.
One burst pipe claim: over $23,000 on average. The worst ones, over a million.
Water damage is the second most common homeowners insurance claim after wind and hail, accounting for nearly 28% of all claims in 2022.
I don’t know how to make this math any clearer.
This is exactly the kind of task that Homevisory was built for. The seasonal stuff that needs to happen before it’s too late, not after. Our Homevisory home task manager will remind you to check your pipe insulation before winter hits, not in February when youre already dealing with the aftermath. You can sign up free, set up your home profile, and get reminders for this and everything else your house needs. Thats what we do here at Homevisory.