
Most people start thinking about how to winterize a house in December. By then its too late. The best time to winterize is fall, typically between September and November, before the first frost shows up and reminds you that you forgot to do everything on this list.
I learned this the hard way during my years working commercial renovations. Spent a lot of time in Chicago during winters that would freeze your eyelashes together. Literally. You’d walk outside and within ten minutes the moisture on your eyelashes would ice up. Thats when you learn real fast what cold air does to a building thats not prepared for it.
So heres the complete checklist I use every year, and the one we recommend at Homevisory. Some of this you can do yourself in an afternoon. Some of it requires a professional. I’ll tell you which is which.
Start With an Energy Audit
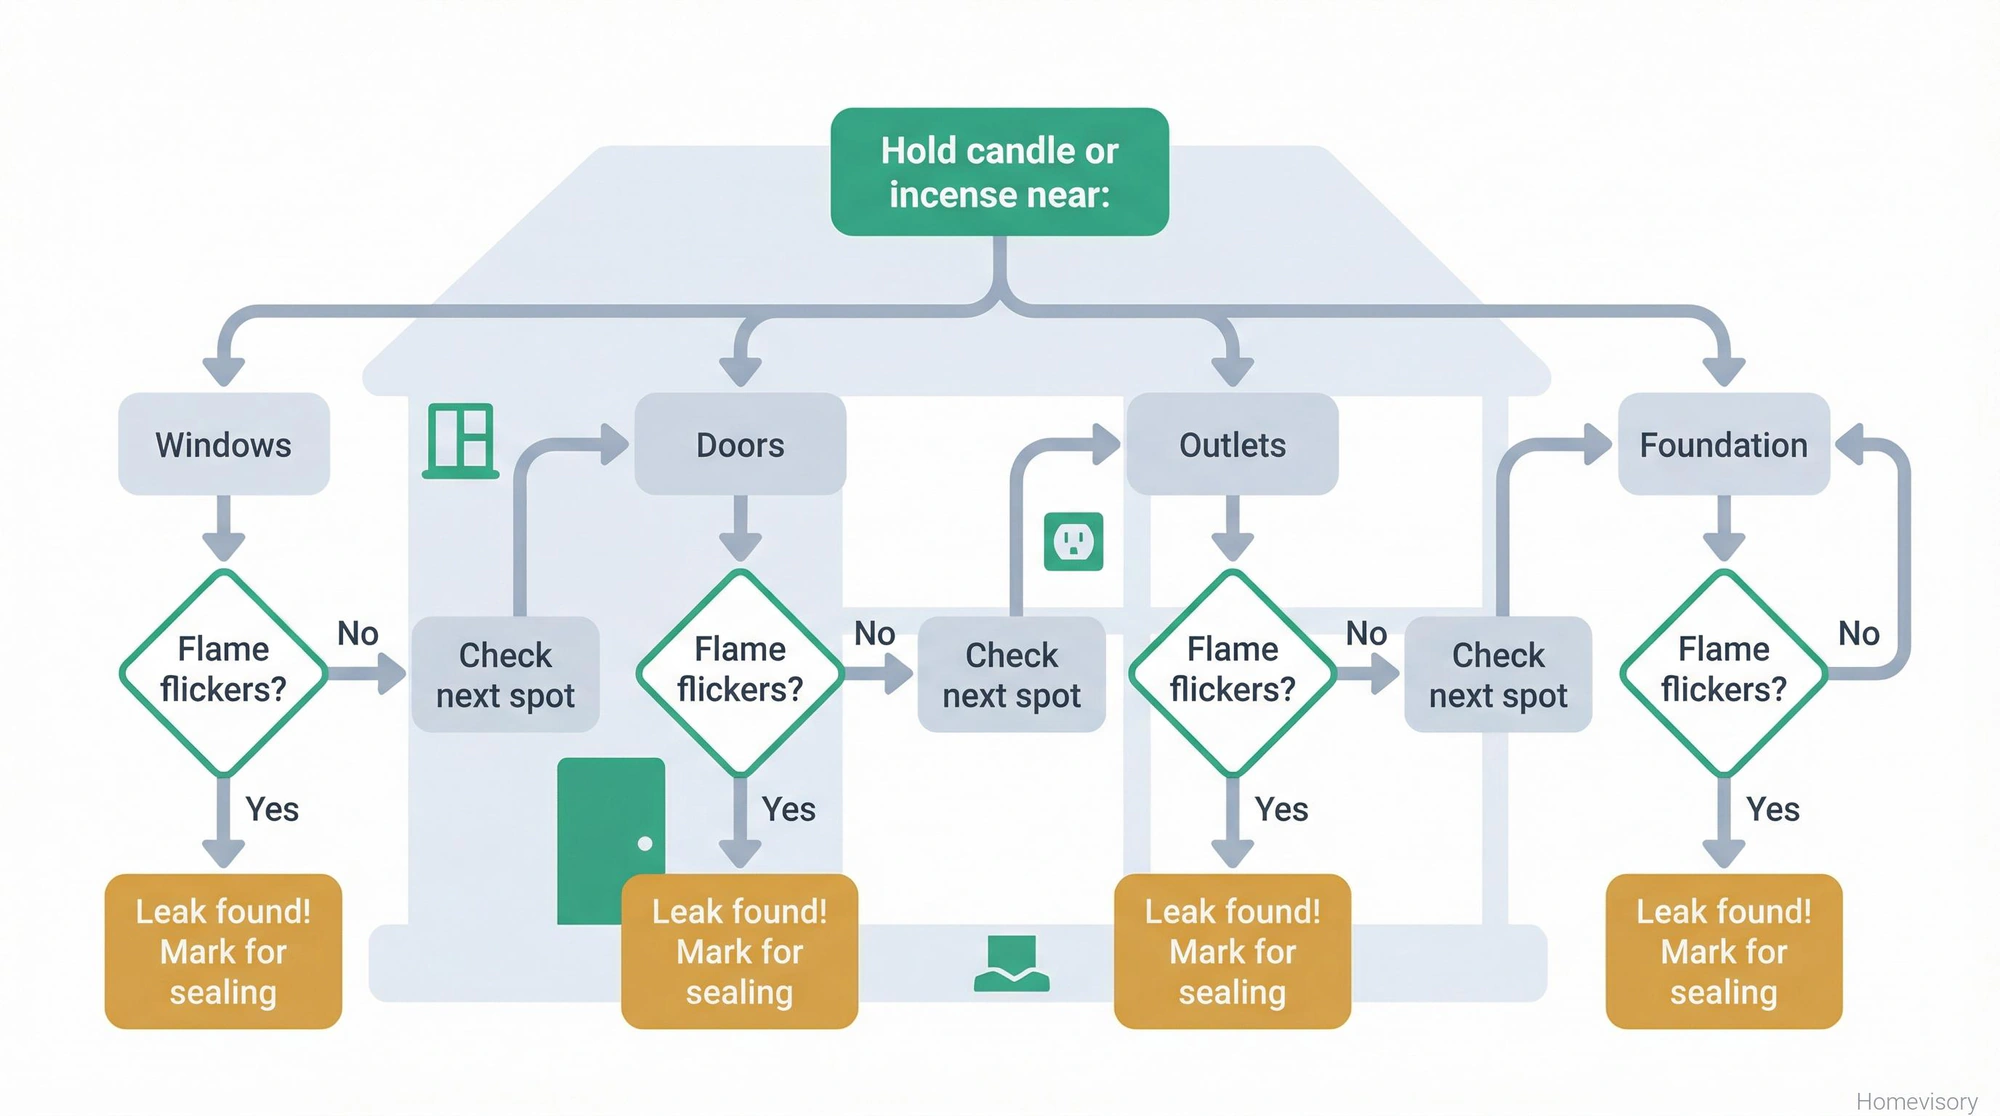
Before you do anything else, figure out where youre actually losing heat. You can hire someone to do a professional energy audit, or you can do a basic version yourself with a candle or incense stick. Hold it near windows, doors, electrical outlets, anywhere air might be sneaking through. If the smoke wavers or the flame flickers, you found a leak.
Energy audits can identify areas for improvement and potentially lead to 5-30% energy savings. Thats a wide range, I know, but it depends on how bad your house is right now. Older homes tend to be worse. Newer construction is usually tighter, but not always.
Air Sealing and Weatherstripping
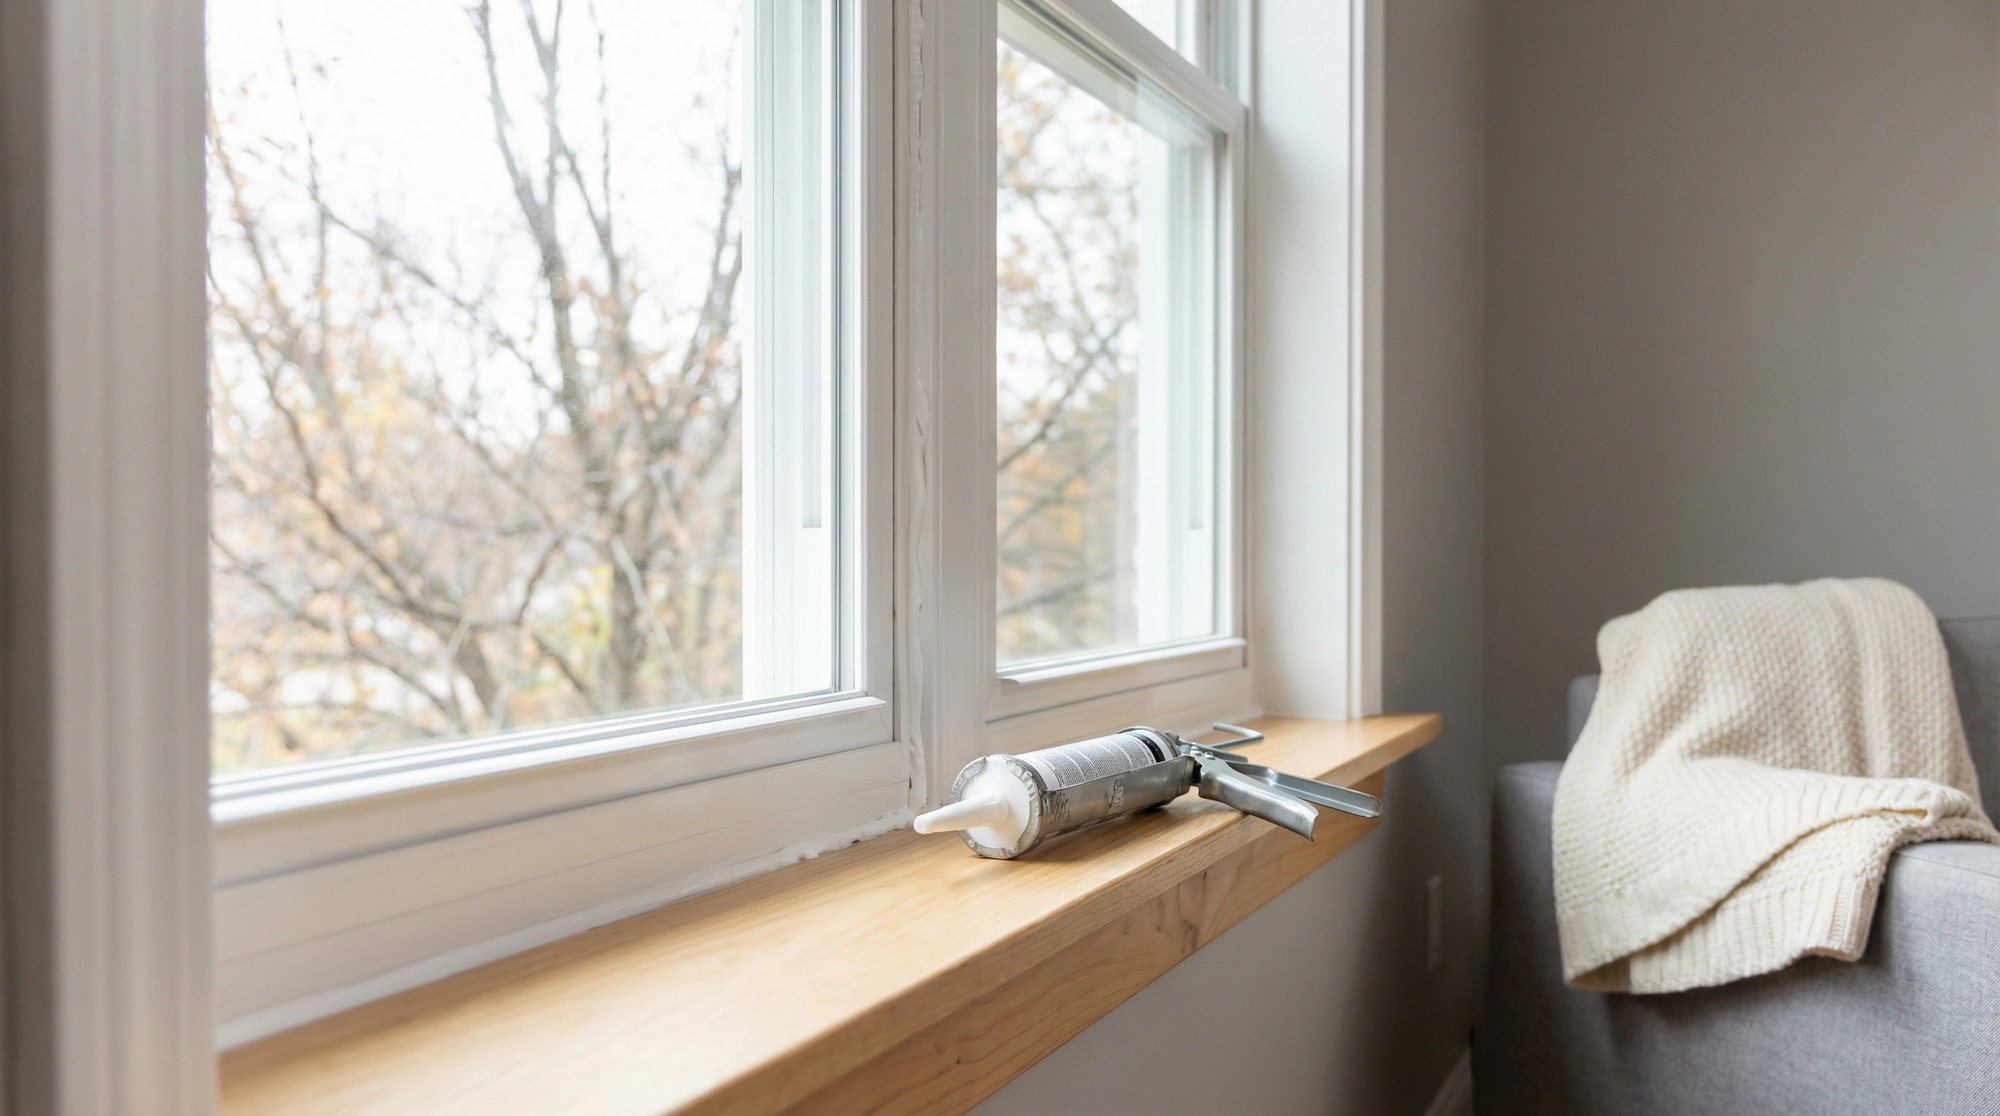
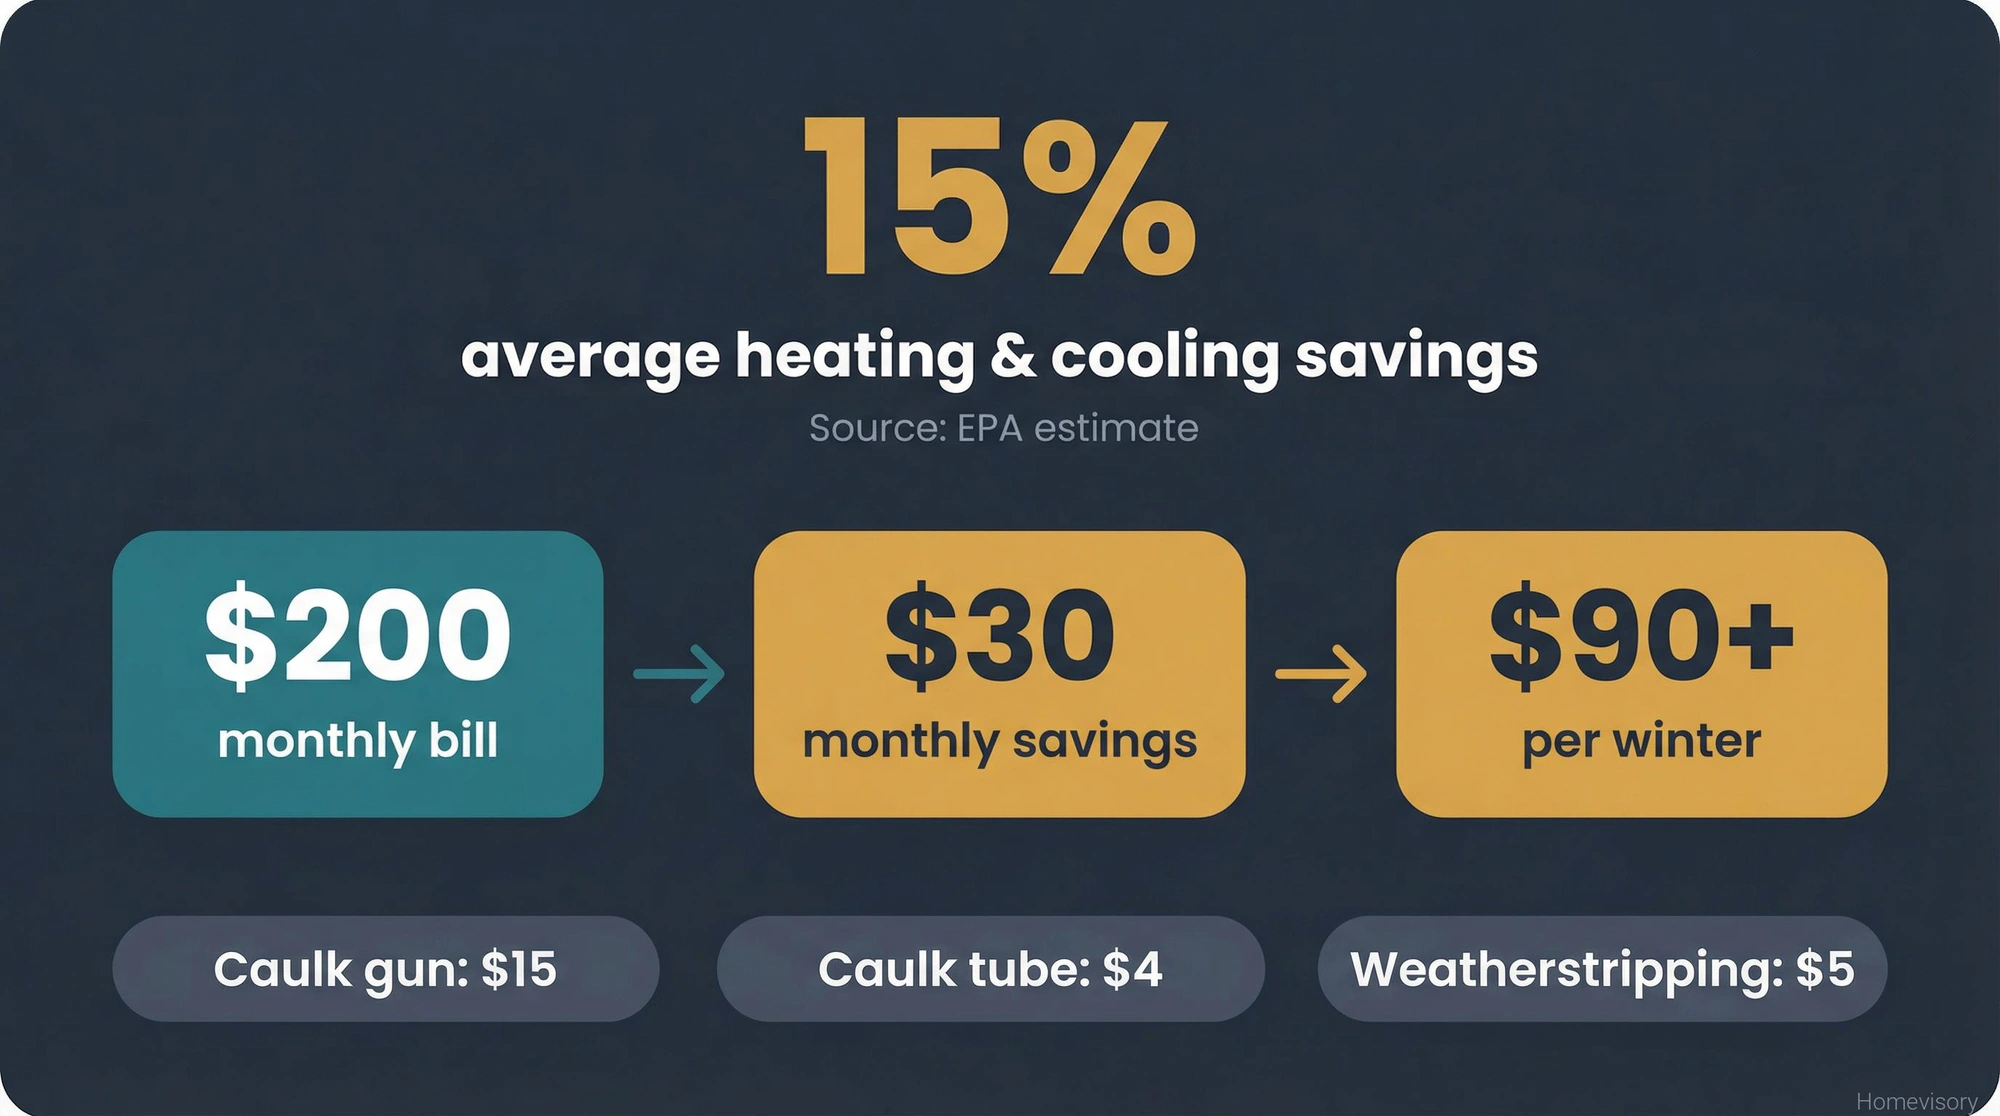
This is the part I probably care too much about. But I’ve seen so many people skip air sealing because it sounds boring and then they complain about their heating bills all winter. Air sealing is the single most effective thing you can do to reduce energy costs, and its also one of the cheapest. A caulk gun costs maybe fifteen bucks. A tube of caulk is four dollars. Weatherstripping is a few dollars per door.
The EPA estimates homeowners can save an average of 15% on heating and cooling costs by air sealing their homes and adding insulation. Fifteen percent. On a $200 winter heating bill, thats thirty bucks a month. Over a winter thats real money.
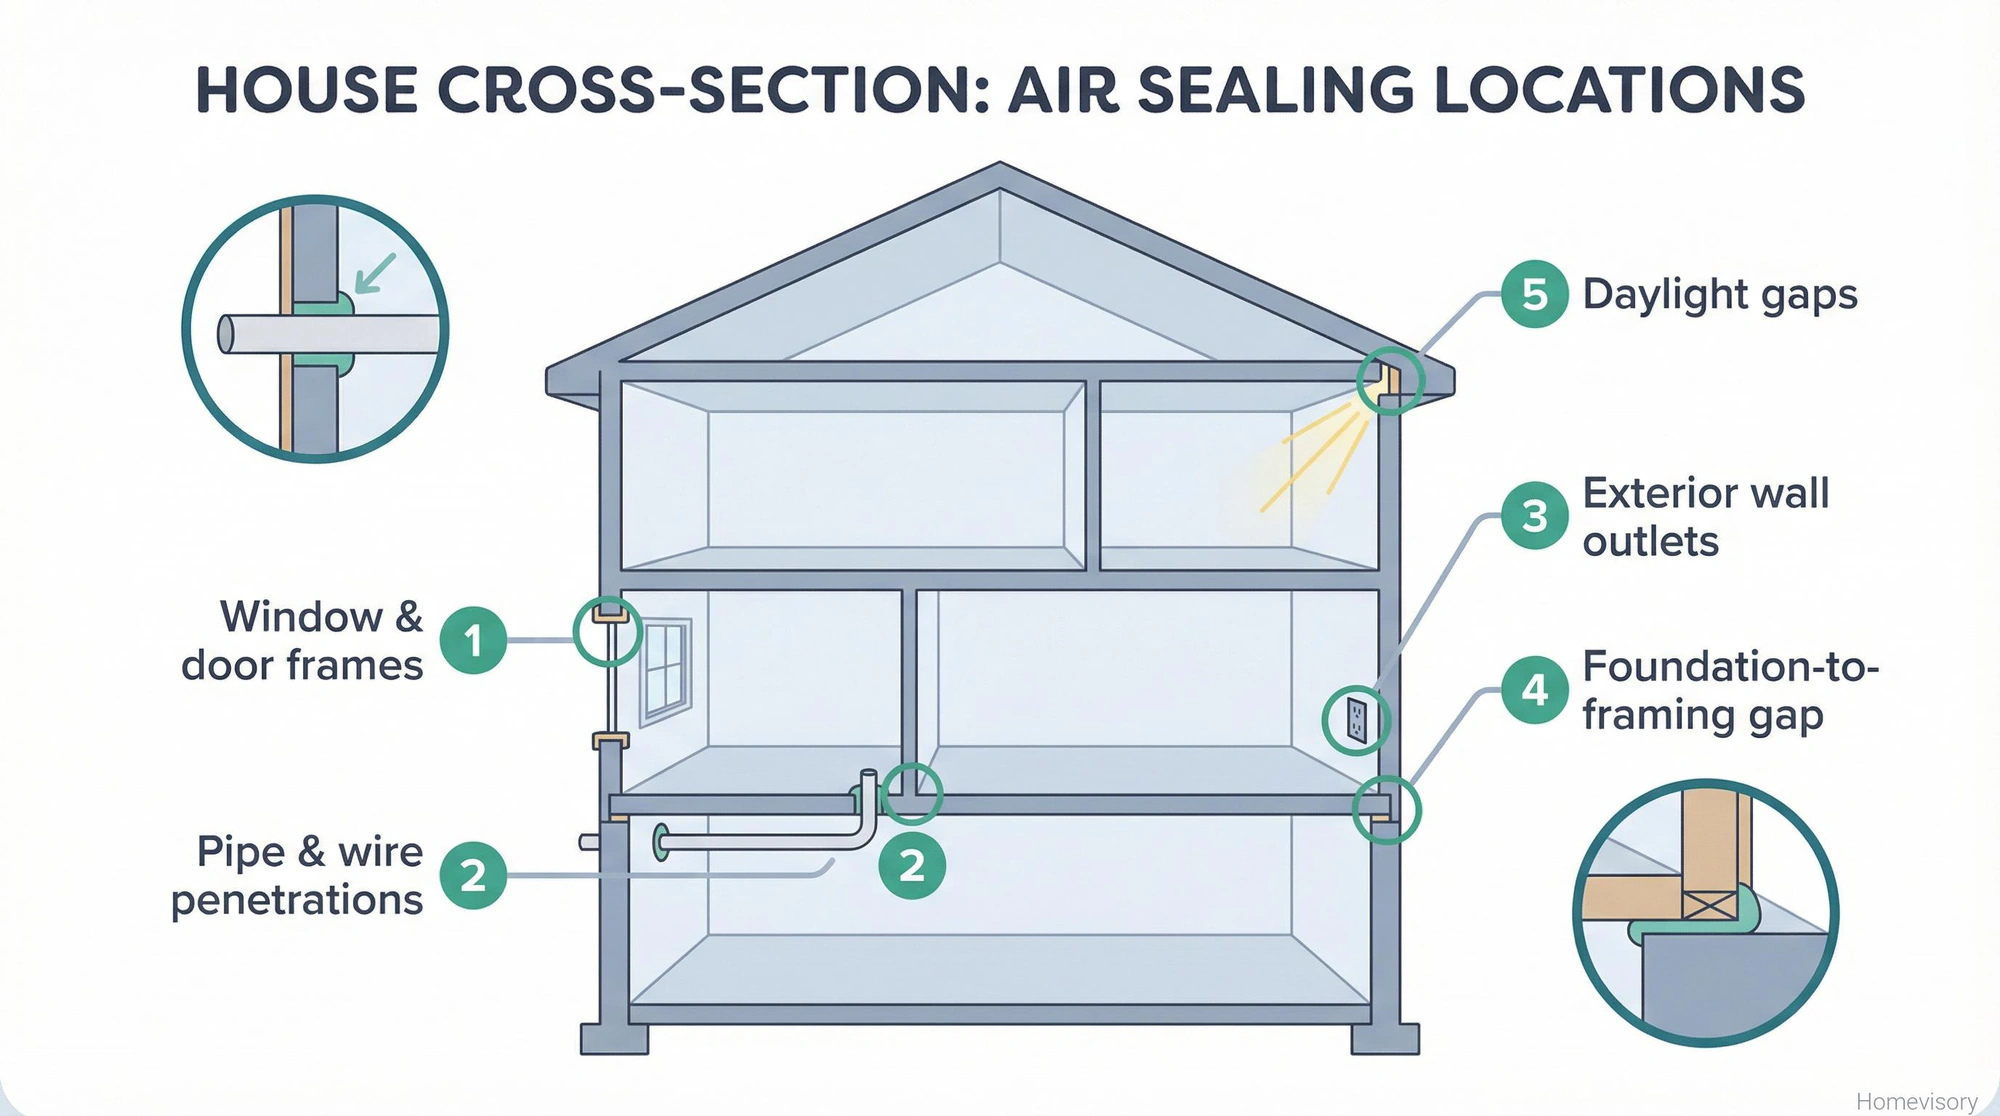
Where to seal:
- Around windows and door frames
- Where pipes and wires enter your house through exterior walls
- Around electrical outlets on exterior walls
- Where the foundation meets the wood framing
- Any gap you can see daylight through
For gaps up to a quarter inch, use caulk. For bigger gaps, use expanding foam insulation. The foam comes in a can with a little straw applicator. Its messy but it works.
Door Sweeps and Weatherstripping
Every exterior door needs a door sweep on the bottom and weatherstripping around the frame. Run your hand around the edges of a closed door. If you feel cold air, the weatherstripping is shot.
Replacing weatherstripping takes maybe twenty minutes per door. The hardest part is picking the right type at the hardware store because there are fifteen different kinds and none of them are labeled in a way that makes sense. V-strip works for most doors. Foam tape is cheaper but wears out faster. Whatever. Just pick one and install it.
Mr. Davis, my woodshop teacher back in Atlanta, used to say measure twice, cut once. That applies here too. Measure your door gaps before you buy weatherstripping so you get the right thickness. Too thin and it wont seal. Too thick and the door wont close.
Window Insulation
Windows are where most homes lose heat. You can feel it if you stand next to an old single-pane window in January. Cold just radiates off the glass.
If you have old windows, replacing them is the best long-term solution but its expensive. Were talking hundreds of dollars per window installed. For a cheaper fix, use window insulation film. Its basically plastic sheeting that you tape to the window frame and then shrink with a hair dryer. Looks a little janky but window insulation film can keep up to 70% of heat from leaking out of windows.
My dad Curtis used to tape plastic over the windows in our house in Atlanta, which seemed ridiculous to me as a kid because Atlanta isn’t that cold. But he grew up somewhere further north, I think his family was originally from Virginia or maybe North Carolina, and he just had it in him that you cover the windows when it gets cold. I asked him about it once and he said something about his mother doing it, his mother who I never met because she passed before I was born. Anyway.
The kits cost between seven and twenty dollars and cover multiple windows. Worth it.
Attic Insulation
Heat rises. This is basic physics and yet most people ignore their attics completely. According to ENERGY STAR, 9 out of 10 homes in the U.S. are under-insulated, which means 90% of American homes are losing heat through their attics, their walls, their floors, everywhere that insulation should be but isn’t or should be thicker but isn’t. Your attic should have at least 10-14 inches of insulation depending on where you live. If you can see the floor joists, you dont have enough. Climb up there with a ruler and check. If its below the top of the joists, add more. You can roll out fiberglass batts yourself if you dont mind itching for a day, or you can hire someone to blow in cellulose which is faster and fills gaps better.
While youre up there, check for any gaps around pipes, wires, or the chimney. Hot air escaping into the attic is wasted money.
Pipe Insulation and Freeze Prevention
Frozen pipes are one of those things that seem unlikely until they happen to you. Then you’ve got water damage, burst pipes, and a very expensive repair bill.
Any pipes in unheated spaces need to be insulated. This includes:
- Pipes in the garage
- Pipes in the crawl space
- Pipes along exterior walls
- Pipes in the basement if your basement isn’t heated
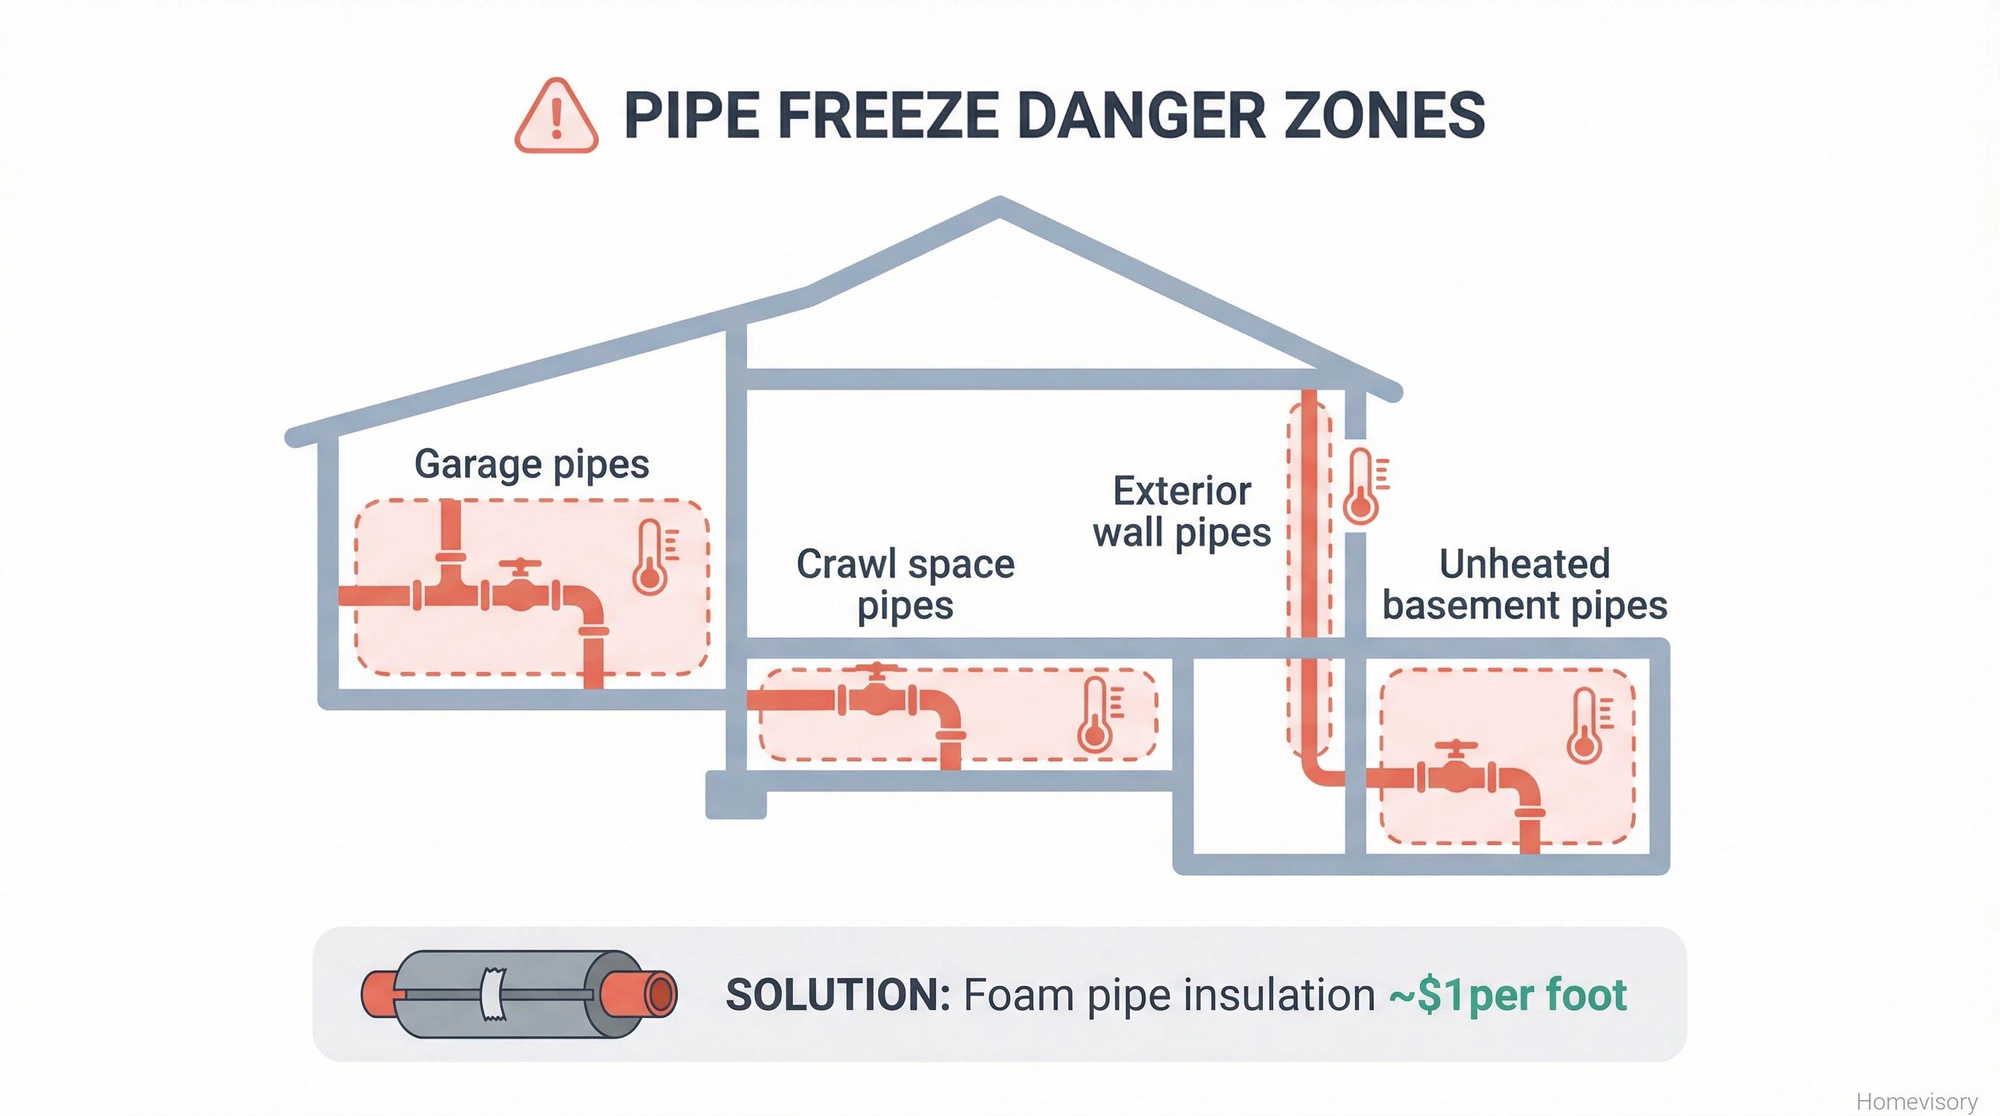
Foam pipe insulation is cheap, like a dollar per linear foot, and you just slit it lengthwise and slip it over the pipe. Takes five minutes. Theres no excuse not to do this. I’ve got a complete pipe insulation guide that covers foam sleeves, heat tape, and which pipes to prioritize.
For pipes that are really vulnerable, the ones in the crawl space or along exterior walls in older homes, you can add heat tape. Its an electrical cable that wraps around the pipe and keeps it above freezing. Costs more to run but cheaper than fixing a burst pipe.
When temperatures drop below freezing, let your faucets drip slightly. Moving water is harder to freeze. And open cabinet doors under sinks so warm air can reach the pipes.
Your Heating System
Get your heating system serviced before winter. Every year. I dont care if it worked fine last year. Get it checked.
A technician will clean the burners, check the heat exchanger for cracks, make sure the pilot light or ignition system is working, and verify that everything is running efficiently. This costs maybe $80-150 depending on where you live. A new furnace costs $3,000-7,000.
Replace your filter too. Dirty filters make your system work harder and cost you money. I’ve written about this before. Check your filter every month and replace it when its gray.
Thermostat Settings
The Department of Energy suggests keeping your thermostat at 68 degrees when you’re home. Lower when you’re sleeping or away. You can save as much as 10% on heating costs by turning your thermostat back 7-10 degrees for 8 hours a day.
A programmable thermostat makes this automatic. Set it to drop the temperature when you leave for work and warm back up before you get home. Smart thermostats do this even better because they learn your schedule.
Get one or dont. Moving on.
Exterior Prep
Gutters
Clean your gutters before the first freeze. Clogged gutters mean ice dams, and ice dams mean water backing up under your roof and leaking into your house. I got obsessed with drainage after a deck project went wrong years ago in Plano. Water finds every mistake you make.
Outdoor Faucets
Disconnect garden hoses. If you leave a hose connected, water can back up into the pipe and freeze. Turn off the water supply to outdoor faucets if you have interior shutoff valves. Let the faucets drain.
If you dont have interior shutoffs, buy insulated faucet covers. They cost about five dollars and slip over the faucet to protect it.
Sprinkler Systems
If you have an irrigation system, get it winterized. This means blowing compressed air through the lines to push out all the water. You can rent an air compressor and do it yourself, or hire someone for $56 to $131 on average.
I’d hire someone. The compressor rental plus your time isn’t worth the savings, and if you do it wrong you crack a pipe underground.
The Fireplace and Chimney
If you have a fireplace, get the chimney inspected and cleaned before you use it. Creosote builds up in chimneys and its flammable. I’m not getting into chimney maintenance here because honestly, call a chimney sweep. This isn’t a DIY job.
One thing I will say: make sure your damper closes properly. When the fireplace isnt in use, that damper should be shut tight or you’ve got a hole in your roof letting cold air pour in.
Crawl Space and Basement Insulation
Your crawl space is probably the part of your house you think about least. Its also one of the biggest sources of heat loss.
At minimum, insulate the rim joists in your basement. Thats the band of wood around the top of your foundation walls. Use rigid foam insulation, cut it to fit, and seal the edges with caulk.
If your crawl space has exposed dirt, consider covering it with a vapor barrier, which is just heavy plastic sheeting. This keeps moisture from coming up into your floor system, which reduces both energy loss and the chance of mold.
What This All Costs
The cost to winterize a house ranges from $50 to $1,500 depending on what you do yourself versus hire out, and how much your house needs.
If you’re just doing weatherstripping, caulk, and window film, you’re looking at maybe $50-100 total. If you’re adding insulation, servicing your HVAC, and hiring people for some tasks, it can hit $500-1,000 easy.
But consider this: households that weatherize save an average of $372 per year in energy costs. That means most winterization work pays for itself within one to three years, and then you’re just saving money every year after that.
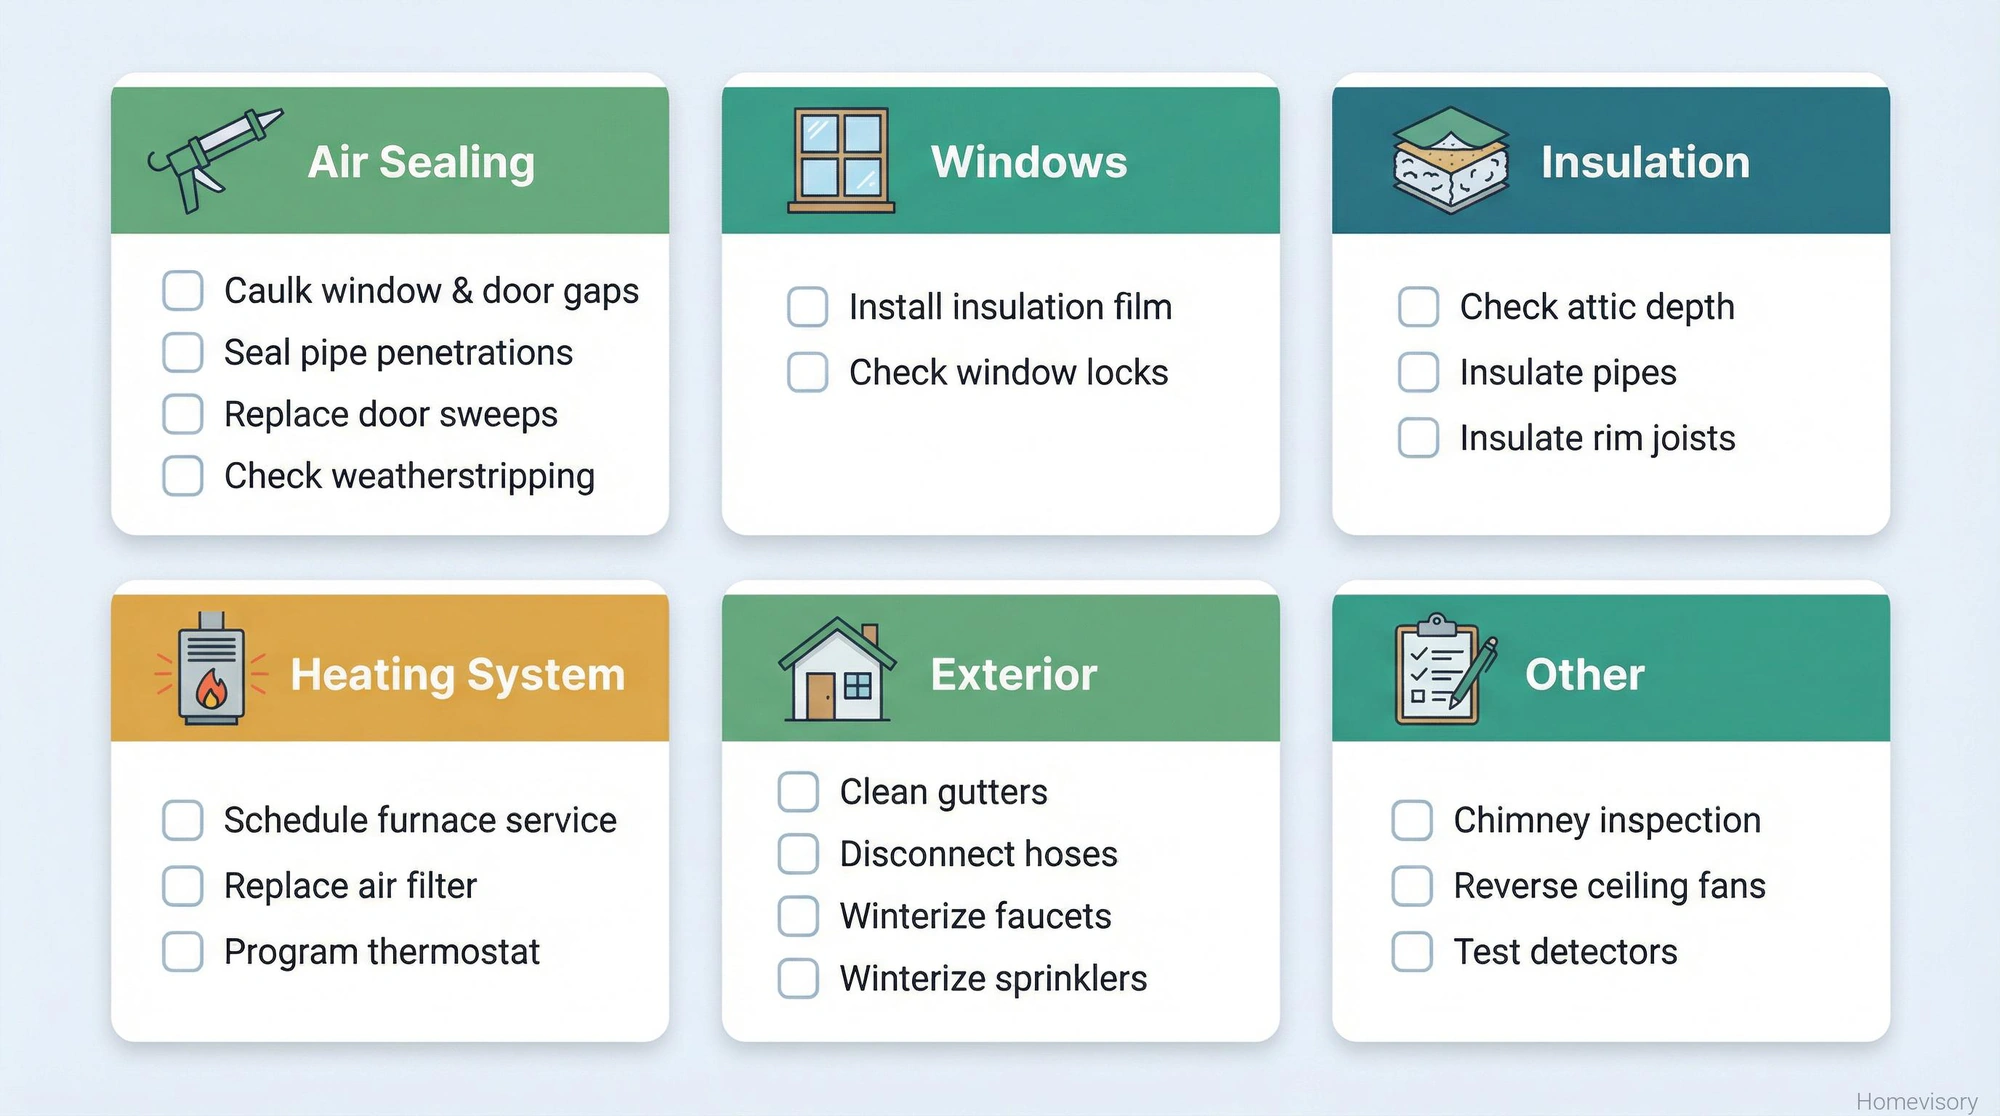
The Checklist
Here’s everything in one place:
Air Sealing
- Caulk gaps around windows and doors
- Seal around pipes and wires on exterior walls
- Foam larger gaps
- Install or replace door sweeps
- Check and replace weatherstripping
Windows
- Install window insulation film on old windows
- Check window locks (locked windows seal tighter)
Insulation
- Check attic insulation depth
- Insulate exposed pipes
- Insulate rim joists in basement
Heating System
- Schedule furnace service
- Replace air filter
- Program thermostat for energy savings
Exterior
- Clean gutters
- Disconnect hoses
- Winterize outdoor faucets
- Winterize sprinkler system
Other
- Chimney inspection if you have a fireplace
- Reverse ceiling fans to clockwise (pushes warm air down)
- Winterize your garden beds before the first hard freeze
- Check smoke and CO detector batteries
I call my parents every Sunday after church. Curtis is in his late seventies now and Shirley isn’t far behind, and every fall I ask them if they’ve done their winterizing. My dad usually says something like “I’ve been doing this longer than you’ve been alive” which is fair. But I still ask.
This covers fall and winter prep, but maintenance is a year-round system. Our complete home maintenance checklist breaks down what to do every season so nothing sneaks up on you.
Take care of your house before winter takes care of it for you. For the full picture of everything you need to winterize — windows, pipes, sprinklers, gardens — our complete winterization guide puts it all in one place.
Managing all these seasonal tasks is exactly why we built Homevisory. Our Homevisory home task manager keeps track of what needs doing and when, sends you reminders before things become problems, and stores everything in one place. Sign up free and stop trying to remember all this stuff yourself. That’s what we do here at Homevisory.