

The Tool Everyone Uses Wrong
I’ve watched people use stud finders like they’re playing some kind of slot machine. They press the button, slide it across the wall, it beeps, they drill. Then the anchor pulls right out and their TV is on the floor.
Thats not how this works.
A stud finder is one of the simplest tools you can own and somehow most people manage to screw it up. Not because the tool is complicated but because they skip the basics or they trust the beep without verifying anything. I’m going to walk you through how to use a stud finder the right way and also how to find a stud without a stud finder because honestly the old methods still work better than most people realize.
How Does a Stud Finder Work
Most stud finders, the kind you pick up at Home Depot for twenty or thirty bucks, use something called capacitance. They’re measuring changes in the electrical field behind your wall. The drywall is one density, and the wood stud behind it is a different density, and the tool detects that change. When it senses something denser than the empty space between studs it lights up or beeps or both.
Heres the thing though. It’s not magic and its not x-ray vision. The tool is guessing based on density changes. That means it can get fooled. Metal pipes will set it off. Electrical conduit. Old metal lath if you have plaster walls. I’ve seen them go off on thick spots of joint compound where someone patched the drywall. So when your stud finder beeps you havent found a stud for sure. You’ve found something denser than air behind your wall. Could be a stud. Could be plumbing. Could be a metal corner bead. You verify before you drill.
There are fancier models with multiple modes. AC wire detection. Deep scan. Different material settings. Im not getting into all that here — if you want to learn about another essential testing tool, our multimeter guide covers that. Read your manual. The basic principle is the same across all of them.
How to Use a Stud Finder (The Right Way)
Everyone does this part wrong and thats why they end up with holes in their wall that hit nothing.
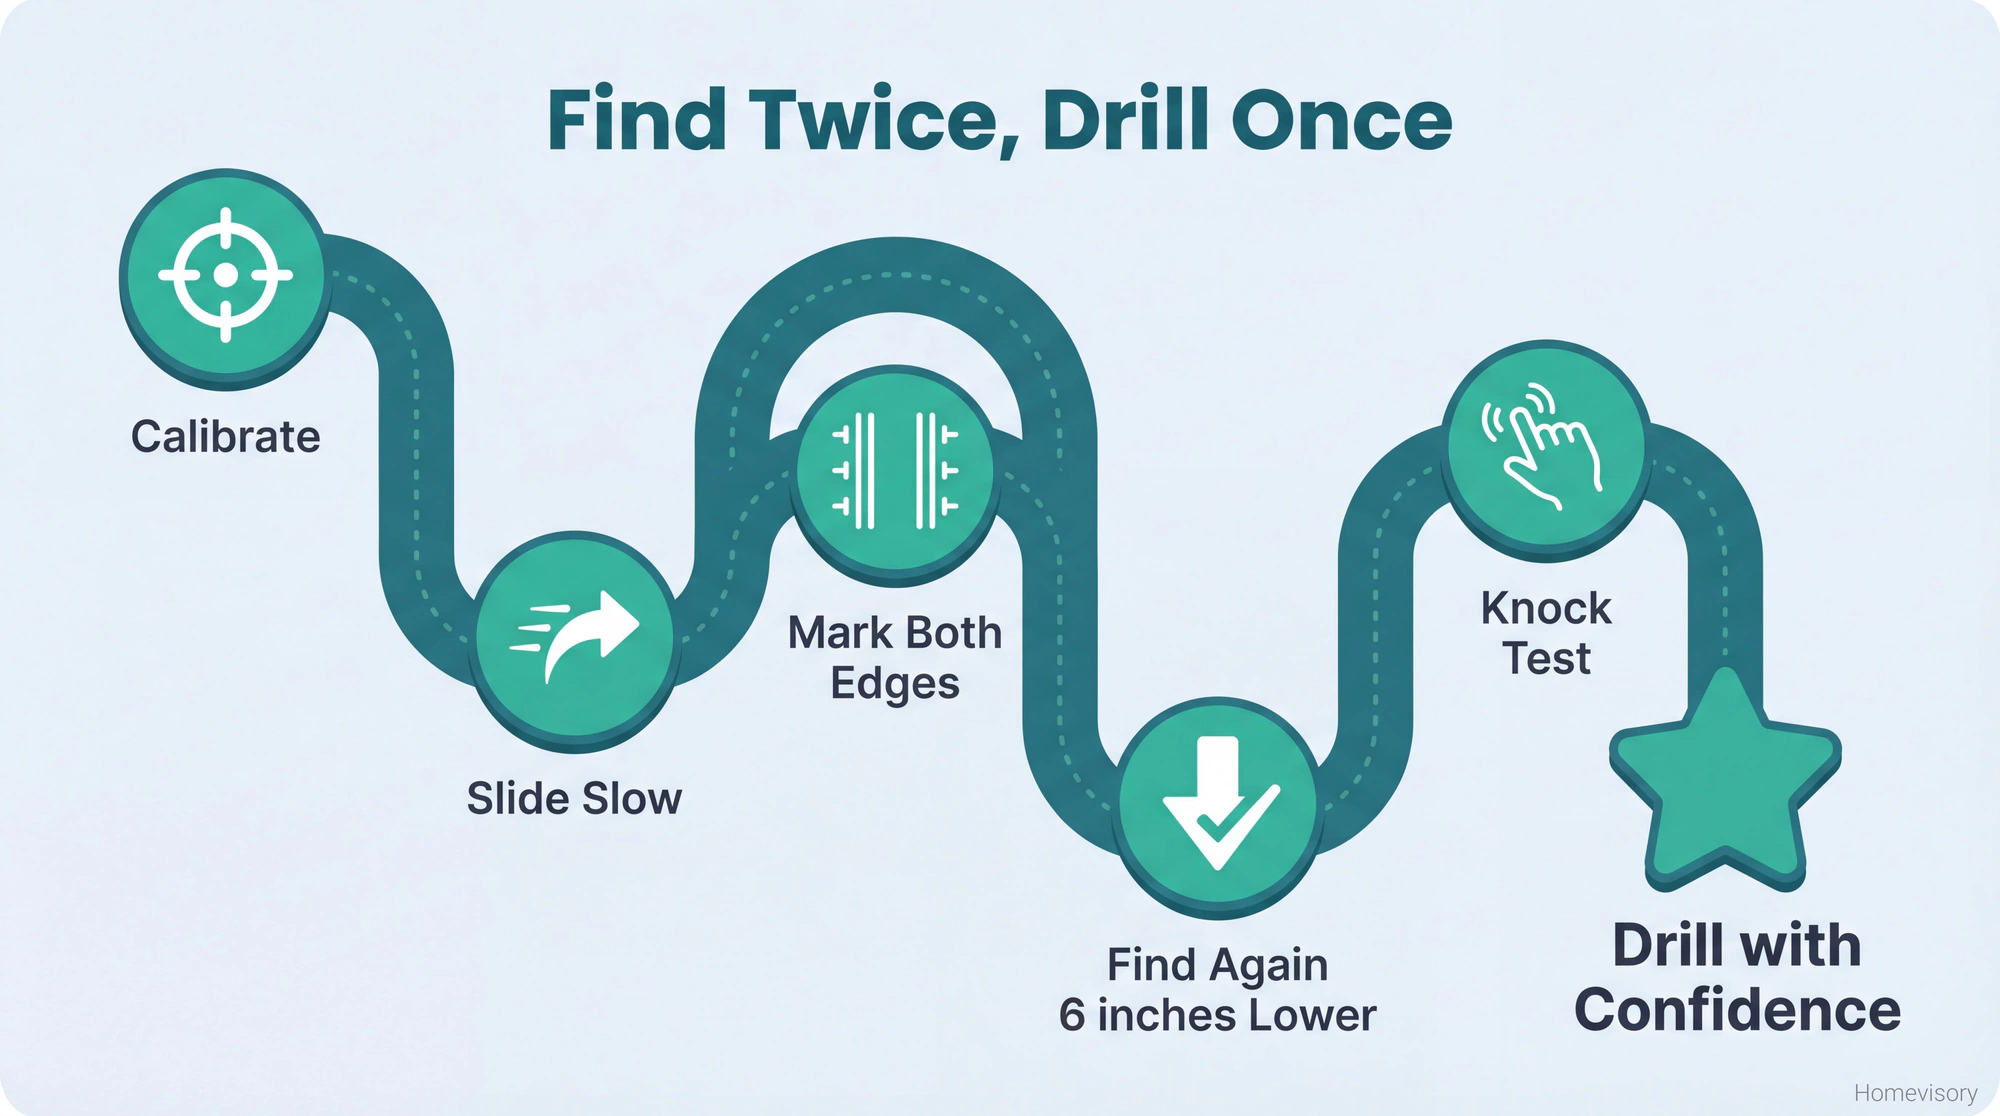
Step One: Calibrate
Every electronic stud finder needs to be calibrated before each use. You place it flat against the wall in a spot where you’re pretty sure there’s no stud, you hold down the button, you wait for it to zero out. Some models beep. Some just have a light that changes. Read yours.
If you dont calibrate, the tool doesn’t know what “empty wall” looks like. Its comparing density changes so it needs a baseline. This is where most people fail. They just turn it on and start sliding.
Step Two: Slide Slow
Move it slow. Slower than you think. If you zip across the wall the sensor doesn’t have time to register the density change. You’ll blow right past studs and never know they were there.
I go about the speed of a crawling baby. Thats my reference. If you’re moving faster than a baby crawls, slow down.
Step Three: Mark Both Edges
This is the part that separates people who hit studs from people who punch holes in drywall.
A standard stud is 1.5 inches wide. Your stud finder is going to detect when you enter the stud and when you exit it. Mark both edges. The center is halfway between your two marks. That’s where you want to drill.
I use a small piece of painters tape. Slide from left to right, mark when it lights up. Slide from right to left, mark when it lights up again. The stud is between those marks. The dead center is your target.
Step Four: Verify
This is where Mr. Davis comes in, my old woodshop teacher from Atlanta. He used to say measure twice cut once. I adapted that to find twice drill once. Maybe that sounds paranoid but I’ve pulled too many drywall anchors out of crumbled gypsum to trust a single reading.
Move six inches down the wall. Find the stud again. Is it in the same vertical line? It should be. Studs run floor to ceiling. If your finder is lighting up in two different places, one of them isnt a stud.
Also, knock on it. Ill get to that in a minute.
How to Find a Stud Without a Stud Finder
Look. Electronic stud finders are convenient. I own three of them. But the old methods work and sometimes they work better, especially in older houses with plaster walls or inconsistent framing.
The Knock Test
This is my go-to and honestly its the method I trust most even when I have a stud finder in my hand.
Knock on the wall with your knuckle. Where there’s no stud behind the drywall, it sounds hollow. Kind of a low thunk. Where there’s a stud, it sounds solid. Higher pitch. Denser. Less resonant.
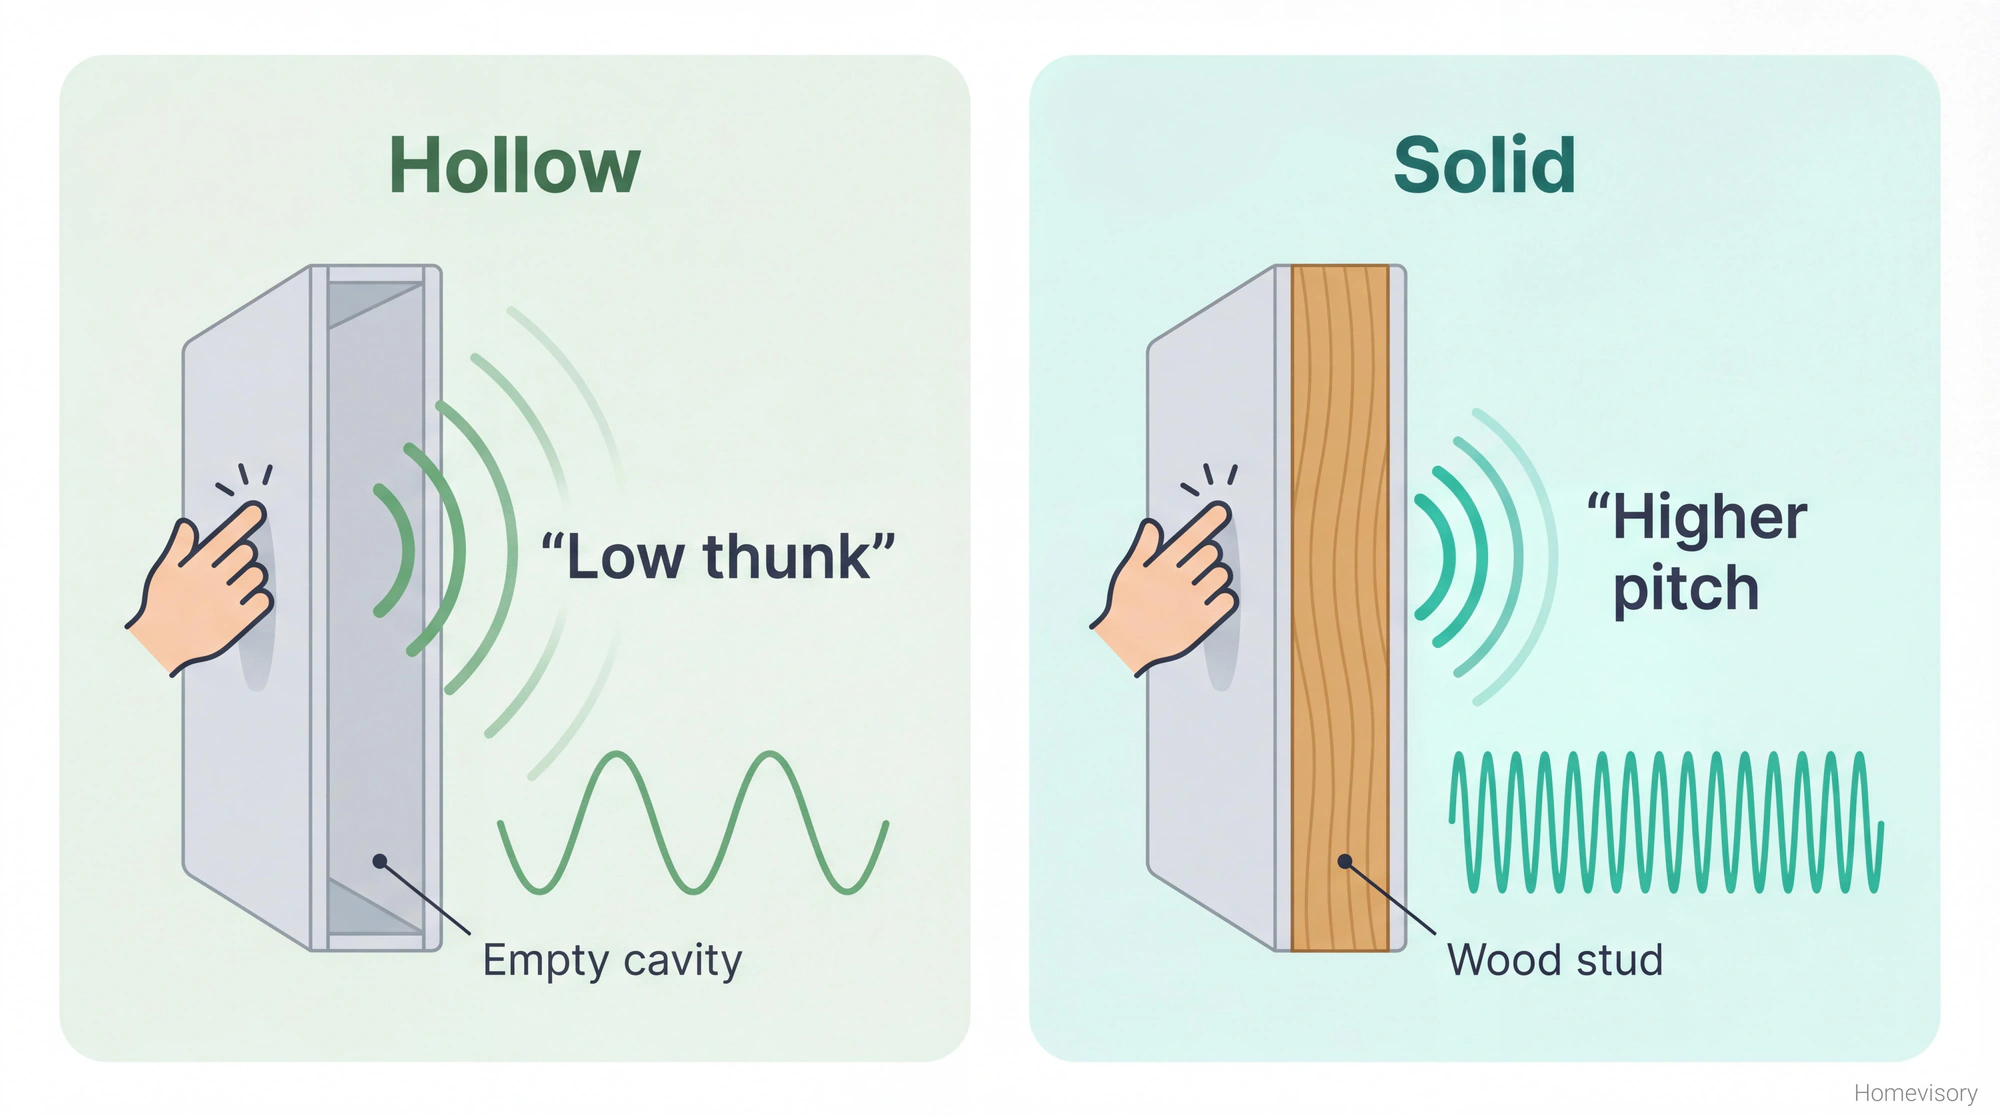
You have to train your ear. Knock across a stretch of wall back and forth until you hear the difference. Once you hear it you wont unhear it. Hollow. Solid. Hollow. Solid. The solid spots are your studs.
My dad Curtis used to be able to find studs by looking at the ceiling. Hed say thats where the drywall crew got lazy, you could see slight imperfections where they screwed into the top plate. I never developed that skill honestly. Different generation. He worked in a plastics factory most of his life but he could build anything and his observation skills were different than mine. He noticed things. Anyway.
The knock test isnt precise enough to give you a dead center but it tells you where to look. Combine it with the outlet method and you’re set.
The Outlet Method
This one is almost foolproof.
Electrical outlets and light switches are mounted to studs. By code. So find an outlet or switch on the wall you care about, pop off the cover plate, and look which side of the box is screwed into wood. That tells you which side the stud is on.
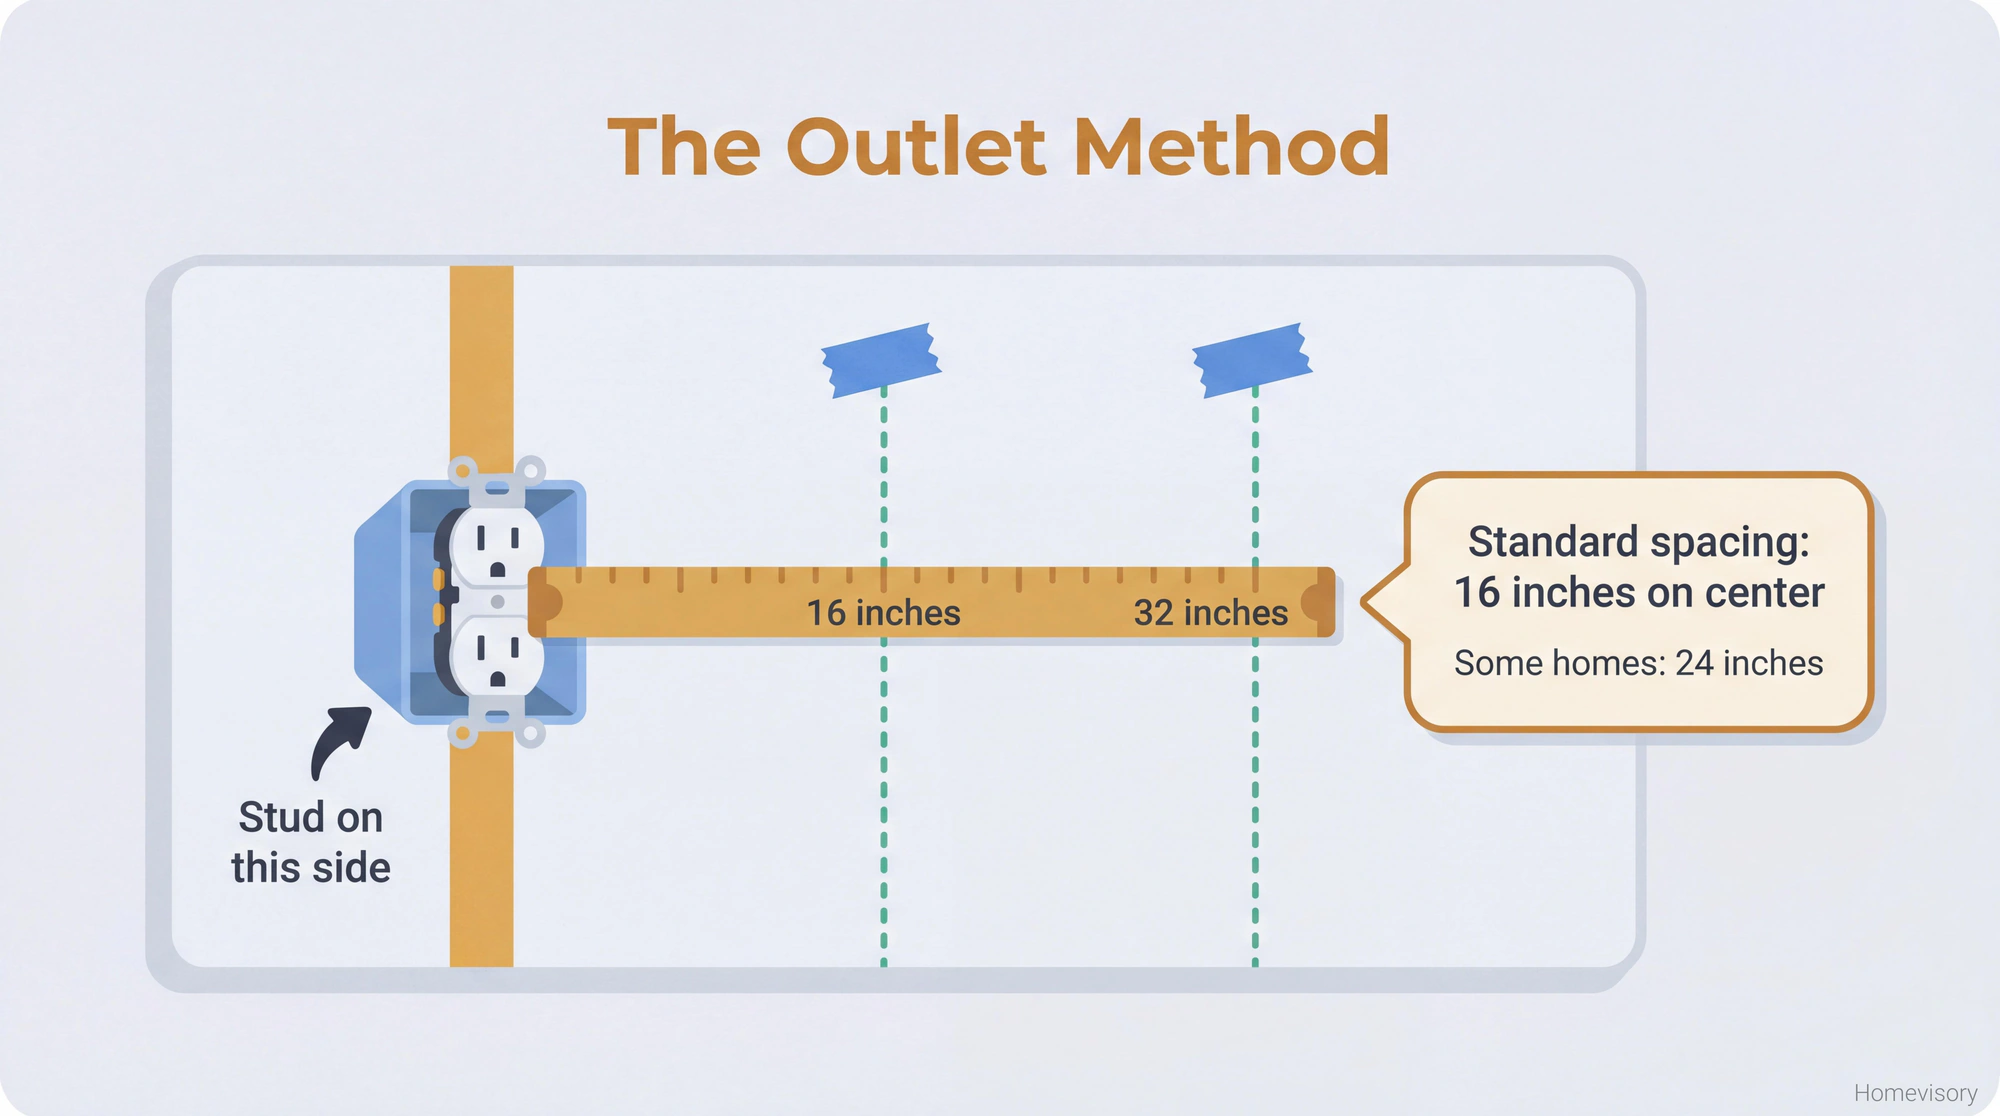
From there you measure. Standard stud spacing is 16 inches on center. Some houses are 24 inches. Older houses are chaos. But if you know where one stud is, you can measure 16 inches and find the next one, then verify with a knock or your stud finder.
I helped Richard hang his first shelf when he was maybe fourteen. We found the stud using the outlet method, measured 16 inches, knocked, and he drilled his first hole right into solid wood. Clean hit. His face when the screw grabbed and stopped. Like he’d done something important. Because he had.
The Magnet Method
Works surprisingly well. You’re not finding the stud directly. You’re finding the drywall screws or nails that hold the drywall to the stud. Where theres a fastener, theres a stud directly behind it.
Get a strong magnet. Not a refrigerator magnet. A real neodymium magnet. Slide it along the wall slowly. When it sticks or drags, you’ve found a screw head. String of screw heads going vertically? Thats your stud line.
I keep a magnet on a string in my tool bag specifically for this. Looks ridiculous. Works great.
Look for Clues
Baseboards are nailed into the bottom plate and often into studs. Look for nail holes in your baseboard. Thats where the framing is.
Crown molding same thing.
If you’re hanging something heavy, take an extra five minutes and find clues before you drill. The evidence is usually there if you look.
Why You Miss Studs (And What to Do About It)
Three reasons people miss.
One, they dont calibrate. Already covered this.
Two, they’re going too fast. Already covered.
Three, they dont verify. They get one reading and they drill. The stud finder beeps at something and they assume its wood and they drive a screw and it goes into nothing.
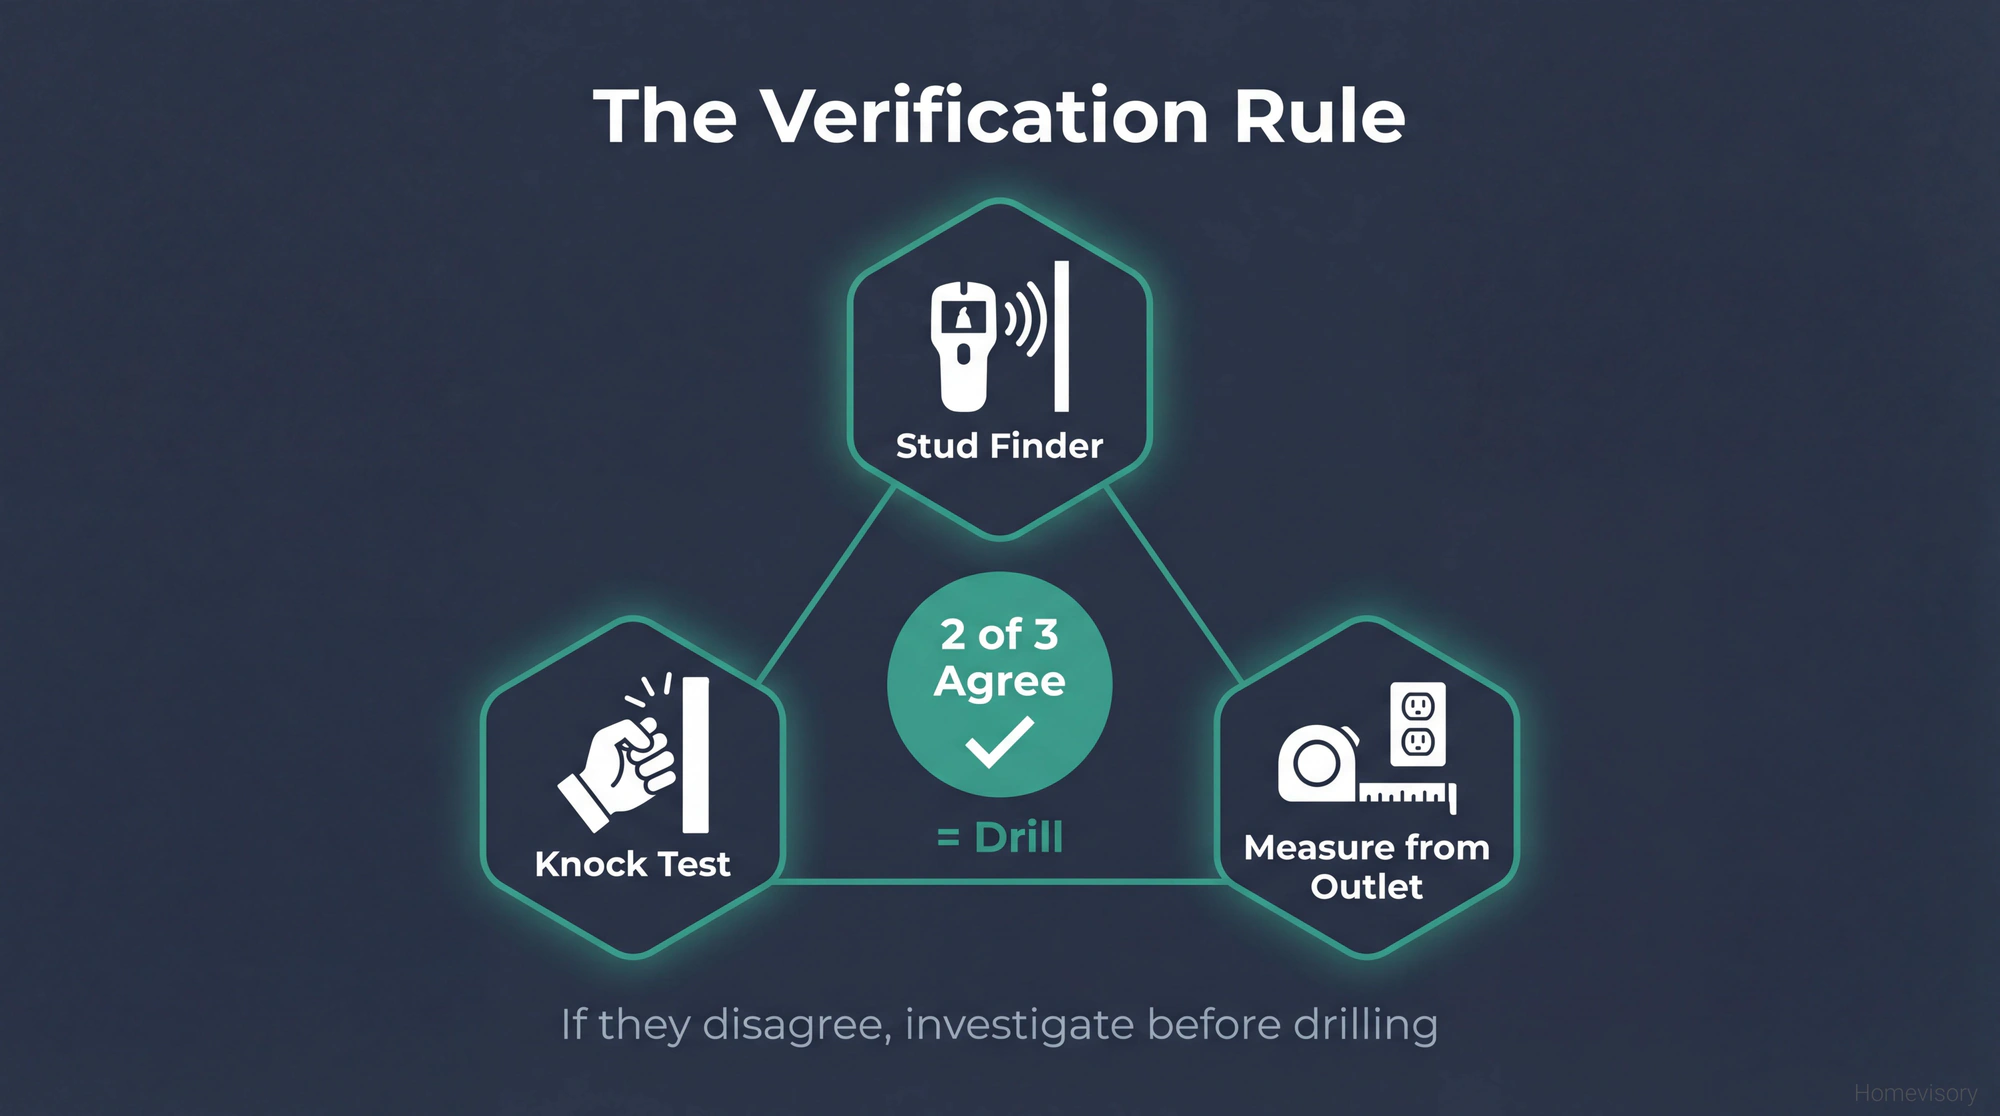
You verify by marking both edges. You verify by finding it again six inches lower. You verify by knocking. If two out of three methods agree, drill. If they dont agree, figure out why before you put holes in your wall.
The worst is when you’re hanging something heavy. A TV. A full-length mirror. Floating shelves. You need that stud. Not hollow wall, not a toggle bolt backup plan, an actual stud. Ive seen people try to hang 70-inch TVs on drywall anchors because they got impatient and couldnt find the stud. That TV is coming down eventually. Physics always wins.
I was demoing a bathroom vanity once, about ten years ago, trying to save time by not removing the mirror first. The mirror was glued to the wall with that construction adhesive that never lets go. I was prying and the whole thing came off the wall and slid and shattered. Eleven stitches in my palm. The nurse in urgent care asked what happened and I said I got in a fight with a mirror. She asked if I won.
Does it look like I won.
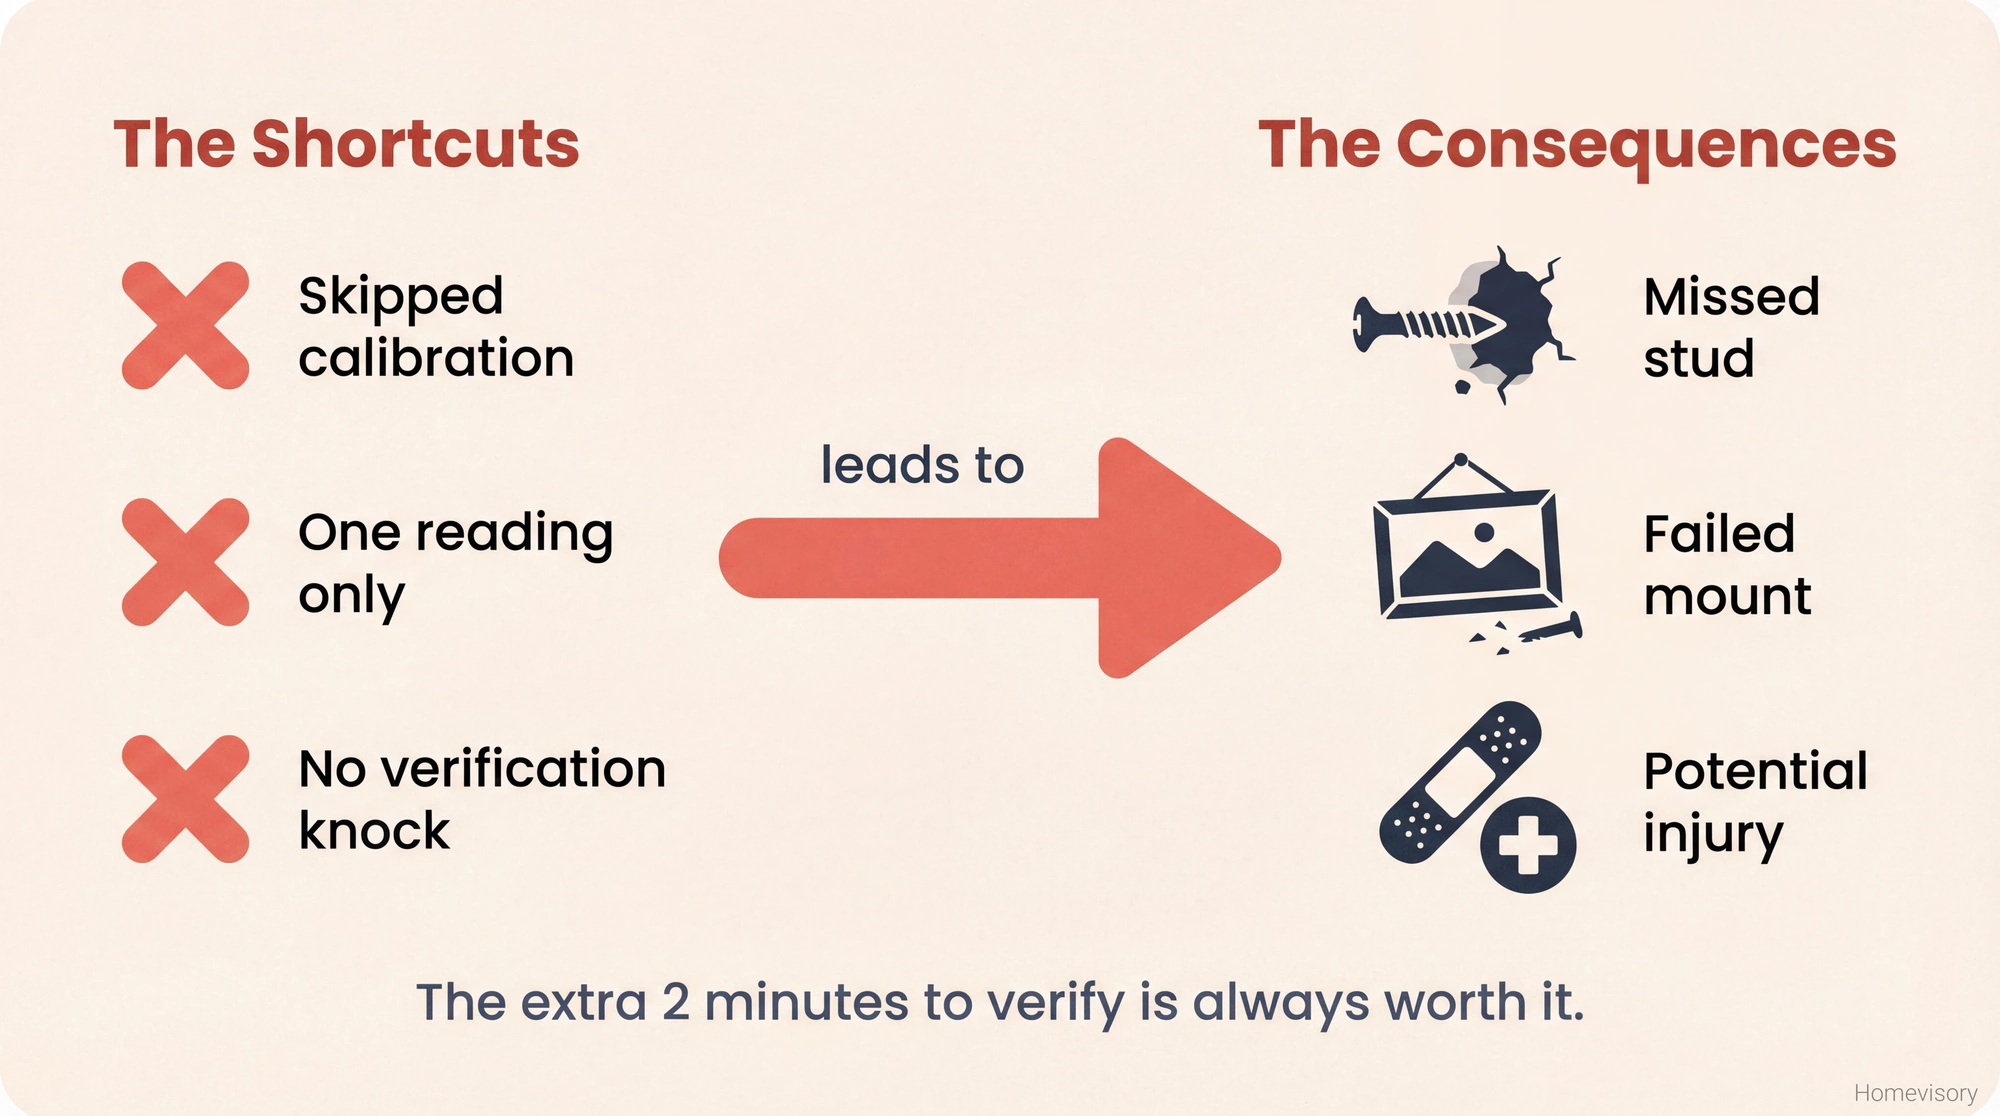
The point is, taking shortcuts on mounting stuff, on finding studs properly, it catches up to you. The extra two minutes to verify is worth it. I promise.
Types of Stud Finders
Edge finders, center finders, multi-scanners with radar and LED displays. They all do the same thing basically. Detect density changes. Moving on.
If you’re buying one, the $25 ones at Home Depot work fine for typical homeowner use. Zircon makes good ones. Franklin Prosensor is popular if you want something fancier. The really expensive ones with deep scan modes are for professional contractors who are working in commercial buildings with thick walls. You dont need that for hanging shelves.
When to Skip the Stud Entirely
Sometimes you dont need a stud. Small picture frame under 15 pounds. A single hook. Light stuff. A drywall anchor is fine for that.
But anything heavy. Anything that pulls away from the wall. Shelves that will hold books. TVs. Mirrors. Grab bars. Find the stud. Use the stud. Dont trust your walls structural integrity to a plastic anchor.
If the stud isnt where you need it, use a toggle bolt. The big metal ones. Not the plastic garbage. Those can hold 50+ pounds in drywall if installed correctly. Still not as good as a stud but much better than a standard anchor.
What Homevisory Does For You
You shouldn’t have to remember all this stuff. When it’s time to hang something heavy, when you’re doing a project that needs proper mounting, you should know exactly what you’re working with.
That’s what we do here at Homevisory. We built a Homevisory home task manager that keeps track of your maintenance schedule, your home projects, the stuff you need to deal with before it becomes a problem. Knowing where your studs are matters because at some point youre going to hang something that weighs more than ten pounds. Our home maintenance checklist covers the full schedule of seasonal tasks to stay ahead of. Having a system that reminds you to check things, track your projects, and stay ahead of maintenance, thats the point.
You can sign up for free. We’re not selling you a stud finder. We’re helping you take care of your home.