
The Tool That Scares People for No Reason
A caulk gun looks more intimidating than it is. It’s basically a trigger attached to a plunger. You squeeze, caulk comes out. Thats the whole thing.
But I’ve watched people turn a simple caulk job into a disaster because nobody ever showed them how to use a caulk gun properly. They squeeze too hard, go too fast, don’t release the pressure, and end up with caulk everywhere except where it needs to be. Then they blame the tool.
Its not the tool.
Learning how to use a caulk gun takes maybe ten minutes if someone explains it right. I’m going to explain it right.
What You’re Working With
A caulk gun has five parts that matter:
The frame holds the tube. The plunger pushes the caulk. The trigger controls how much pressure you apply. The release mechanism stops the flow when you let go. And theres usually a little cutter built into the handle for opening tubes.

Thats it. Not complicated.
The tube goes in the frame with the nozzle pointing forward. The plunger presses against the back of the tube. When you squeeze the trigger, the plunger advances and pushes caulk out. When you release the trigger, on a good gun anyway, a spring or lever releases the pressure so caulk stops oozing.
I should mention the release mechanism because this is where people mess up. On most caulk guns theres a lever or button near the back that you press to disengage the plunger. If you dont release the pressure between beads, caulk keeps oozing out even when youre not squeezing. You’ll have caulk dripping everywhere. I’ve seen it happen. I’ve cleaned it up.
Buying the Right Gun
You can spend anywhere from three dollars to fifty dollars on a caulk gun. The three dollar ones from dollar stores are garbage. They skip, they jam, the release mechanism barely works, and you’ll fight with it the whole time.
The best caulk gun for most people costs between twelve and twenty dollars. Look for:
- Smooth rod (not serrated, less skipping)
- A release mechanism that actually releases
- Comfortable grip because your hand will get tired
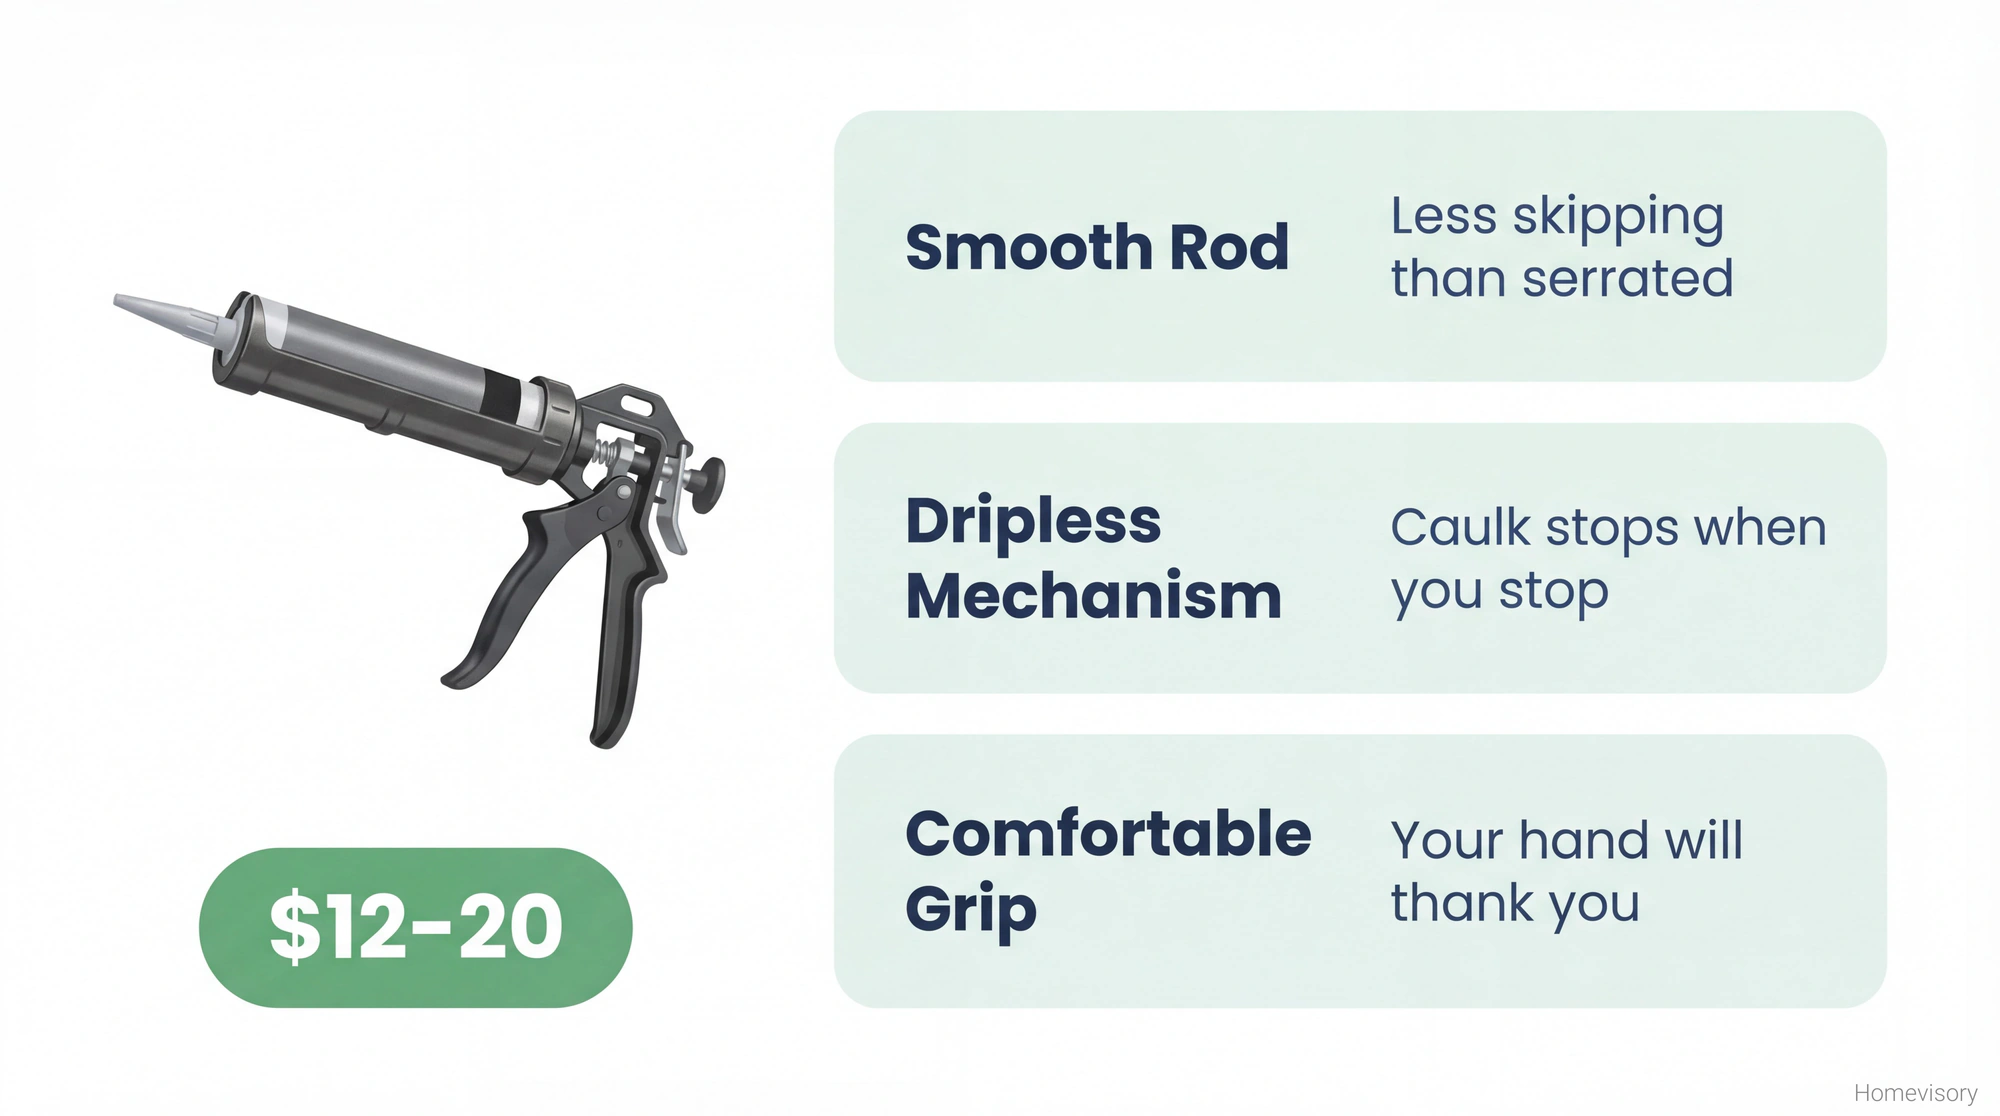
I use a dripless caulk gun from the hardware store. Cost me maybe fifteen dollars six years ago. Still works fine. The dripless feature means when I stop squeezing, the caulk actually stops. Revolutionary concept apparently.
If you’re doing a lot of caulking, commercial work or rental properties or whatever, spend the fifty on a professional-grade gun with better leverage. Otherwise the fifteen dollar option is fine.
I’m not getting into caulk chemistry here. Silicone versus latex versus polyurethane versus whatever else, thats a whole other article. If you’re specifically caulking a shower or tub, our shower caulking guide covers what product to use and the technique for wet areas. Otherwise just read the tube. Kitchen and bath? Get kitchen and bath caulk. Exterior? Get exterior caulk. The tube tells you what its for.
Loading the Gun
Cut the tip of the caulk tube at a 45-degree angle.
This matters more than people think. If you cut straight across, youll get a flat bead that doesn’t sit right in corners. The angle lets you push caulk into the gap at the right trajectory. Cut too much off and you get a huge bead you cant control. Cut too little and nothing comes out and you keep squeezing harder which makes everything worse.
Start small. You can always cut more off.
Most caulk tubes have a foil seal inside the tip. Poke through it with a long nail or the poker tool on your caulk gun if it has one. If you skip this step you’ll squeeze and squeeze and wonder why nothing’s happening.
Pull the plunger all the way back. Set the tube in the frame, nozzle forward. Let the plunger touch the back of the tube. Squeeze the trigger a few times until you feel resistance, until the plunger is actually pressing against the tube.
Done.
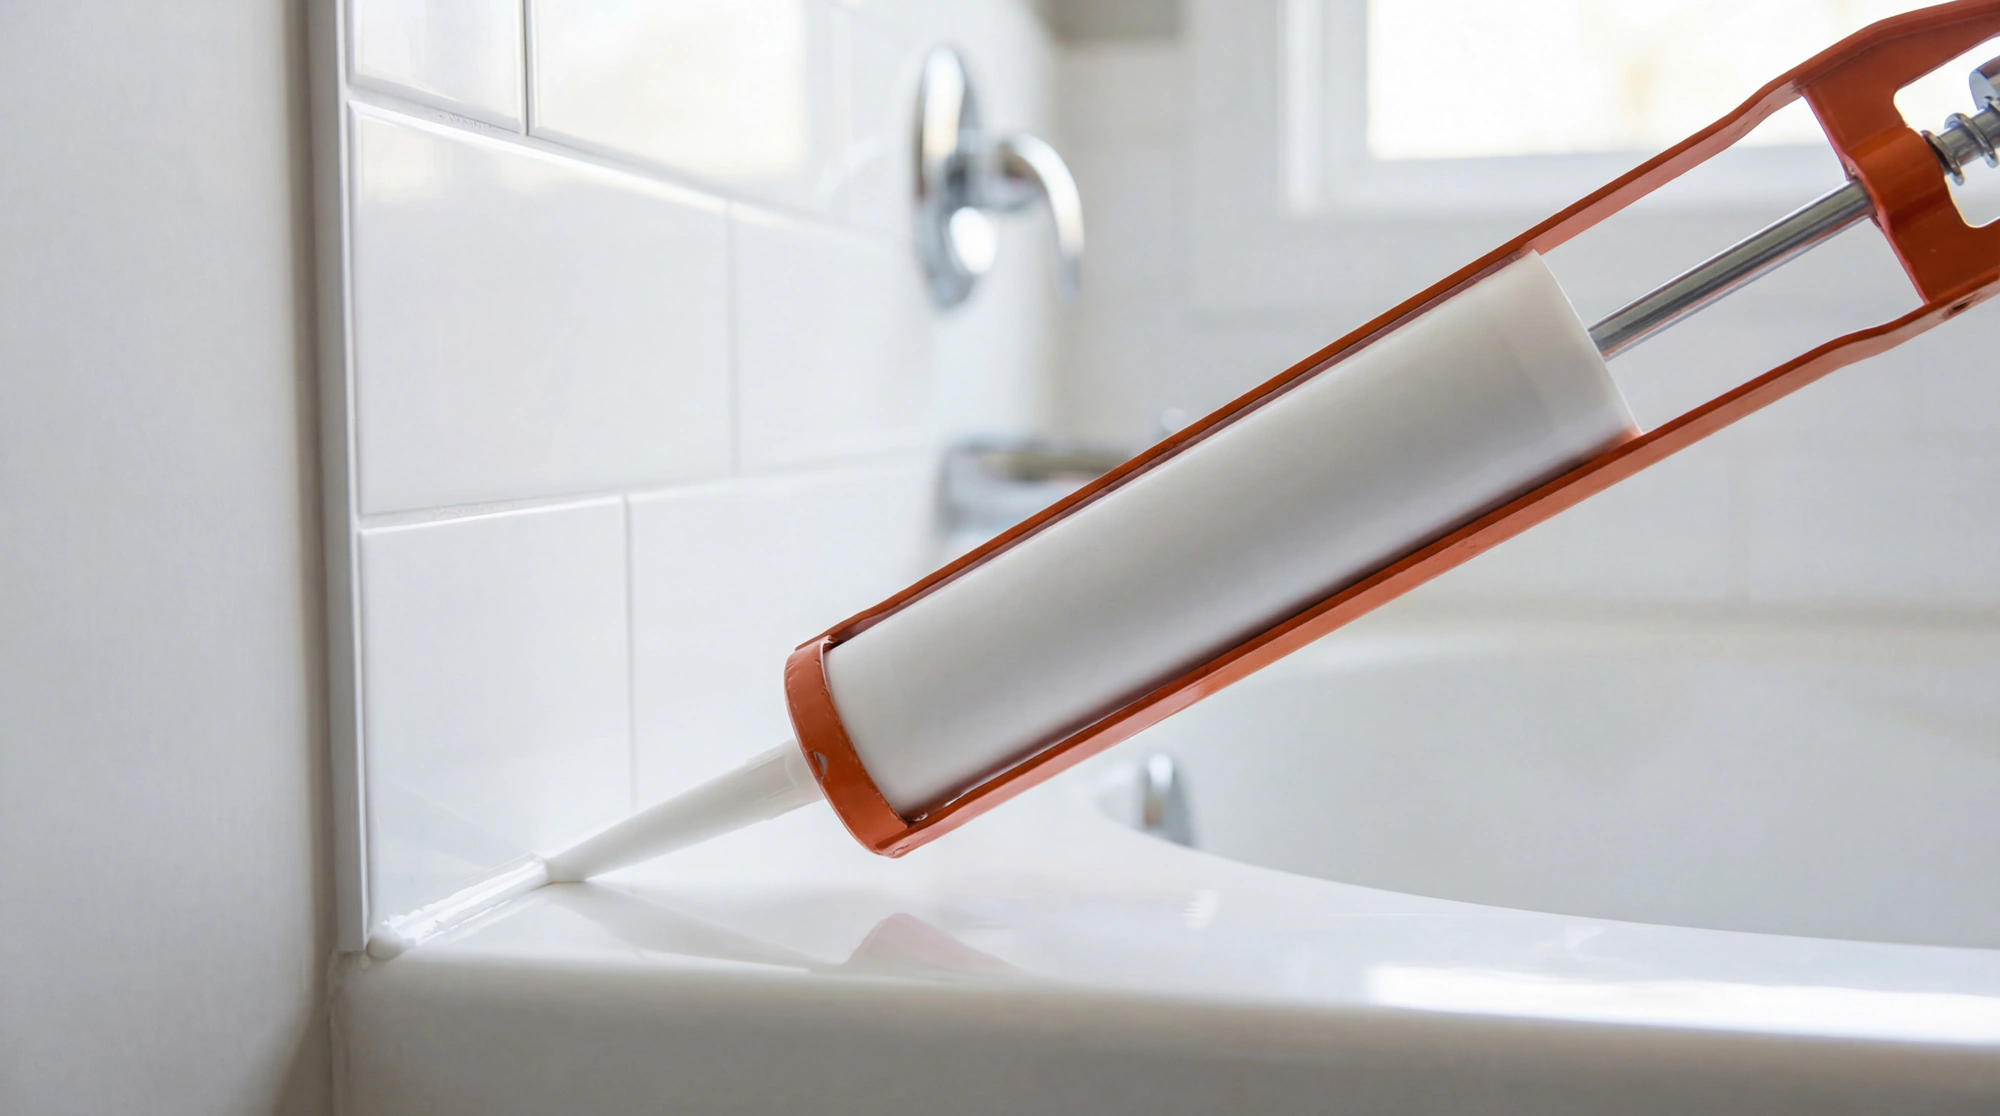
The Technique That Actually Matters
Here’s where people butcher it and I’ve watched this happen so many times I probably care too much about it but I’ve seen homeowners and even some guys who should know better just grab the gun and squeeze as hard as they can and drag it along like theyre in a race and the caulk comes out in this uneven mess, thick here, thin there, blobs in the corners, and then they try to smooth it out with their finger and make it worse and the whole thing looks terrible and water gets behind it anyway because it wasn’t actually seated in the joint. The caulk gun isn’t working against you. You’re working against yourself. Slow down. Let the tool do the work.
Mr. Davis, my woodshop teacher back in Atlanta, he used to say something about letting the tool do the work. “You’re not arm-wrestling the wood, you’re guiding it.” He was talking about a table saw but it applies to everything including caulk guns. Youre not fighting the trigger. Youre guiding the bead.
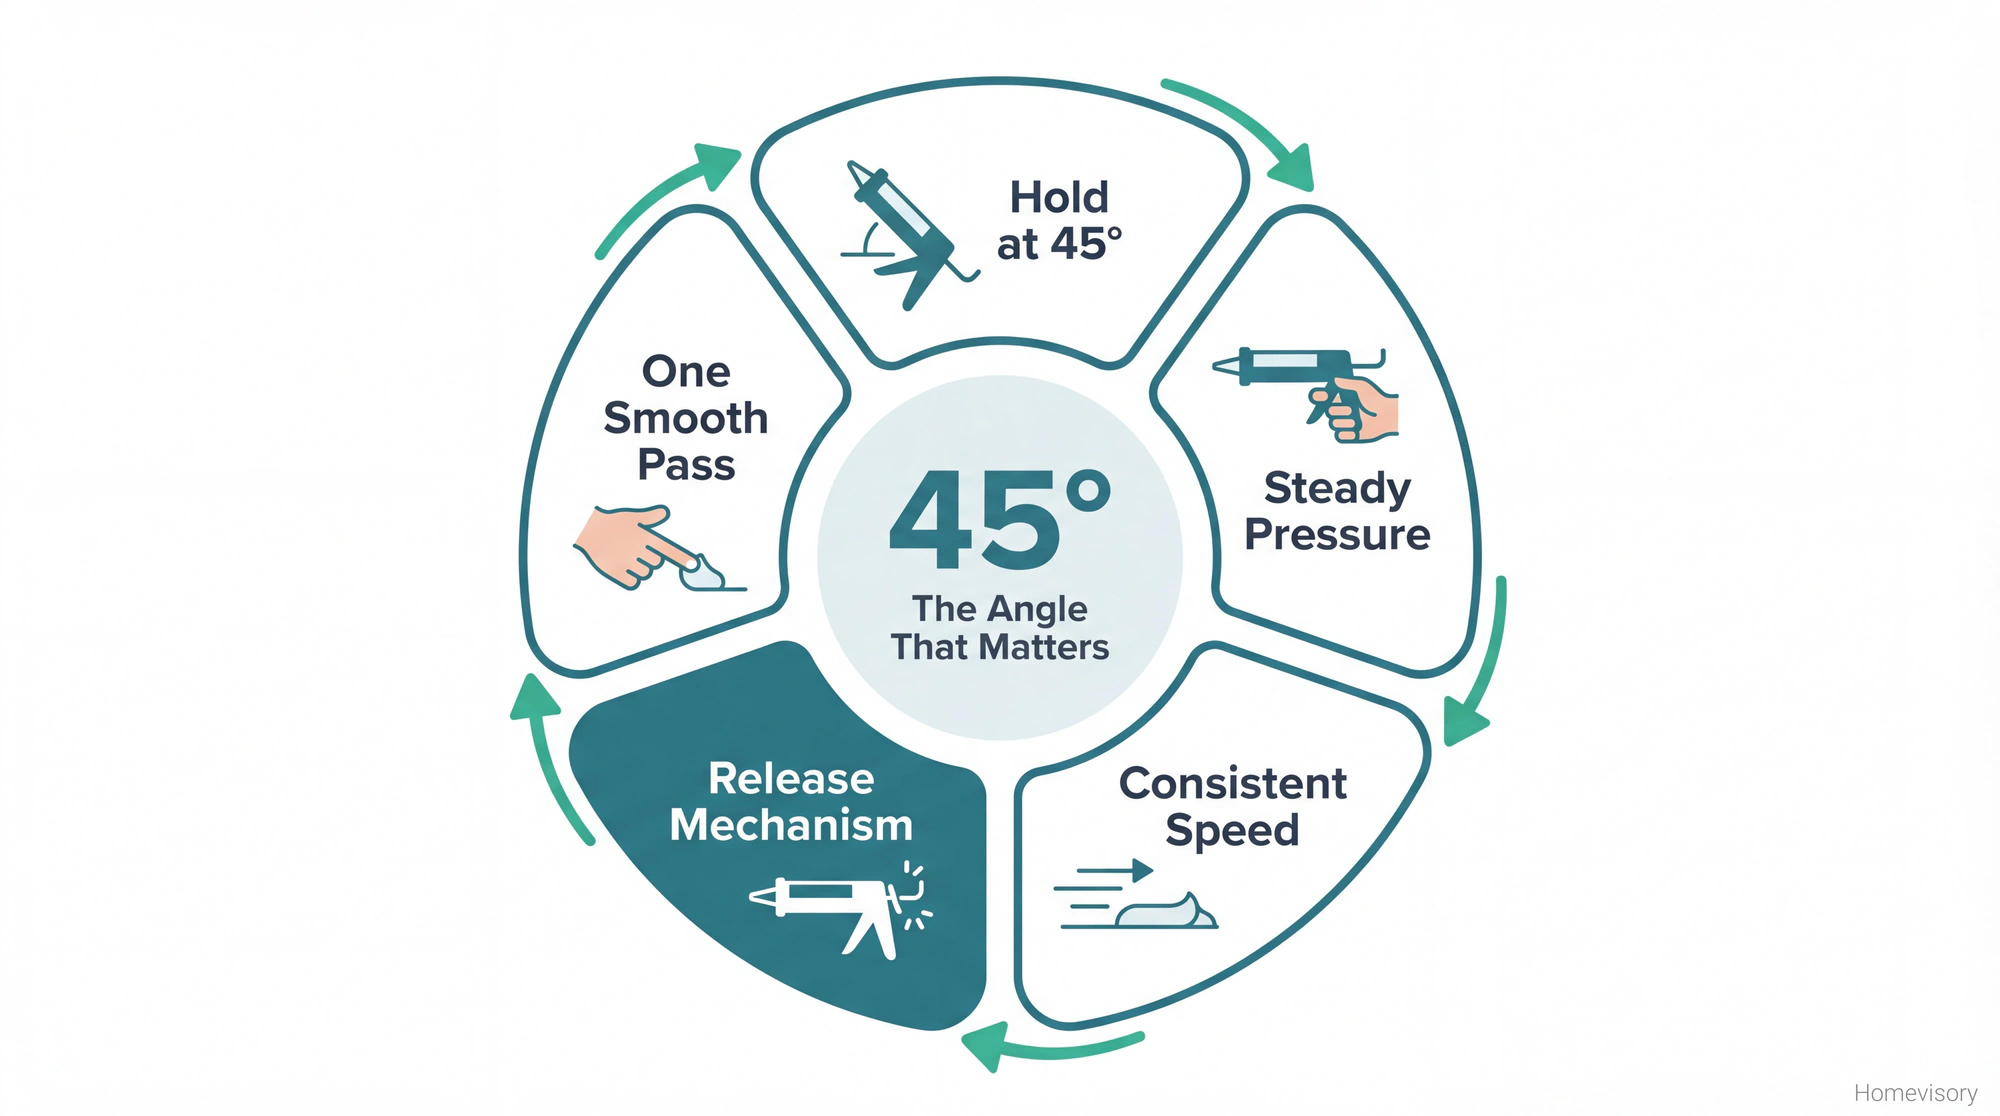
Hold the gun at a 45-degree angle to the surface. This is the same angle you cut the tip, not a coincidence. The angled tip should sit right against the corner or gap you’re filling.
Apply steady, even pressure on the trigger. Not hard. Not a death grip. Just enough to keep caulk flowing. Move the gun along the joint at a consistent speed. If caulk is bunching up, you’re going too slow. If the bead is thin and gappy, you’re going too fast. Find the speed where caulk flows out and fills the joint without piling up.
When you reach the end of your run, hit the release mechanism immediately. This is the step everyone forgets. That lever or button near the back, press it. The plunger disengages and caulk stops oozing. If you dont release, caulk keeps coming and drips onto whatever’s below.
Corners and Gaps
Corners are where caulk jobs fall apart.
When you hit a corner, don’t stop squeezing and then restart. You’ll get a gap or a blob. Instead, keep the pressure steady through the corner, pivoting the gun smoothly.
For inside corners, push the caulk into the corner as you go. The angle of your cut tip helps with this. For outside corners, you might need to do each side separately and let them meet.
Large gaps need backer rod first. If the gap is more than a quarter inch, caulk alone won’t fill it properly. Shove some foam backer rod in there, leave about a quarter inch of depth, then caulk over it. Without backer rod, caulk sinks into the void and cracks.
I watched my dad caulk around the bathtub in our house in Atlanta when I was maybe ten. He had this whole routine, wet finger, smooth pass, wet finger again. The bathroom smelled like silicone for days. I don’t know why I remember that so clearly. Probably the smell. Anyway.
Smoothing the Bead
You have about five minutes to smooth before the caulk skins over. Less if it’s hot.
Wet your finger. Run it along the bead in one smooth motion. Don’t press too hard or you’ll push caulk out of the joint. Don’t go too light or you won’t smooth anything. Just enough pressure to flatten the surface and push caulk into the edges.
One pass. Maybe two if the first one was bad.
Some people use those little caulk finishing tools. They work fine. I don’t bother. My finger has been smoothing caulk for thirty years, it knows what to do.
If you mess up a section badly, scrape it out and redo it. Don’t try to fix bad caulk with more caulk.
The Richard Story
Taught my son Richard how to caulk when he was sixteen. We were redoing the bathroom in our Texas house, the grout around the tub was shot, and I figured it was a good teaching moment.
I showed him how to use the caulk gun. Cut the tip, load the tube, steady pressure, release mechanism, the whole thing. Then I handed it to him and he immediately death-gripped the trigger like he was trying to strangle it.
Caulk everywhere. On the tub, on the tile, on the floor, on his shirt somehow. I asked what he was doing. He said he thought you had to squeeze hard to get it to come out.
No. You don’t. The gun does the work.
We scraped it all off and started over. Second time he got it. But that image of him white-knuckling a caulk gun while caulk spurted in every direction, thats burned into my memory.
Steady pressure. I cant say it enough.
Cleanup
Damp rag. Thats it. Moving on.
Okay, slightly more detail. Wipe up any excess caulk before it dries. Once it skins over you’re scraping instead of wiping. Keep a damp rag in your other hand while you work.
If you get caulk on something you shouldn’t have, wipe immediately. Don’t think “I’ll get that later.” Later it’s cured and now you’re cutting it off.
The nozzle on your tube, wipe it clean when you’re done. Cap it or wrap it in tape if you want to use the rest later. Even then, might be dried out next time. Caulk tubes aren’t meant to sit half-used for months.
When It Goes Wrong
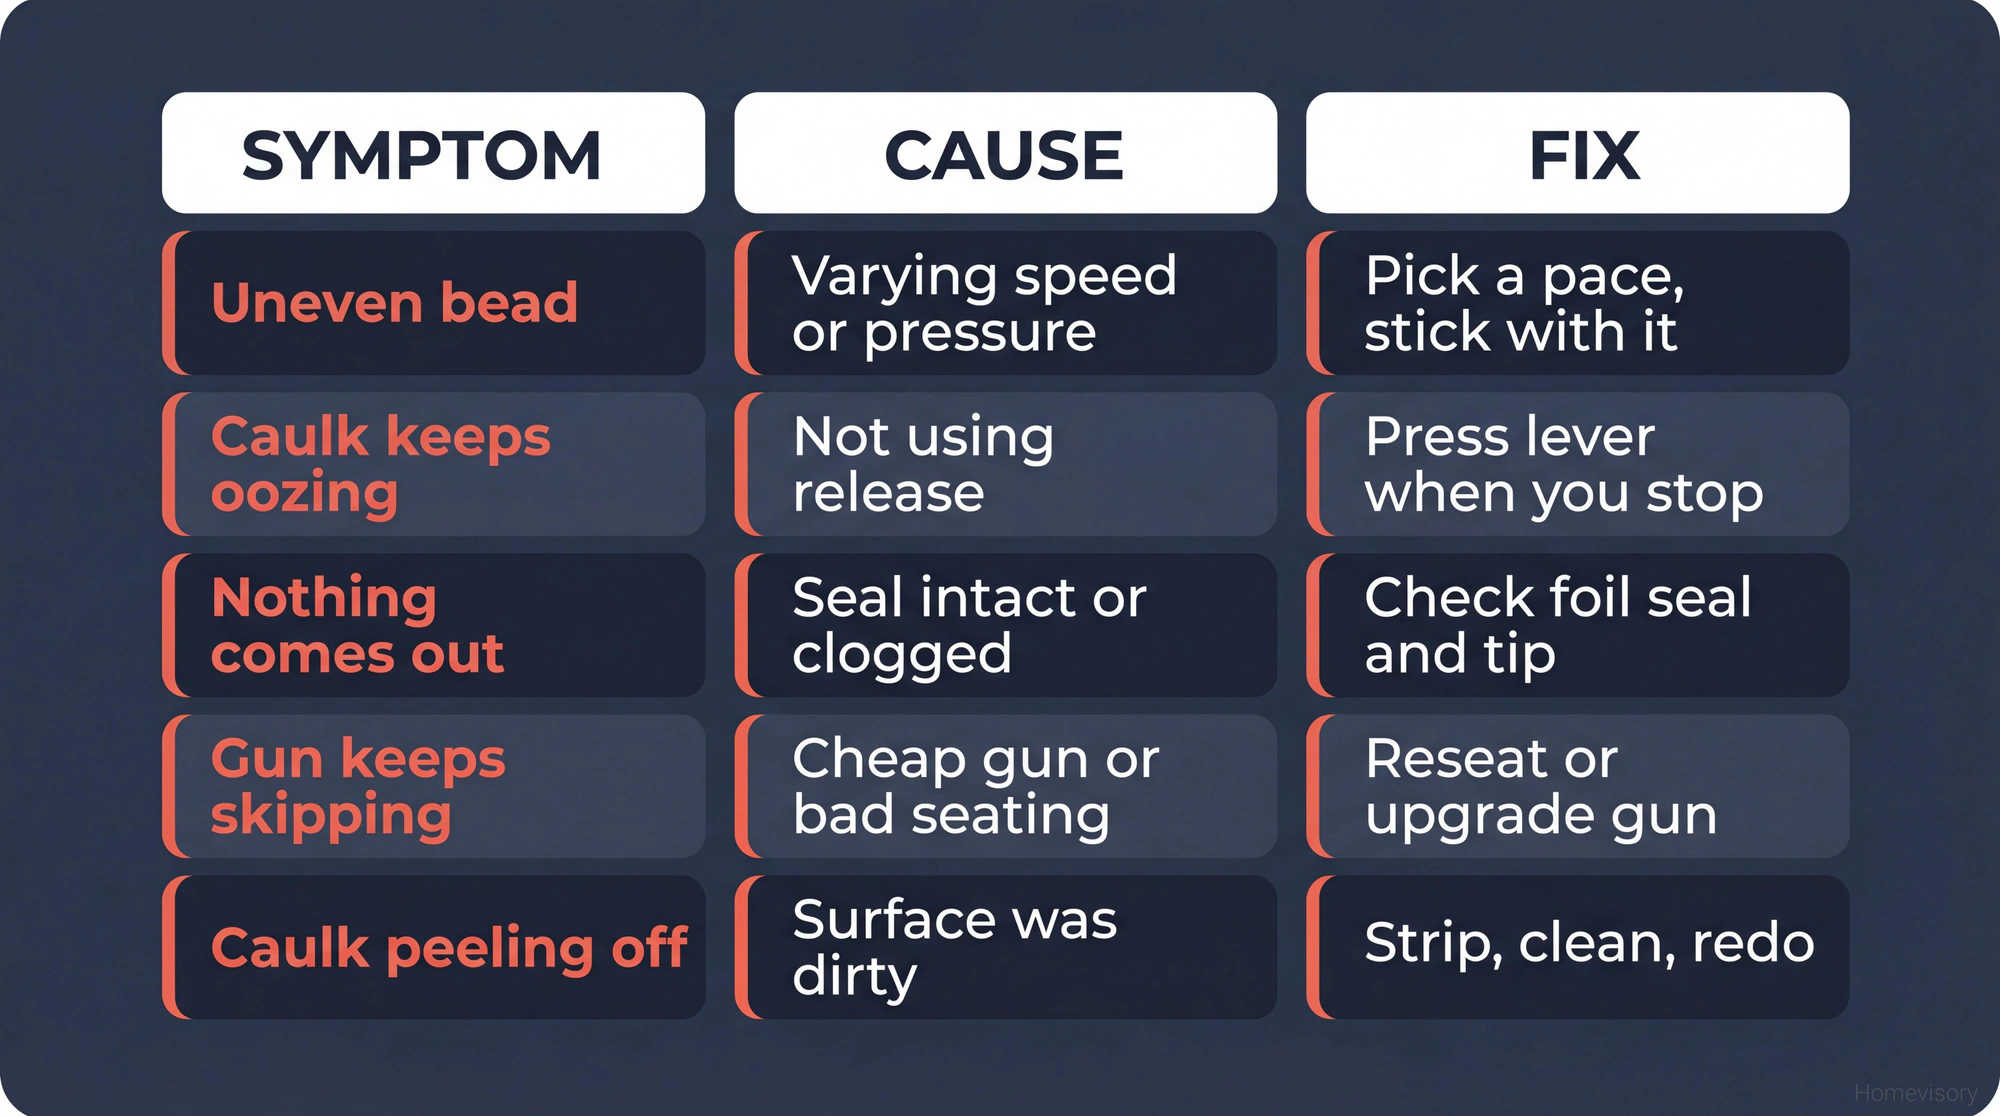
The bead is uneven: You’re varying your speed or pressure. Pick a pace and stick with it.
Caulk keeps oozing after you stop: You’re not hitting the release mechanism. That lever exists for a reason.
The caulk won’t come out: Either the tube is empty, the foil seal is still intact, or the tip is clogged. Check all three.
The gun keeps skipping: Cheap gun with a serrated rod, or the plunger isn’t seated right. Reseat it or buy a better gun.
Caulk is peeling off after a week: Surface wasn’t clean when you applied it. Caulk doesn’t stick to dirt, soap residue, or old caulk remnants. Strip it — our guide on how to remove silicone caulk covers the proper removal technique — clean the surface, try again.
I’ve messed up plenty of caulk jobs. Not recently, but plenty in my early years. The shower tile shortcut disaster in 2011, the whole thing started because my caulk job over old tile didn’t hold and water got behind everything. Six months later I’m ripping out the whole shower. Water finds every mistake you make.
The Simple Version
Heres how to use a caulk gun if you skipped to the end:
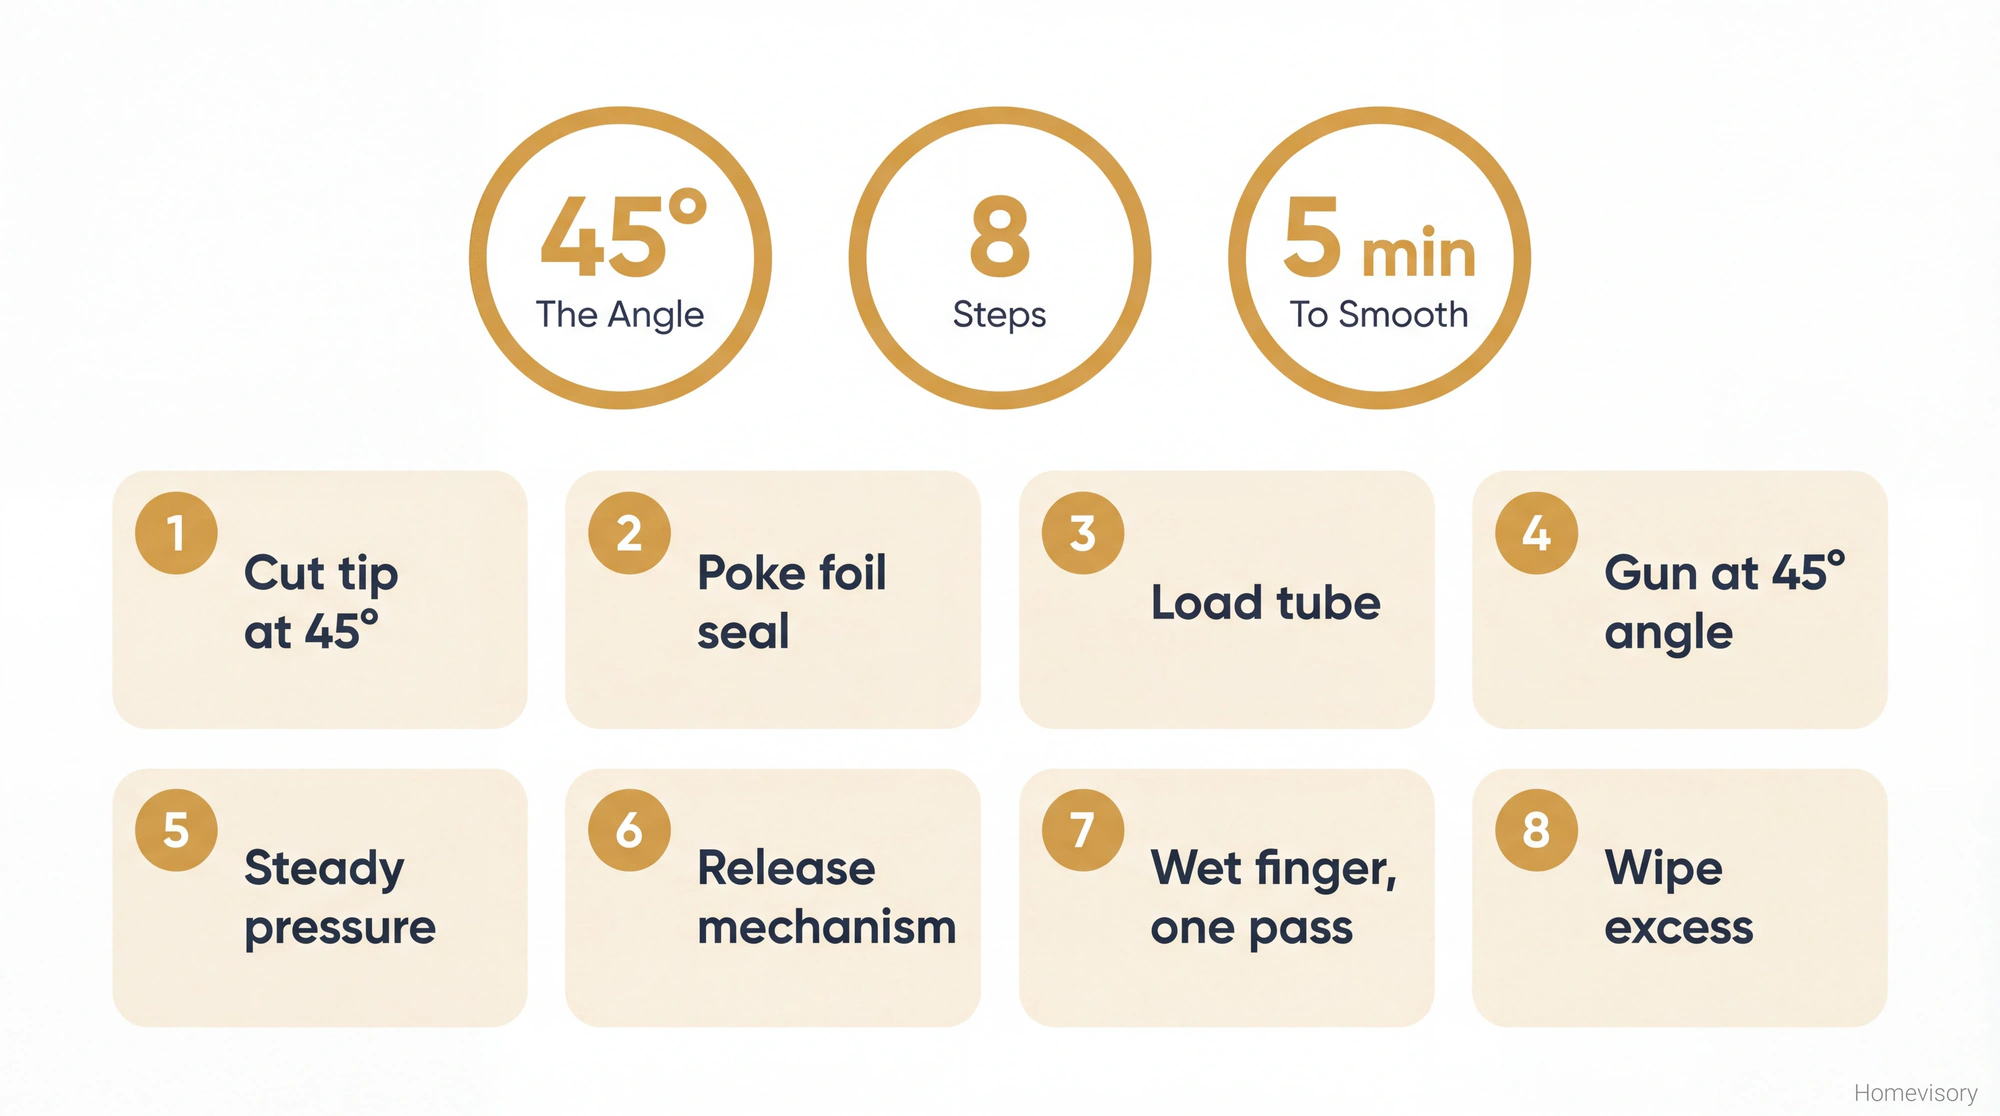
- Cut tip at 45 degrees, start small
- Poke through the foil seal
- Load tube, squeeze until plunger engages
- Hold gun at 45 degrees to the surface
- Steady pressure, steady speed
- Release mechanism when you stop
- Smooth with wet finger, one pass
- Wipe excess with damp rag
That’s the whole thing. Ten minutes to learn, looks professional every time if you stick to it.
The best caulk gun in the world won’t save you if your technique is bad. And a cheap gun will frustrate you even with good technique. Get something decent, take your time, and let the tool do the work.
At Homevisory, we built a Homevisory home task manager that reminds you when maintenance is due, including things like checking the caulk around your tub and windows before small gaps become water damage. Sign up free and stop relying on memory for stuff like this. Thats what we do here at Homevisory.