
The Problem Nobody Sees
You can have the best insulation in your walls and a brand new HVAC system and still watch your energy bill climb because cold air is pouring in around your exterior doors. I see it constantly. People spend thousands on windows and then ignore the quarter-inch gap at the bottom of their front door.
Exterior door weatherstripping types matter more than most homeowners realize. Theres not just one kind. Theres about six kinds, and using the wrong one for your situation means youre either going to have gaps, or youre going to have a door that doesnt close right, or youre going to be replacing it again in eight months.
So lets talk about whats actually out there and what works.
Foam Tape
Ill start here because its what most people grab first. Its at every hardware store, its cheap, its easy to install.
Its also temporary garbage.
Adhesive-backed foam tape is fine if you need something right now and youre planning to replace it with real weatherstripping later. Its not a permanent solution. The foam compresses over time and loses its seal. The adhesive fails, especially in heat. Six months to a year and youre doing it again.
If youre renting and you just need to get through winter, fine. If this is your house, skip it. Moving on.
V-Strip (Tension Seal)
This is the folded metal or plastic strip that creates a spring tension seal. You nail or stick it into the door jamb and when the door closes it compresses against it.
V-strip is solid. Ive used it for decades. The metal version lasts basically forever if you install it right. The plastic version is easier to work with but wont last as long.
The key with V-strip is getting the angle right. Too flat and theres no tension. Too aggressive and your door wont close without slamming it. You want just enough resistance that you feel it seal when you close the door but youre not fighting it.
One thing I see people mess up is they install it with the V opening facing the wrong direction. The open end of the V should face outside, toward the weather. If its facing inside, water can get pushed into it instead of deflected away.
Tubular Rubber and Vinyl
These are the round or bulb-shaped strips that compress when the door closes. Some have a hollow tube, some are solid. They attach to the door stop, which is that little piece of trim that the door closes against.
I like tubular gaskets for doors that have some play in them. Older houses especially. The door might not sit perfectly flush with the jamb everywhere, and the tubular shape can accommodate that unevenness better than a flat seal.
The vinyl versions are cheaper. The rubber versions, especially EPDM rubber, last longer and stay flexible in cold weather. Vinyl gets stiff when it gets cold and can crack.
My dad used to say, about something totally different at the factory, he used to say measure twice and cut once because you cant put it back after you take it off. He wasnt talking about weatherstripping but it applies. Measure your door jamb carefully before you cut. Tubular gasket thats too short leaves gaps at the corners. Too long and it bunches up and the door doesnt close right.
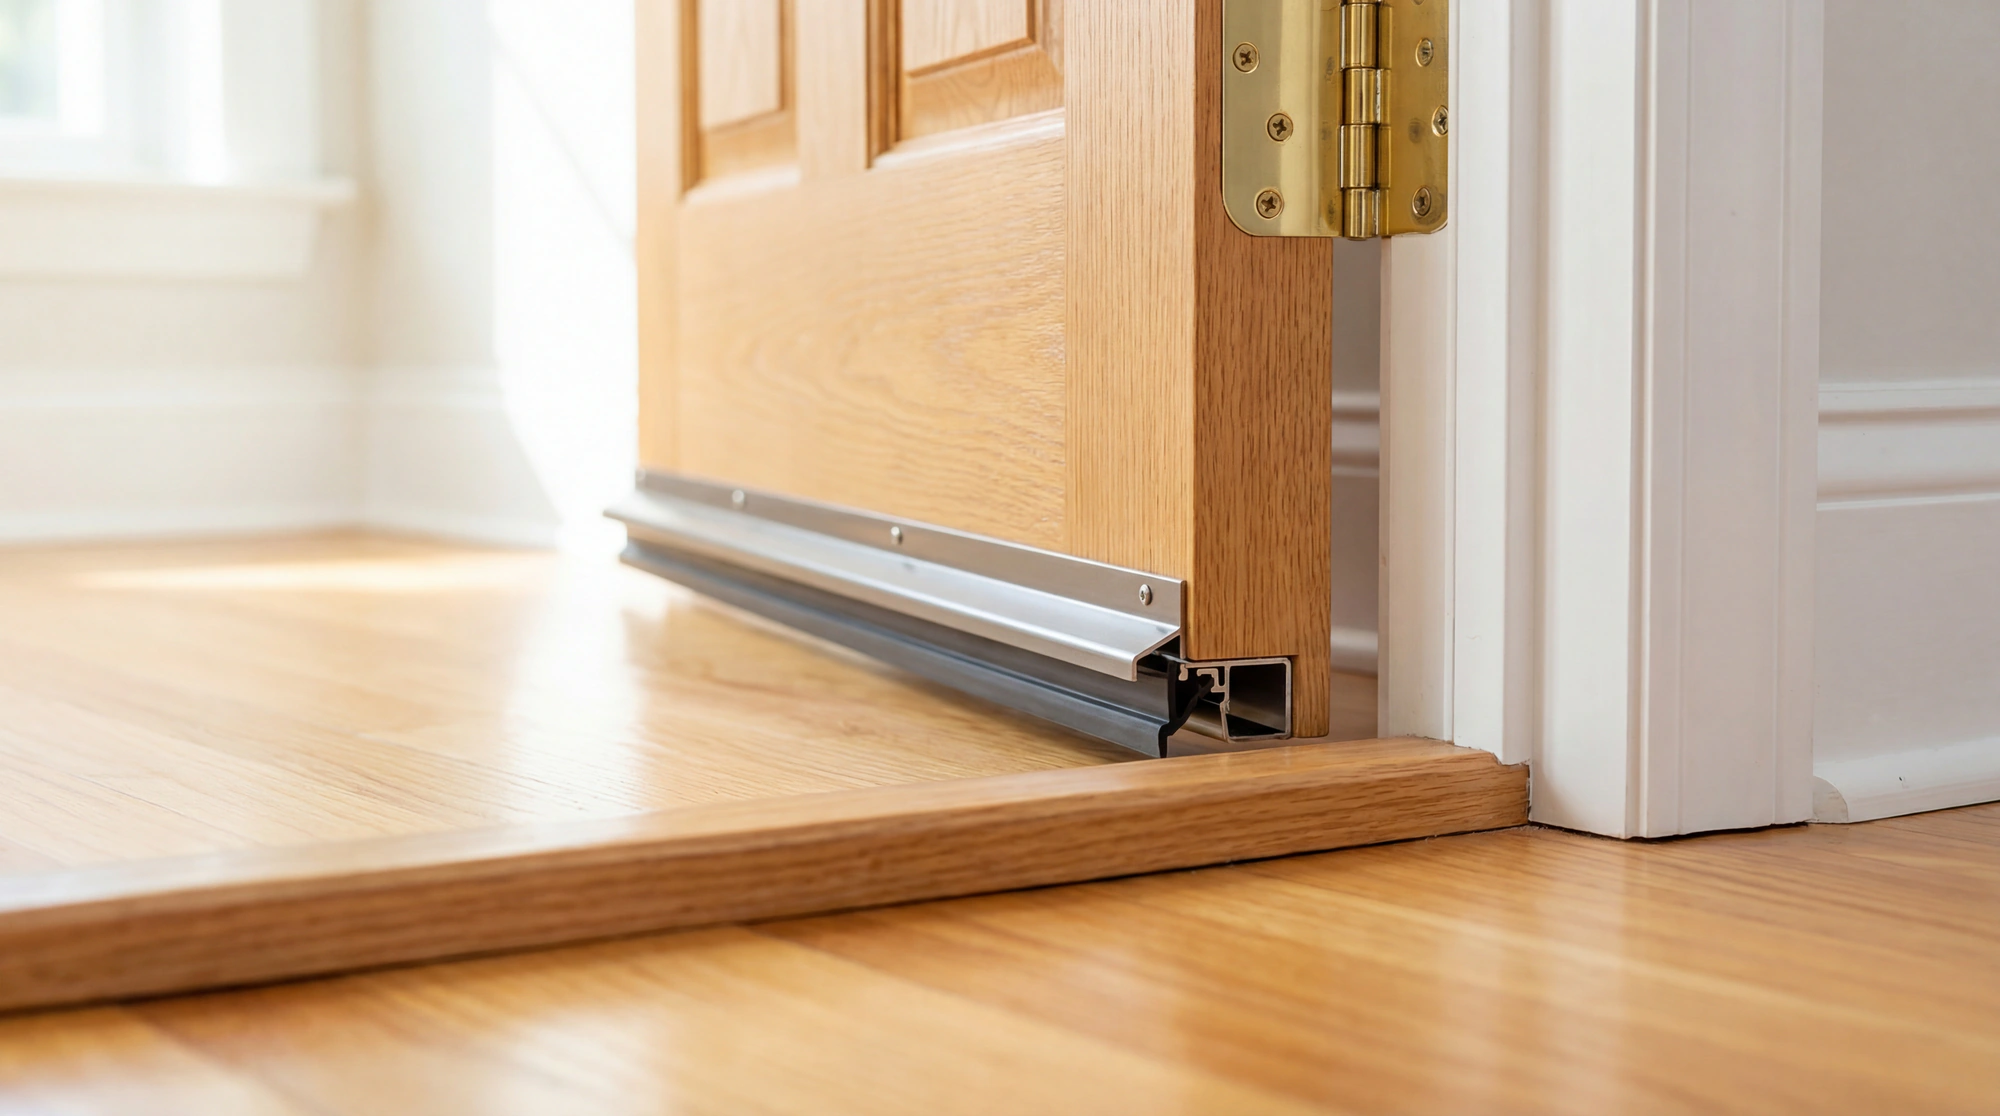
The Door Bottom (This Is Where Most People Fail)
Im going to spend some time here because this is the one that matters most and the one people either ignore or get wrong. The bottom of your door is the biggest gap. Its also the hardest to seal because the door has to swing open over your threshold and still close tight against it. Theres inherent tension there between function and sealing and most of the cheap door sweeps you find at the store are trying to solve that tension by just being flexible enough to drag across the floor or threshold and thats not a great solution because dragging means friction and friction means wear and wear means replacement and in the meantime youre probably scratching up your flooring or your threshold or both. The automatic door bottom exists specifically to solve this problem and most homeowners have never heard of it which drives me a little crazy.
Standard Door Sweeps
A door sweep is the strip that attaches to the bottom of the door on the inside. Usually aluminum or plastic channel with a rubber or vinyl fin that hangs down and contacts the threshold.
They work. They wear out. The fin drags every time you open and close the door. In a high traffic entry, youre replacing these every couple years.
If youre going with a standard sweep, get one with a replaceable fin. Some sweeps let you slide out the old fin and slide in a new one without removing the whole thing. Worth the extra few dollars.
Door Shoes
A door shoe wraps around the bottom of the door itself, covering the bottom edge and both faces. More protection, better seal, but you might have to trim your door to fit it.
I like door shoes on doors that are exposed to a lot of weather. Theres one on my side door in Palm Beach that faces east and gets hammered during storms. The shoe protects the bottom edge of the door from water damage too, not just air infiltration.
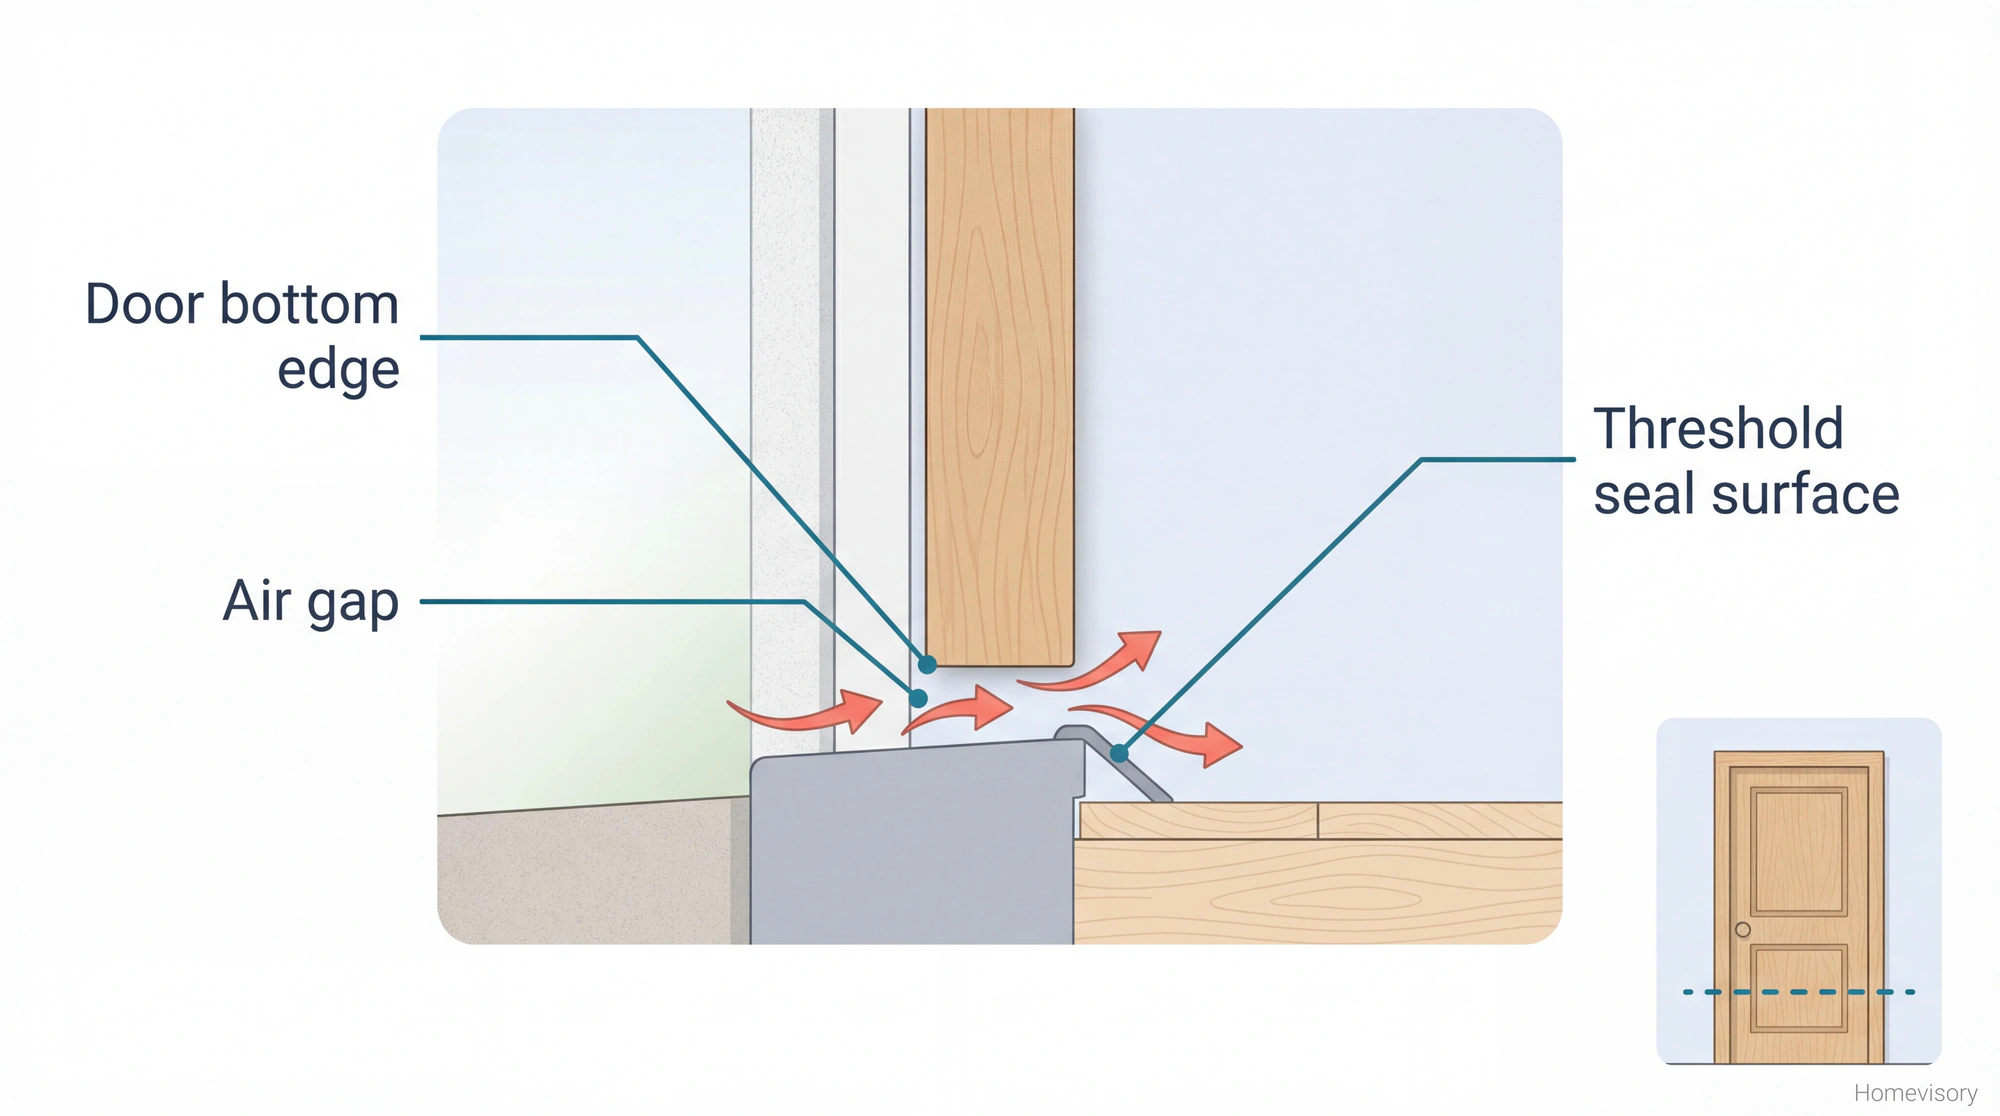
Automatic Door Bottoms
This is what I put on my own doors and what I recommend if you want to do it once and forget about it.
An automatic door bottom has a plunger mechanism. When the door is open, the seal is raised up off the floor. When you close the door, the plunger hits the jamb and drops the seal down against the threshold. Open the door, seal lifts back up.
No dragging. No wear. No friction on your floors.
They cost more. Maybe $40-80 depending on the brand. Worth it. Ive had the same automatic bottom on my front door for seven years and its still sealing like new.
Installation is a little more involved. You have to mortise a channel into the bottom of the door to recess it. If youve never used a router or youre not comfortable with it, this might be one to hire out. Or spend an afternoon learning. Mr. Davis, my old woodshop teacher, he used to talk about how wood moves and breathes and you have to account for that when youre fitting things tight. Something about how a door in summer and a door in winter arent the same size and if you dont leave room for that youre going to have problems. He knew everything about wood. I think about him every time I work on doors. Anyway.
Thresholds and Door Bottoms Together
Your weatherstripping at the bottom of the door only works as well as the threshold it seals against. If your threshold is worn, dented, or the wrong height, no sweep or door shoe is going to save you.
Check your threshold. Run your hand along it. Feel for dips or damage. Look at the seal surface, that little ridge the door bottom contacts. If its flattened out or cracked, replace the threshold.
Some thresholds are adjustable. Theres screws along the length that let you raise or lower the seal surface. Handy for dialing in the seal without replacing anything.
I’m Not Getting Into Magnetic Strips
Magnetic weatherstripping exists. Its for steel doors. If you have a steel door you probably already know what youre doing or you should call someone who does. Different world from wood and fiberglass doors.
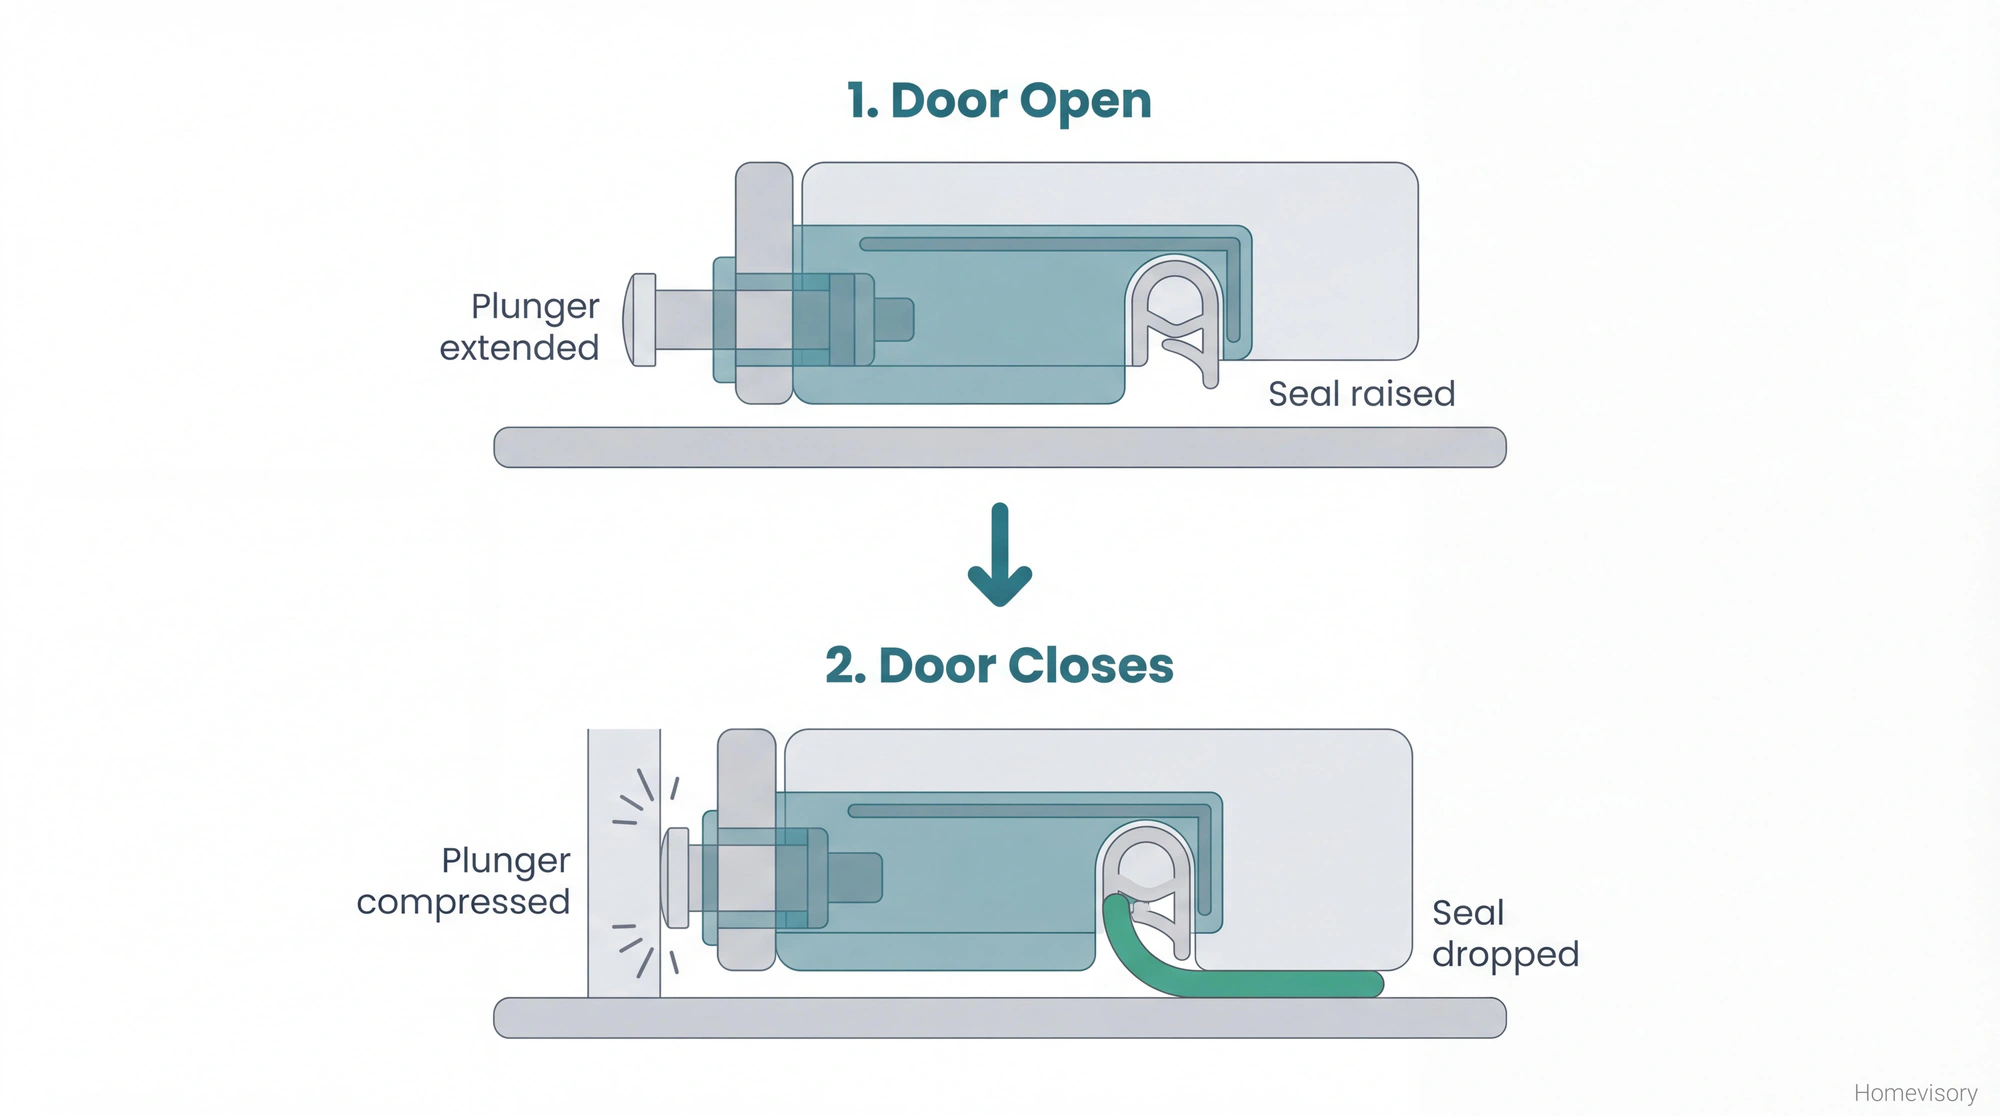
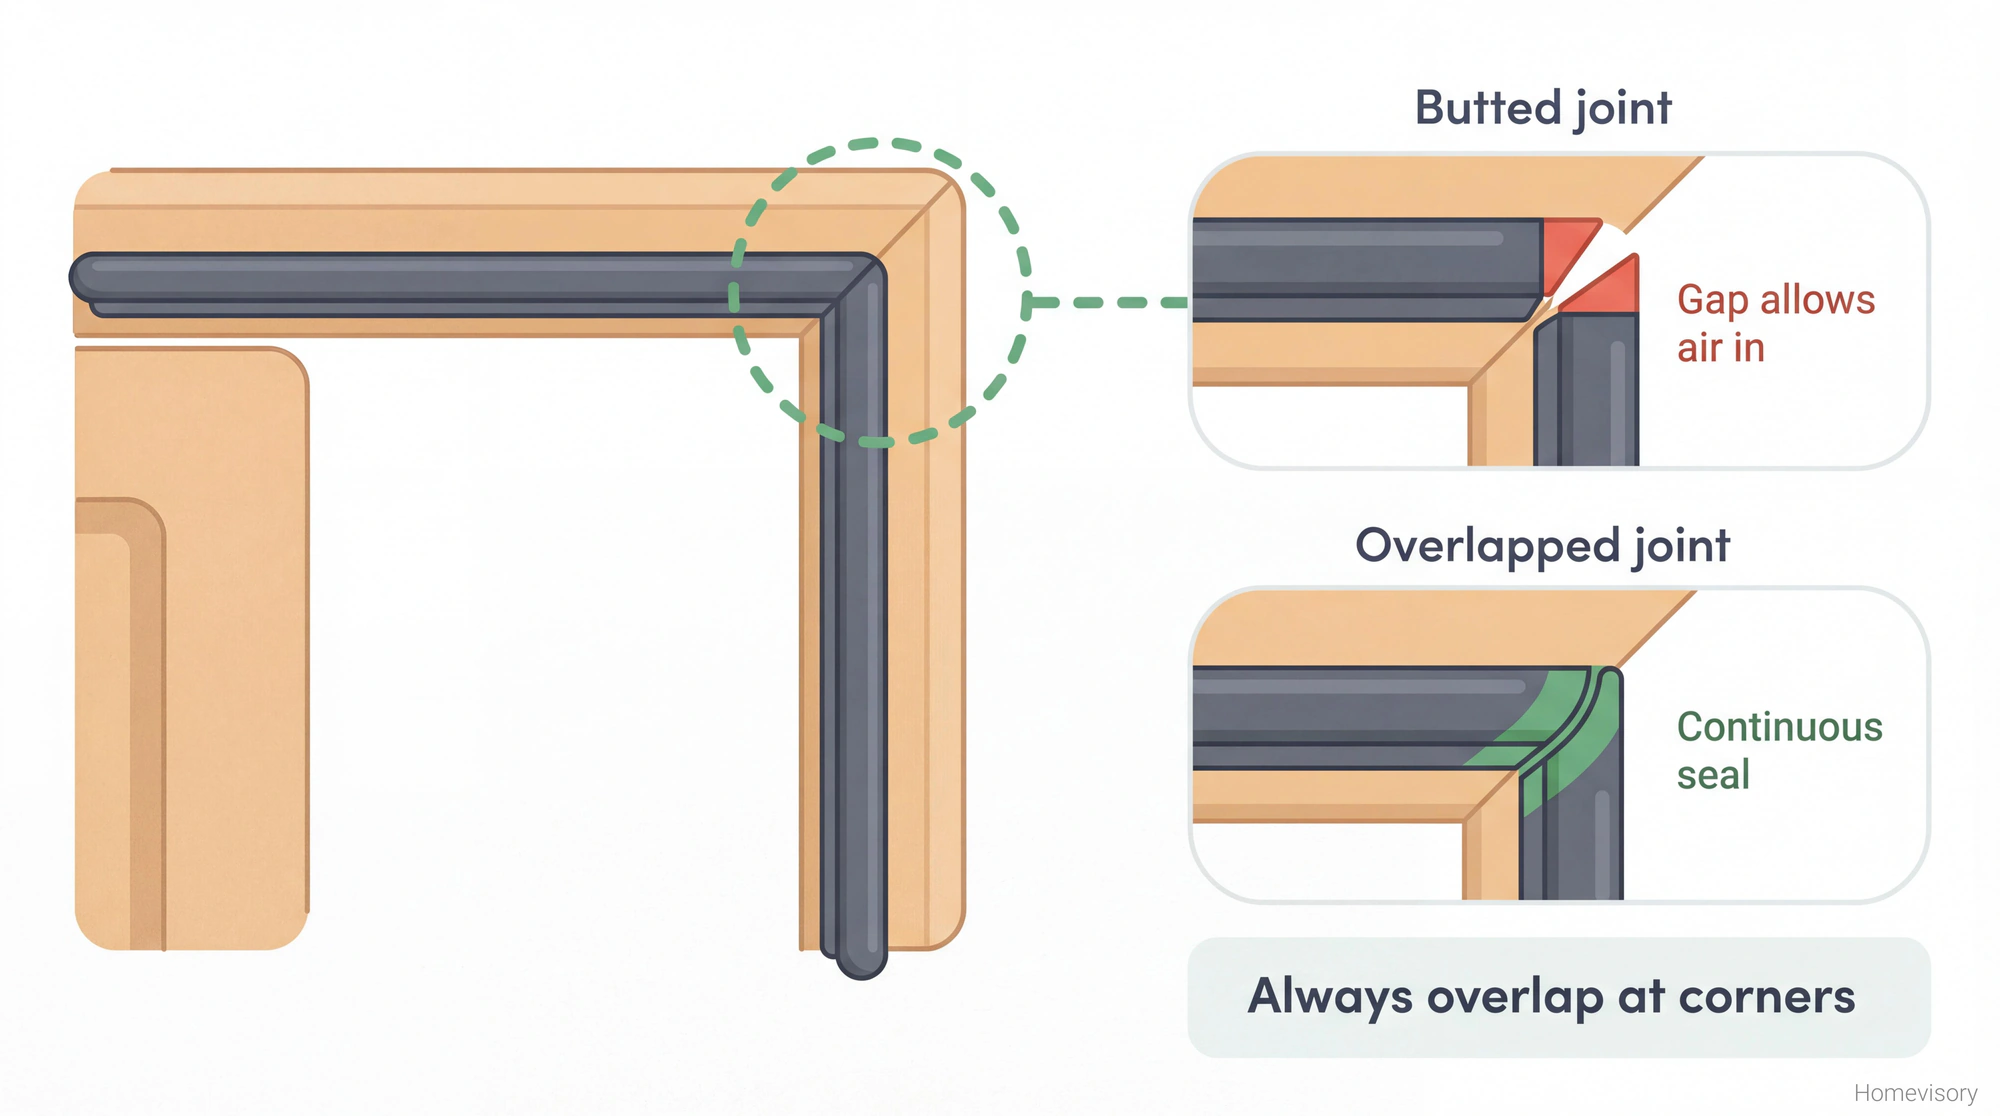
Corner Seals
This is the detail that separates decent weatherstripping from excellent weatherstripping. The corners where the top piece meets the side pieces and where the bottom meets the sides. Gaps love to hide there.
Some weatherstripping kits come with corner pads or connector pieces. Use them. If yours doesnt, overlap the pieces at the corners rather than butting them together. A tiny overlap is better than a tiny gap.
One More Thing That Makes Me Crazy
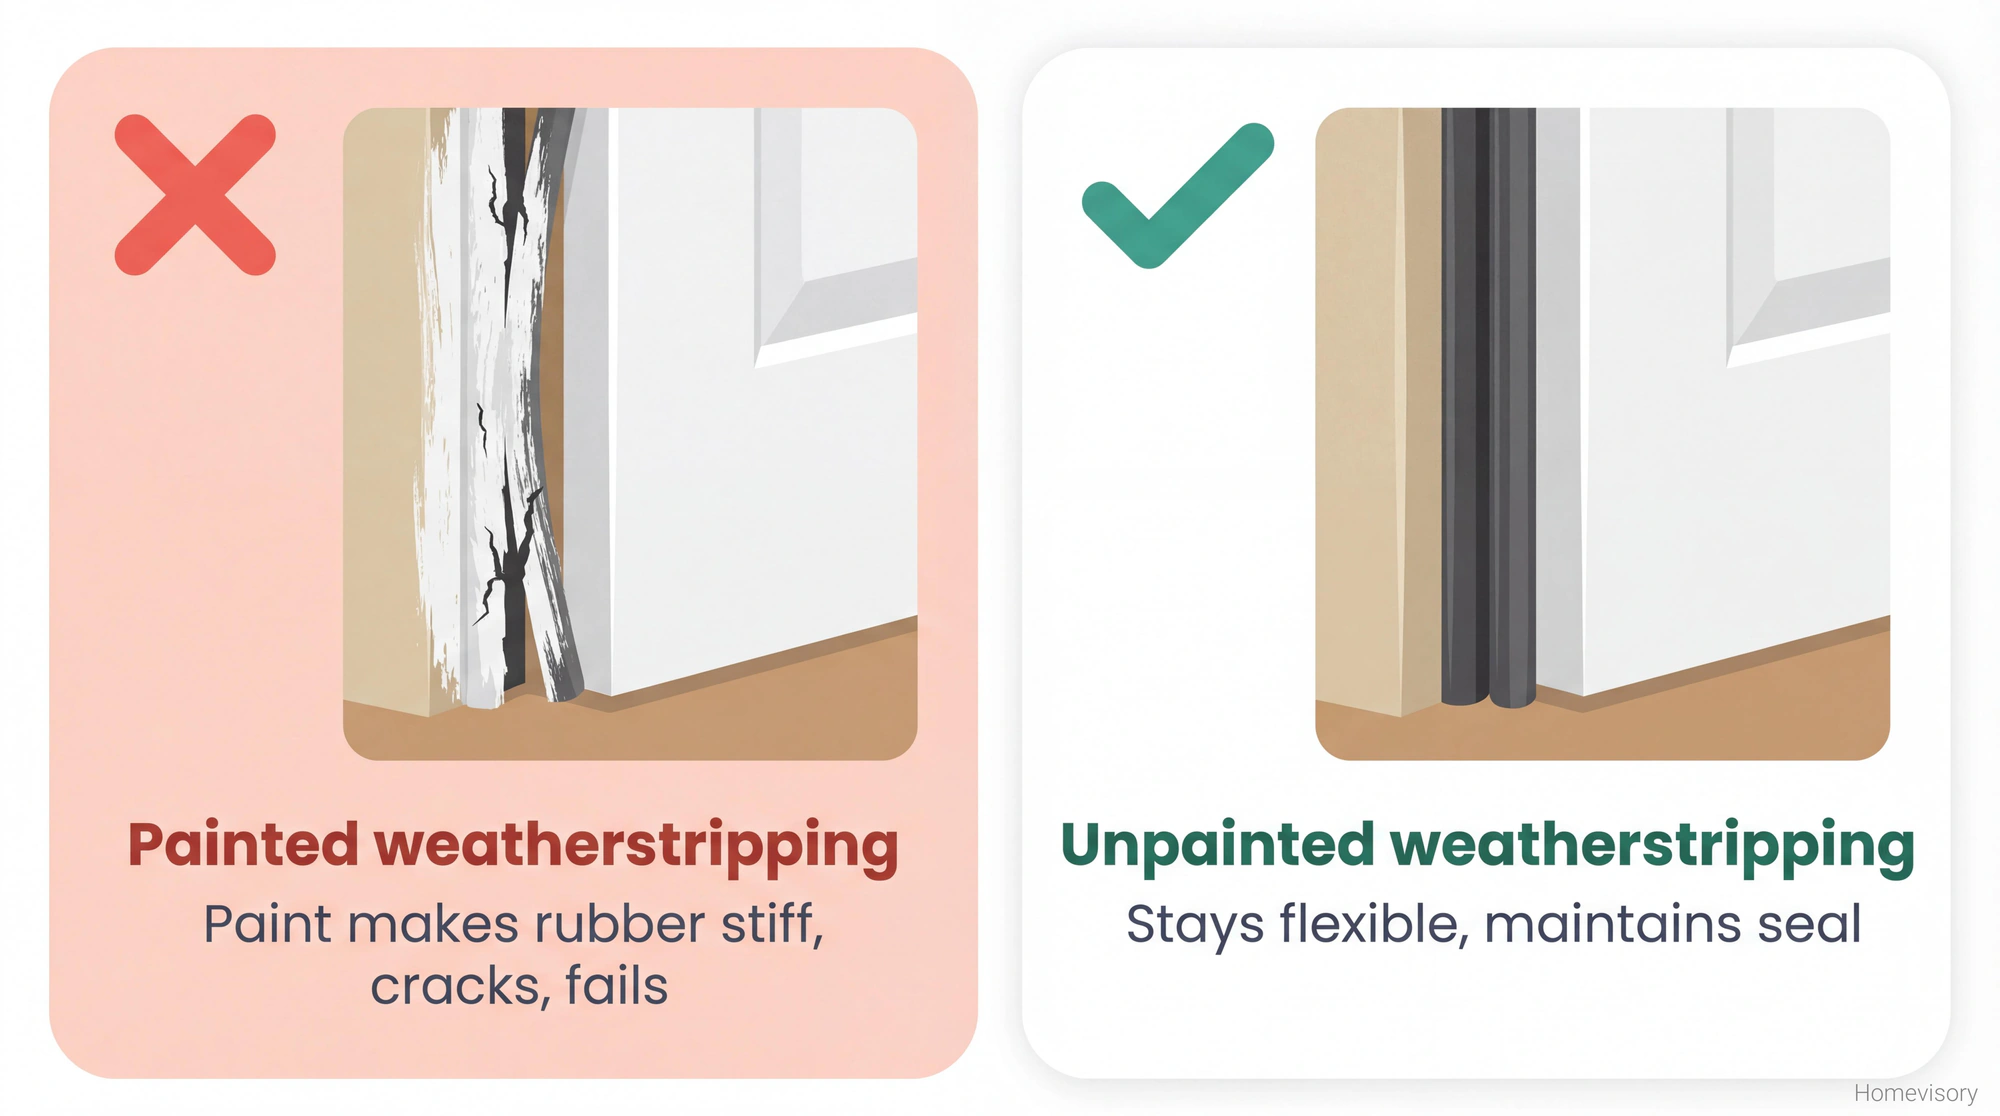
Whoever owned my house before me painted over the weatherstripping on the back door. Just straight up painted it. The weatherstripping was original to the door, probably fine, and someone decided it should be white like the trim so they painted it. Paint makes rubber and vinyl stiff. It cracks. It flakes. It stops sealing.
I had to strip all of it off and start over.
Dont paint your weatherstripping.
What Youre Actually Choosing Between
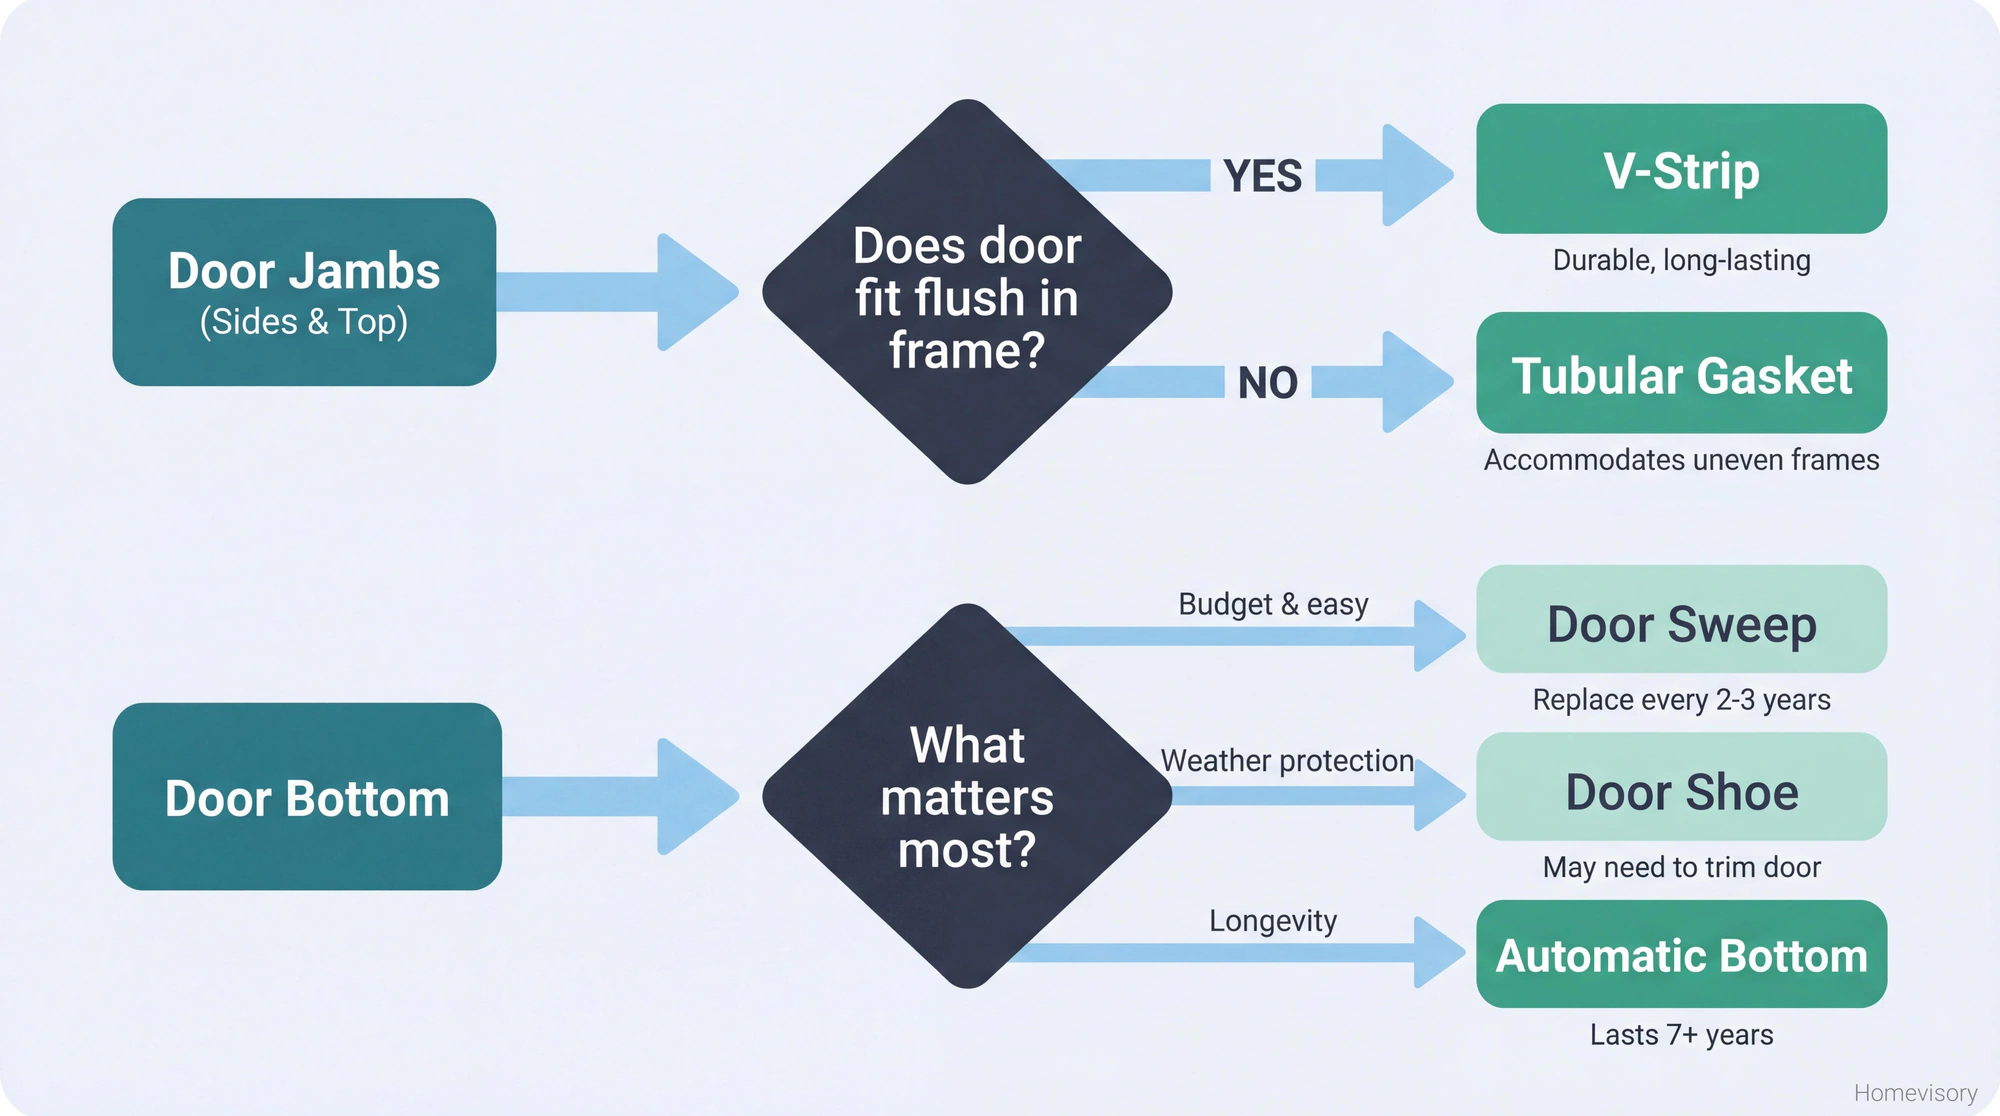
For your door jambs, top and sides, youre choosing between V-strip and tubular gaskets mostly. V-strip if your door fits pretty well and you want something durable. Tubular if your door has some play or your jamb isnt perfectly straight.
For your door bottom, youre choosing between sweeps, shoes, and automatic bottoms. Sweeps are cheapest and easiest but wear out. Shoes offer more protection but require trimming. Automatic bottoms cost more and take more skill to install but last for years and dont drag.
The climate matters too. Im in Palm Beach now, humidity and hurricane season are my concerns. When I lived in Chicago, I had completely different priorities. That winter my eyelashes froze walking from my truck to a job site and I became obsessed with air sealing. You dont forget that feeling. You dont want any gap anywhere after you experience real cold. Window insulation is the other piece of this puzzle — weatherstripping your doors doesnt help if your windows are leaking too. If youre somewhere with harsh winters, invest in the better weatherstripping. The difference between okay and excellent is maybe $50 per door and years of comfort.
Installation Basics
Clean everything first. Old adhesive, dirt, paint residue. Weatherstripping wont stick or seal right against grime.
Measure each piece separately. Doors arent perfectly square. The left side might be a different length than the right.
Dont stretch the material during installation. Let it lay naturally. Stretched weatherstripping contracts over time and leaves gaps. And if youre winterizing your whole house, not just the doors, our winterization checklist covers everything from pipes to heating to exterior prep.
Test as you go. Close the door after each piece and check the seal. Easier to adjust before you do all four sides than to figure out which one is wrong afterward.
That’s what we do here at Homevisory. Not just telling you to weatherstrip your doors, but explaining why certain exterior door weatherstripping types work better than others and when to use each one. And if your screen door needs attention too, our screen door repair guide covers the most common fixes.
If you want help staying on top of all your home maintenance, not just doors but filters and gutters and everything else that needs regular attention, check out Homevisory home task manager. It remembers what needs doing so you dont have to. Seasonal reminders, maintenance schedules, all of it tracked in one place. Sign up and stop letting your house fall behind.