
When Ice Becomes the Problem
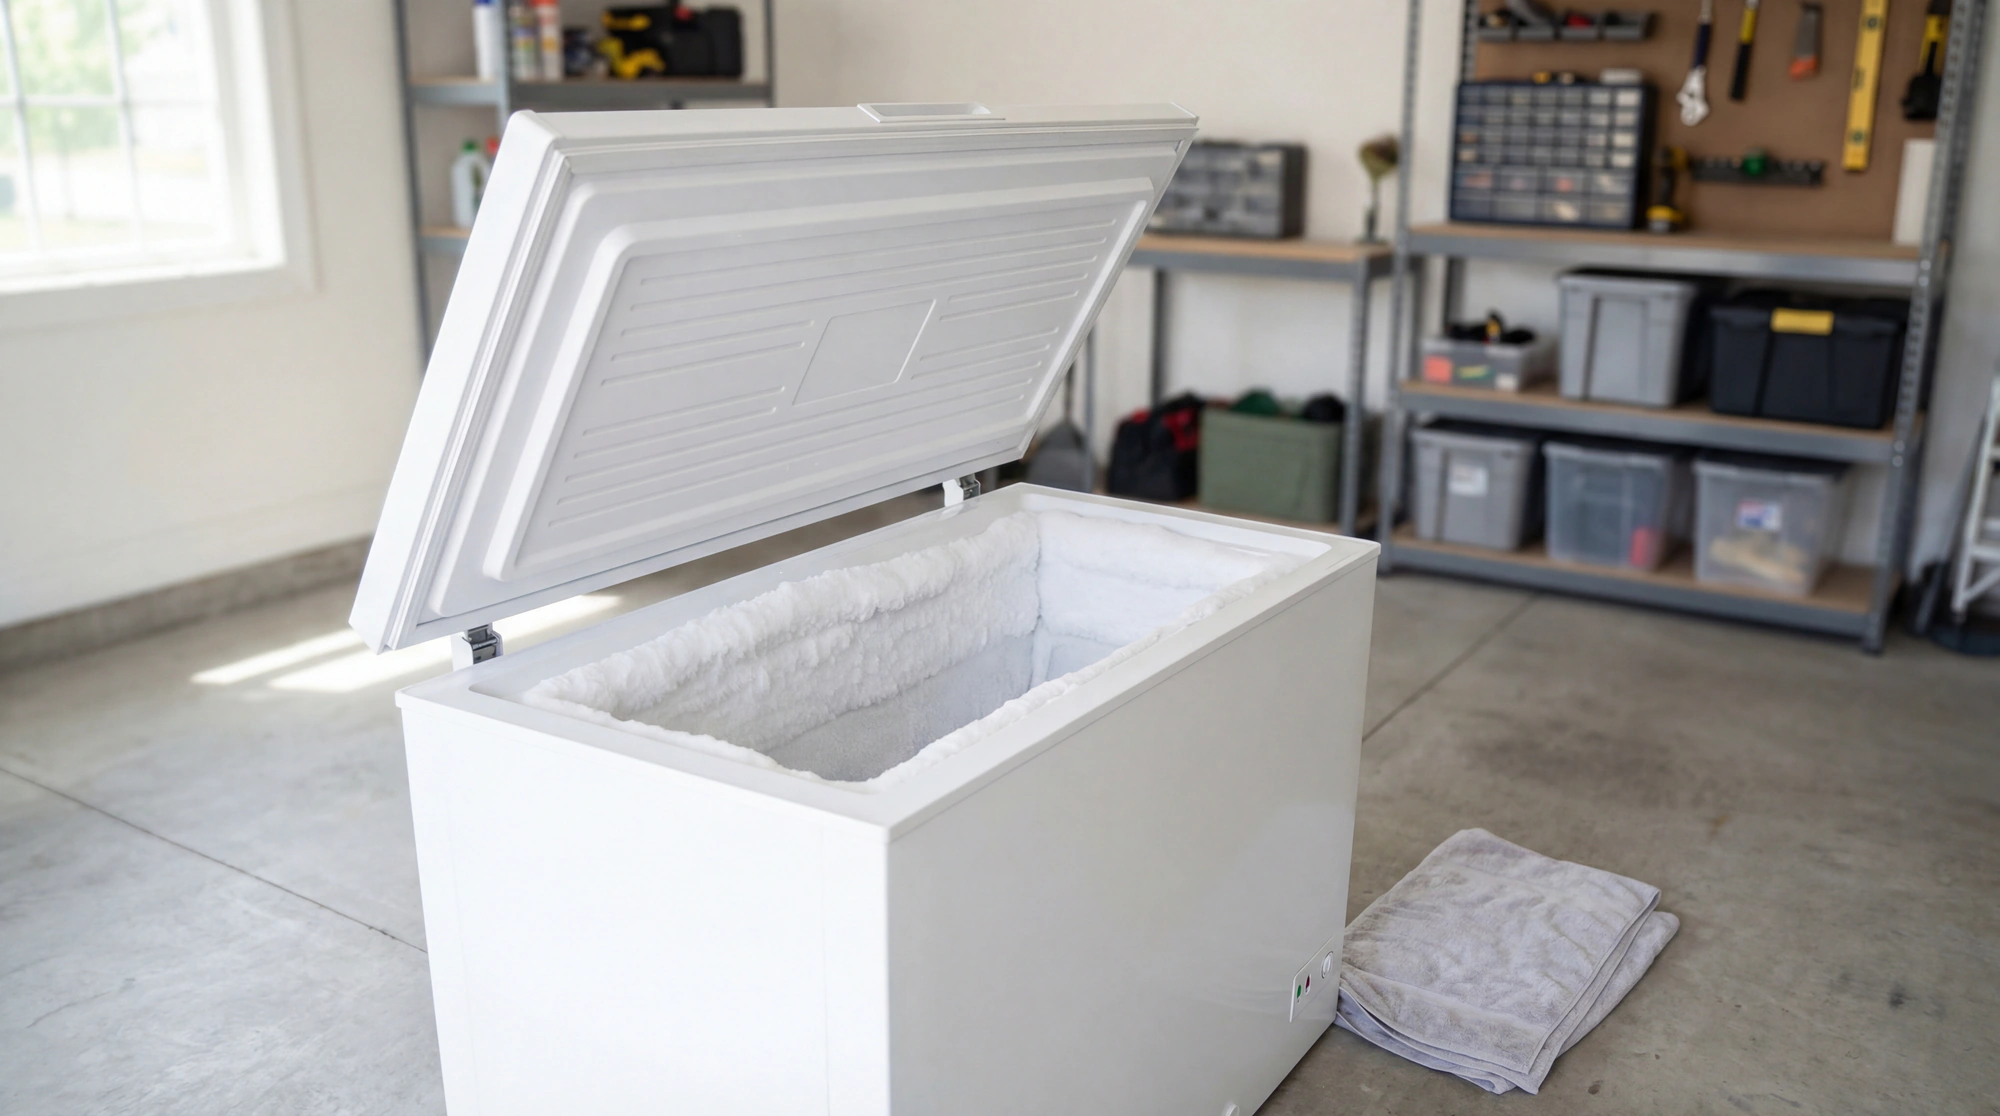
My chest freezer in Texas got so bad once that I couldn’t close the lid. Not because it was overstuffed with food. Because there was four inches of ice on every wall and the ice itself was taking up more space than the groceries. Thats when you know youve waited too long.
Knowing how to defrost a freezer is one of those things that seems obvious until you actually have to do it. Then you realize there are about six ways to mess it up and most of them end with you either ruining the freezer or ruining your floor. Or both.
If you’ve got a frost-free model, good for you, this article isnt for you, go read something else. This is for the rest of us with manual defrost freezers, chest freezers, older units, the ones that build up ice like it’s their job.
Why You Even Need to Do This
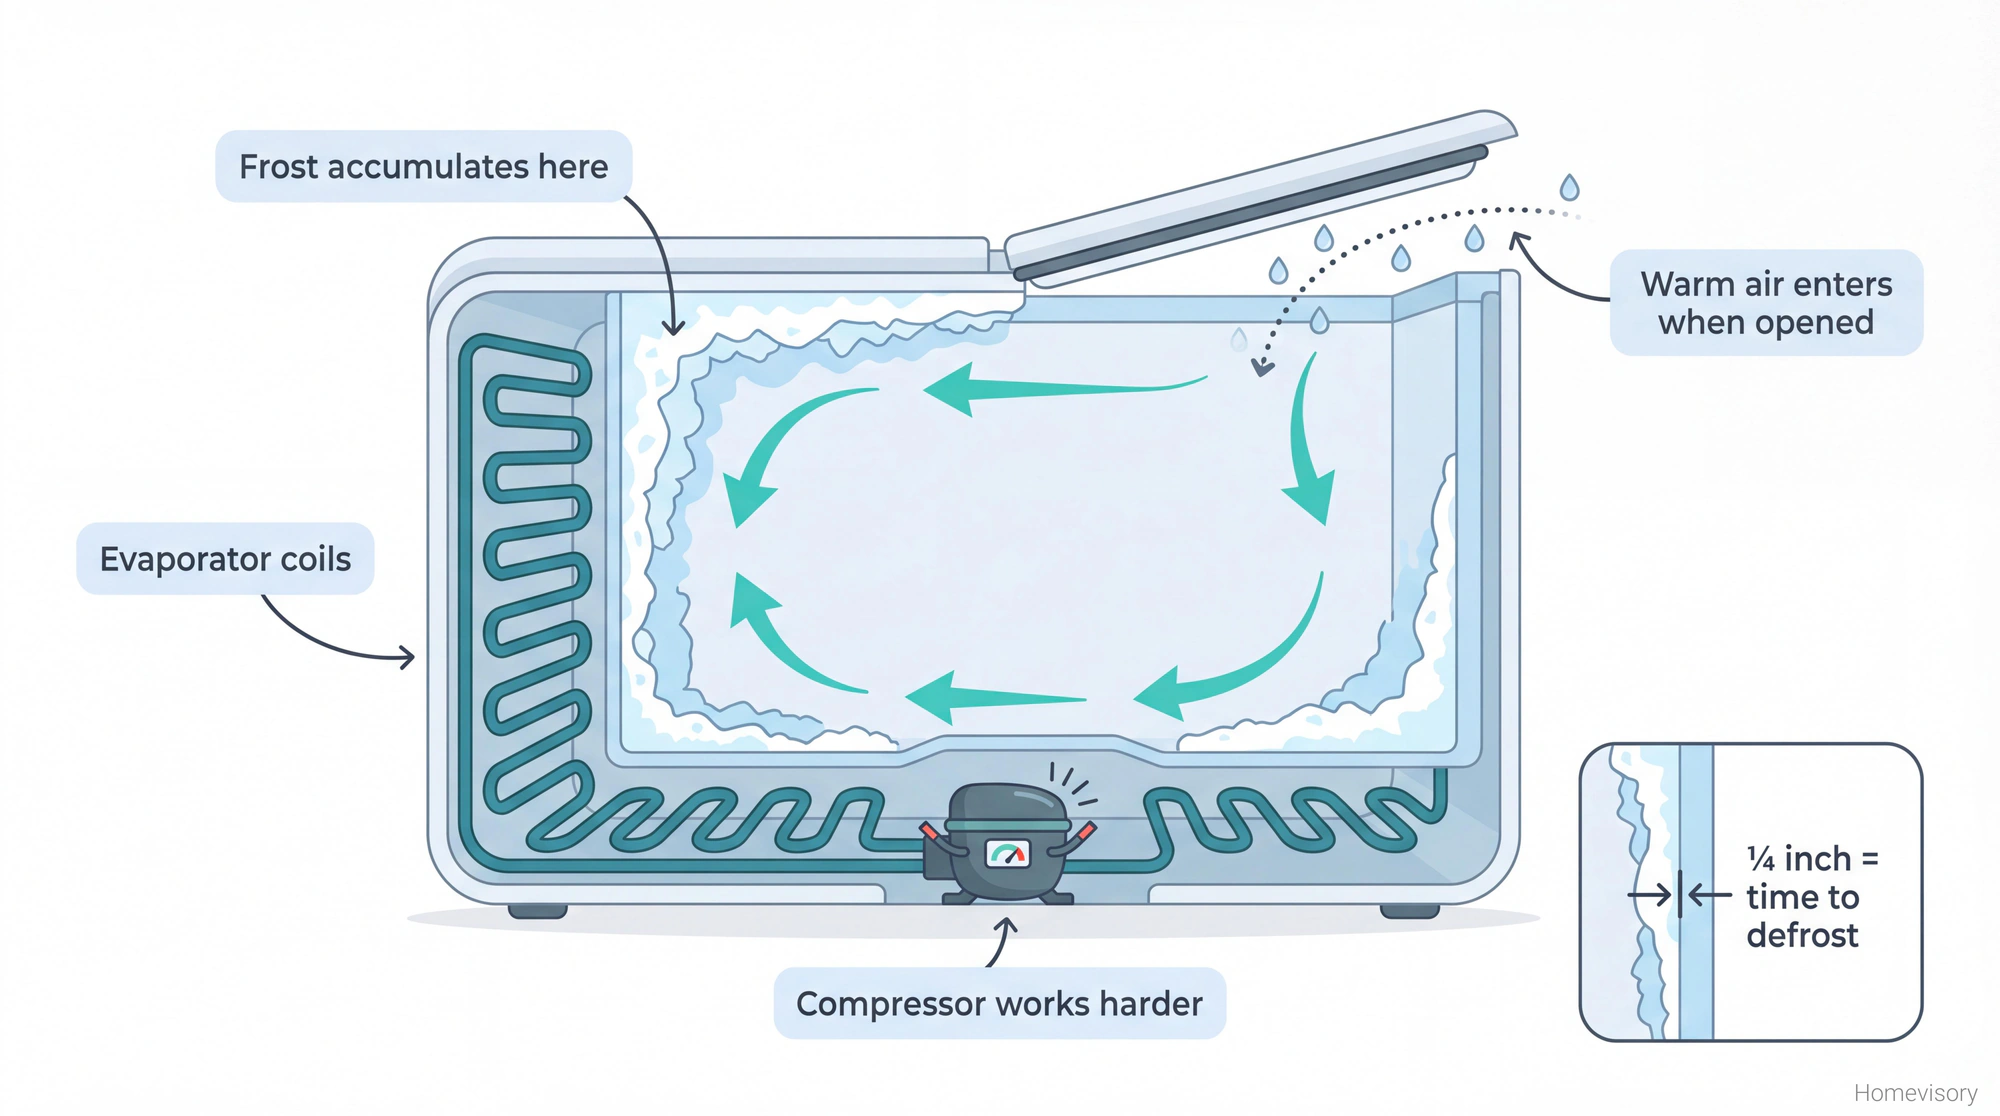
Ice buildup isn’t just annoying. It makes your freezer work harder because the compressor has to cool through all that frost to reach your food. More work means higher electricity bills. It also means the compressor wears out faster and eventually something fails. If your freezer stops cooling altogether, thats a different problem — our refrigerator not cooling guide covers the bigger issues.
Quarter inch of frost. Thats my rule. Once you can see a quarter inch on the walls, schedule the defrost. Some people wait until its an inch thick. Some people, like Texas-2007 Mark, wait until the lid wont close. Dont be that guy.
The other problem is food quality. When frost builds up, temperatures fluctuate more. Your ice cream gets that weird crystallized texture. Meat gets freezer burn faster. None of this is a crisis but its all avoidable if you just defrost the thing twice a year.
How to Defrost a Freezer: The Actual Steps
Empty Everything Out
This is the part people complain about most. You have to take everything out. All of it.
If its summer in Florida, this is stressful because you have maybe two hours before things start thawing. If its winter in Chicago, you can put stuff in coolers in the garage and forget about it. I learned about insulation the hard way during a Chicago January, my eyelashes froze walking to a job site, but at least defrosting the freezer was easy because outside was colder than inside.
Use coolers with ice packs. Or use cardboard boxes lined with towels if youre improvising. Group things together because the frozen items keep each other cold. Work fast but dont panic.
Turn It Off and Unplug It
Some people skip the unplug part. Don’t. Turn the dial to off AND pull the plug from the wall. Water and electricity are not friends and you’re about to introduce a lot of water into this situation.
Leave the door open. This seems obvious but I’ve seen people turn off the freezer, close the door, and wonder why nothing happened.
Wait
This is the part where patience matters. And I mean really matters.
Mr. Davis, my woodshop teacher back in Atlanta, he used to tell us to let the material tell you when its ready. He was talking about wood, waiting for glue to set, not forcing joints before they were cured. But it applies to everything. You cant rush ice. You have to let it soften. If you try to force it before its ready, you break something. In woodshop it was the joint. In your freezer its the evaporator coils.
Put towels on the floor. Old towels, beach towels, whatever you dont care about. The ice is going to melt and the water has to go somewhere. Some freezers have a drain plug at the bottom, if yours does, pull it out and put a pan underneath.
Then wait. For a standard freezer with moderate buildup, maybe two or three hours. For a chest freezer that looks like a glacier, could be six hours or more.
Speed It Up (Safely)
You can speed this up but you have to do it right.
Put a pot of hot water inside and close the door. Not boiling, just hot from the tap. The steam loosens the frost. Replace the pot every 30 minutes or so as it cools down.
You can also point a fan at the open freezer to keep air circulating. Some people use a hair dryer on low heat, moving it constantly, never holding it in one spot. I dont love the hair dryer method because people get impatient and start blasting one area, but if you keep it moving its fine.
What you do NOT do is pour boiling water directly on the ice. The temperature shock can crack plastic liners. I’ve seen it happen. Don’t do it.
The Screwdriver Thing
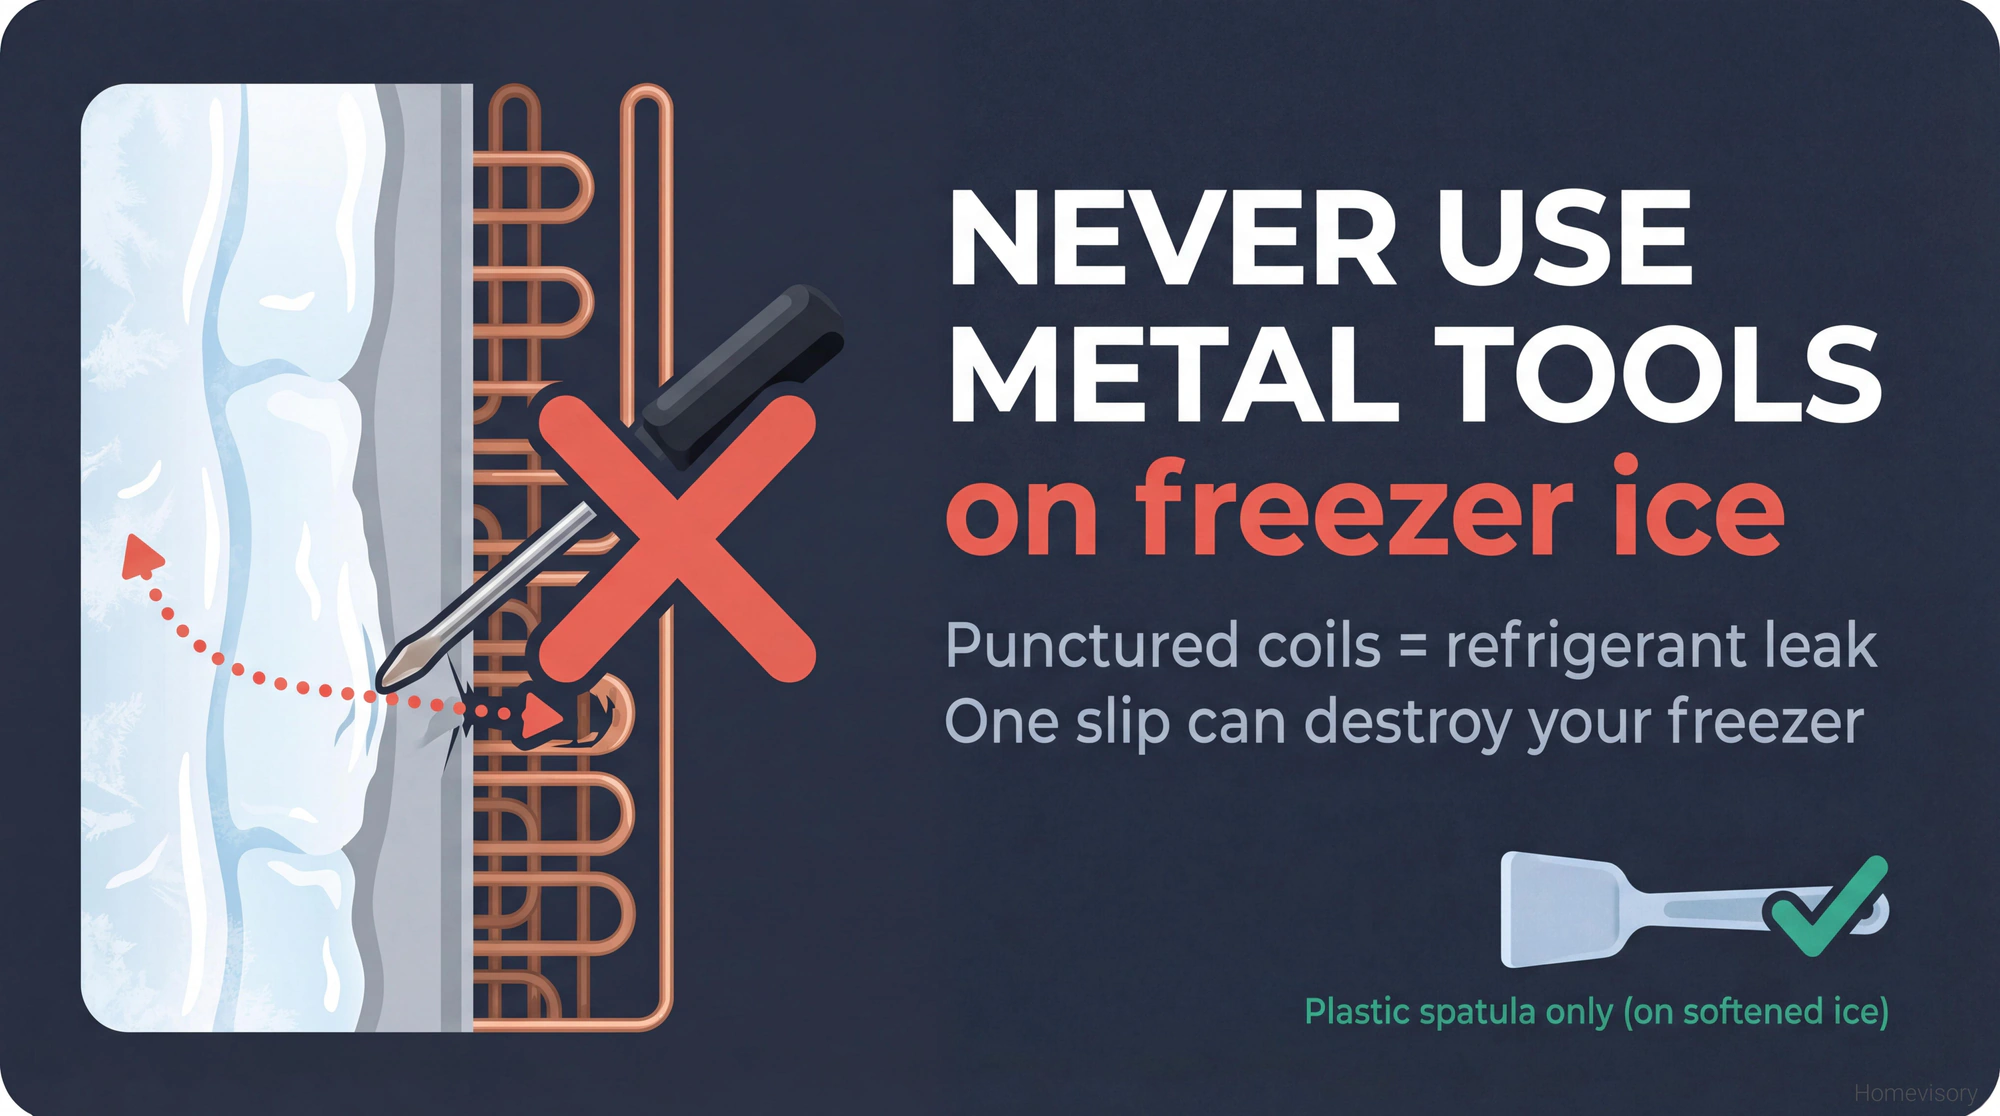
Do not use a screwdriver or knife or chisel or any metal tool to chip ice off your freezer. Do not do this. I know you want to. I know the ice is right there and it feels like you could just pop it off. You cannot. Or rather, you can, but you might puncture the evaporator coils in the process and then you dont have a freezer anymore, you have scrap metal. The refrigerant lines run behind those walls and theyre not as protected as you think they are. One slip, one spot where you push too hard, and you hear that hissing sound and thats the sound of buying a new freezer. I had a neighbor in Plano who did exactly this, used a flathead screwdriver to chip ice, punctured a coil, released refrigerant into his garage, and spent $600 on a repair that almost cost as much as just replacing the whole unit. You can use a plastic spatula, gently, on ice that’s already softening. Anything metal, anything sharp, forget it.
The Texas Chest Freezer Incident
That chest freezer I mentioned, the one with four inches of ice, that was my fault. Raquel had been telling me for months that the frost was building up and I kept saying I’d get to it. I did not get to it.
When I finally defrosted it, I spent three hours scraping ice with a plastic paint scraper because I knew I couldn’t use anything metal. Three hours. My back hurt for a week. The freezer was fine though.
My dad Curtis, he keeps a chest freezer in his garage to this day. Has this handwritten inventory taped to the lid, organized by meat type, with dates. Pork on the left, beef in the middle, chicken on the right, fish in the corner. He updates it every time he adds or removes something. I asked him once why he does it and he said something about your future self needing to know where things are. I dont know if he ever lets ice build up because the man is more organized than anyone I know. Anyway.
Cleaning While Its Empty
While the freezer is empty and defrosted, wipe down the inside. Baking soda and water. About two tablespoons per quart. This removes any smells and cleans the surfaces without leaving residue that could affect food.
Dry everything completely before you turn it back on. Any moisture you leave behind becomes the first layer of your next ice buildup.
Check the door seal while you’re at it. Run your finger along the gasket. If its cracked or loose or you can see gaps, that’s why youre getting frost buildup in the first place. Cold air from inside meets warm air from outside, moisture condenses, ice forms. New seals are $20-50 depending on your model and theyre not hard to install yourself.
Turn It Back On
Plug it in. Wait for it to get cold again, maybe four to six hours to reach proper temperature. Then put your food back.
Done.
How Often to Defrost a Freezer
Twice a year for most people. If youre opening it constantly, maybe three times. If you live somewhere humid, more often because moisture gets in every time you open the door.
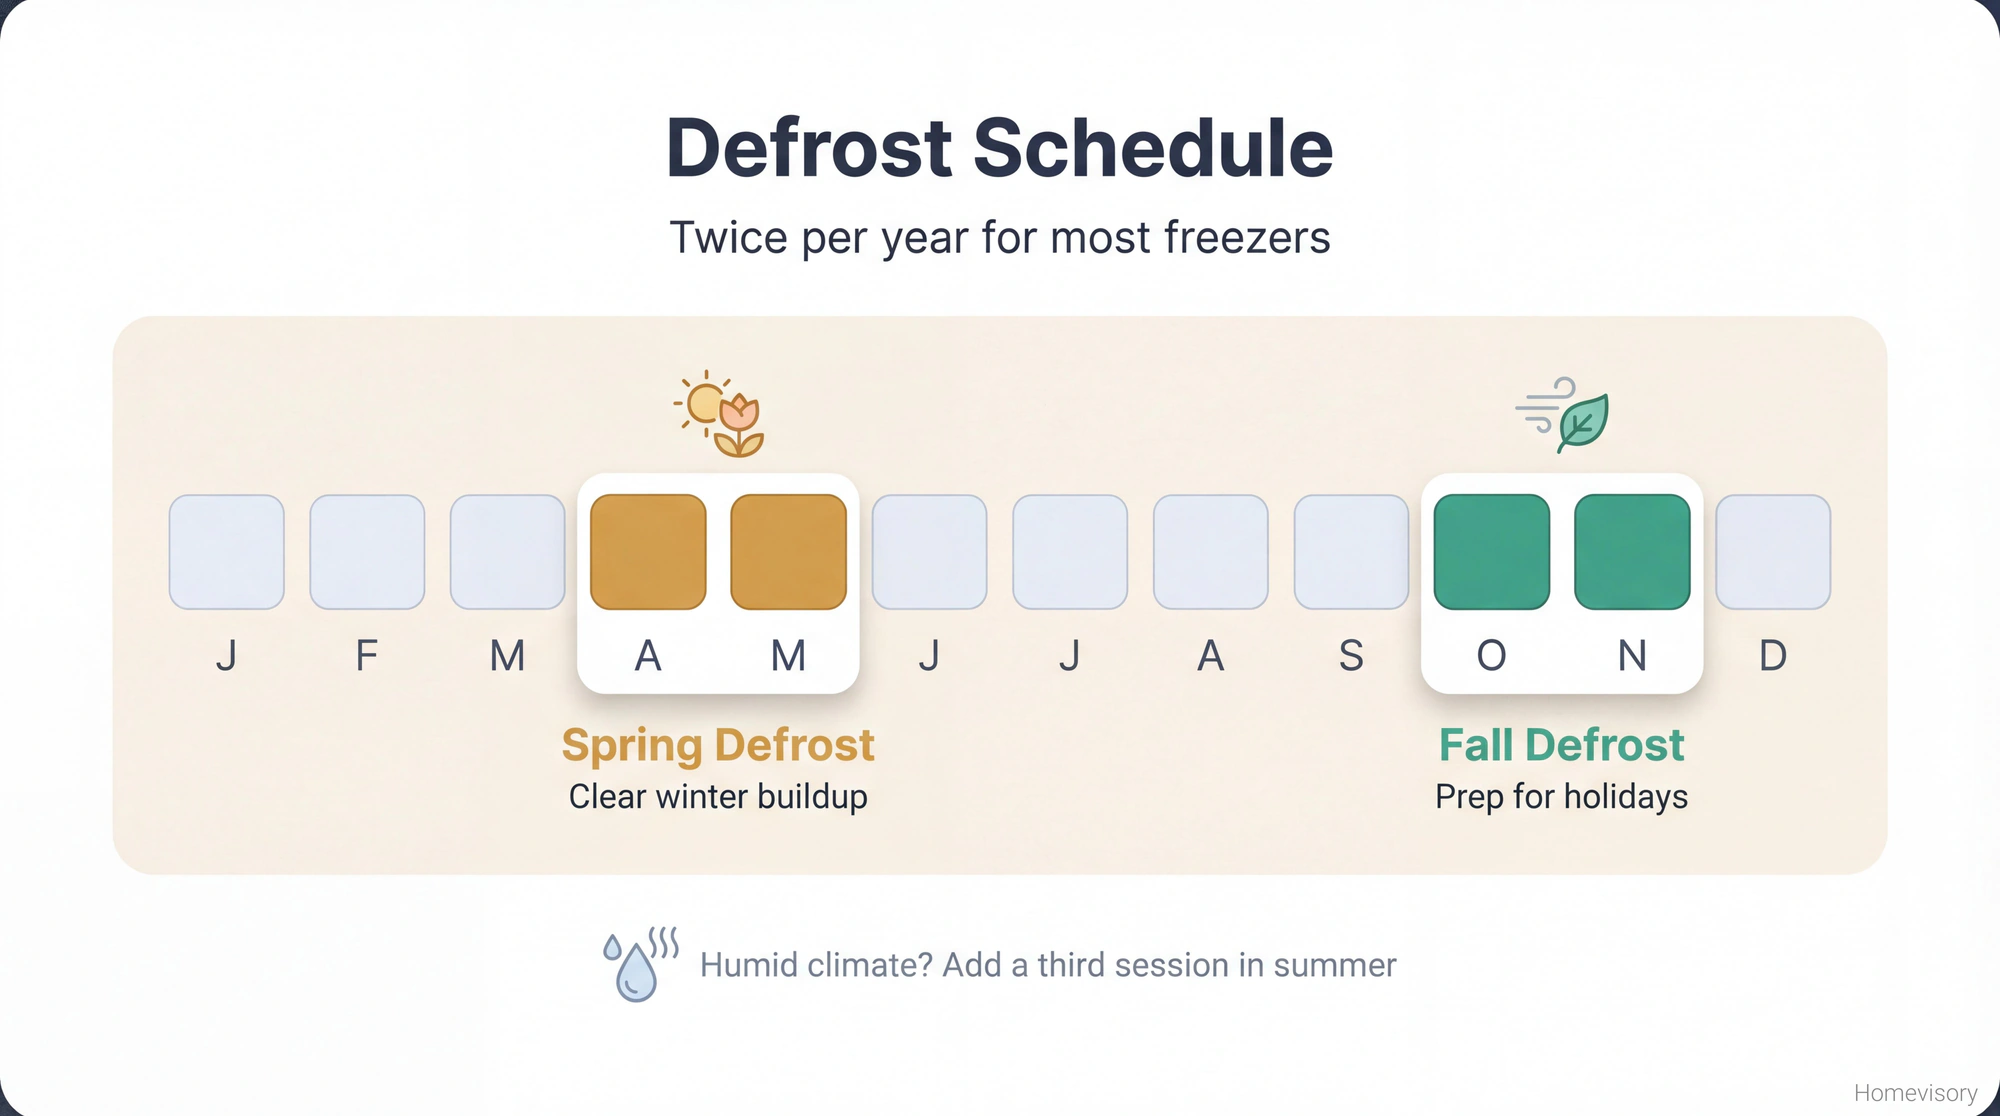
I do mine in spring and fall. Spring because winter is ending and I want to clean out whatever got buried in there for six months. Fall because I want the freezer working efficiently before the holidays when it gets stuffed with food. If you want to know what else to check on this kind of schedule, our home maintenance checklist covers seasonal tasks for your whole house.
Mark it in your calendar or use Homevisory to remind you. Thats what we do here, we help you keep track of all this stuff so you dont end up with a glacier in your garage like I did in Texas.
The Short Version
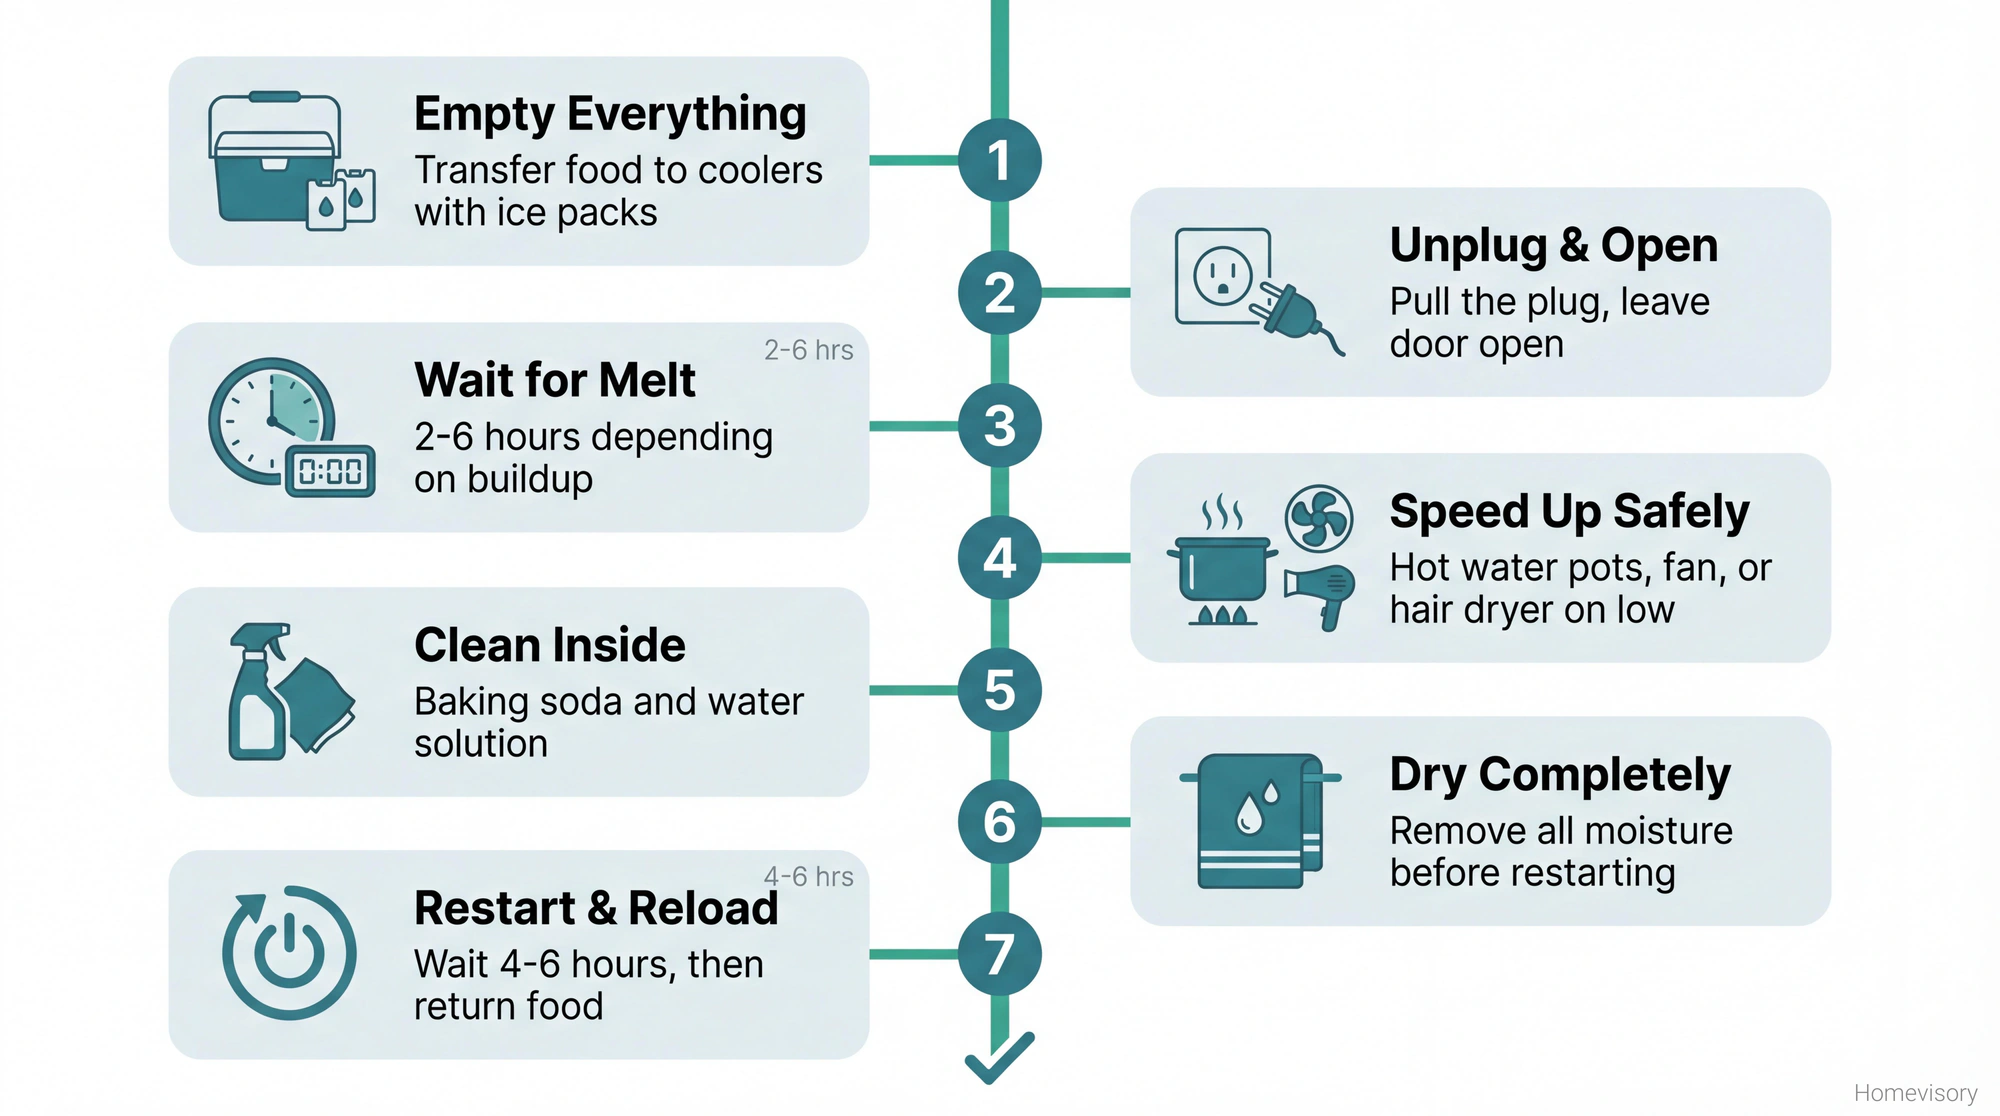
- Empty everything into coolers
- Unplug the freezer, leave the door open
- Put towels down, wait for ice to melt (use hot water pots to speed it up)
- Do NOT use metal tools to chip ice
- Wipe down with baking soda solution
- Dry completely
- Plug back in, wait for temp to drop, reload food
That’s how to defrost a freezer without ruining it or your floors. It takes half a day if youve been neglecting it, or an hour or two if you stay on schedule. Your choice. If your fridge or freezer is having other problems beyond frost buildup, our refrigerator repair guide covers everything from cooling failures to ice maker issues.
Homevisory tracks maintenance tasks like this so you dont have to remember them yourself. The app reminds you when its time to defrost, when to change filters, when to check your smoke detectors, all of it. Sign up free and stop relying on your memory for stuff that matters.